How to Install a Rug Stair Runner: A DIY Guide
Installing a rug stair runner was one of those DIY projects that seemed daunting at first, but it turned out to be much easier than I expected. The secret? Good preparation, the right tools, and a bit of patience. One crucial tip: invest in an electric stapler. Yes, it’s a bit of an upfront cost, but if you tackle DIY projects regularly, it could come in handy.
I learned this the hard way—our rug stair runner was too thick for a manual stapler to handle. After a frustrating attempt (and pulling out dozens of staples), we made an emergency trip to the hardware store to get the electric one. Trust me, the electric stapler is worth it—and honestly, it’s super fun to use.
If you’ve been eyeing a rug stair runner project, now’s the perfect time to give it a shot. It’s a simple one-day DIY that adds style, safety, and comfort to your home. Follow along with this step-by-step guide, and I promise, you’ve got this!
As an Amazon Associate, I receive a small commission (at no additional cost to you) for qualifying purchases on items purchased through the links in this post.
Supplies You’ll Need:
- Runner(s): Measure to determine the correct length for your stairs. We used two 10-foot runners with a plaid pattern that blended easily.
- Carpet pad: cut to size. I used non-slip tread covers made from a foamy, mousepad-like material that we already had on hand.
- Electric stapler: A must for securely fastening the runner. You can rent these from big box hardware stores like Lowe’s and Home Depot if buying doesn’t make sense. I would have gone with that option if there had been one available. The only rental in our area was an hour away and between picking it up, returning it, and the rental fee, and because we have an endless list of projects to complete in our 80-year-old house, it made sense for us to buy.
- Double-sided carpet tape: I ended up using a little more than one and a half rolls to complete the project.
- Carpet tucking tool or plastic drywall spatula: To press the runner into creases.
- Scissors
- Tape measure
- Painter’s tape
A Quick Aside
A huge shoutout to my amazing husband for stepping up on this project. We started installing the rug stair runner a week before Christmas, but when I started feeling under the weather (right before hosting 25 people for our annual Christmas Eve party!), he took on most of the manual labor so I could rest.
Unfortunately, my cold turned into a nasty flu that swept through our whole family (except my husband, who somehow never gets sick!). We had to cancel the party, so no one got to see our gorgeous rug stair runner—and I ended up sleeping through Christmas with a raging fever.
My Christmas-obsessed heart is a little broken, but we’re on the mend now, and there will be plenty of opportunities to host again. Thank you, darling, for carrying this project and most of the Christmas (he did all the wrapping this year!) and taking care of us all while I was down for the count!
Back to the project!
Preparation Steps
As with any project, preparation is everything. Start by measuring carefully and choosing a rug pattern that you’ll love for years to come. Unlike an area rug, swapping out a rug stair runner isn’t as simple, so it’s worth putting extra thought into your selection.
Take into account the pattern, color, and style of the runner in relation to the surrounding rooms and your future plans for the space—it should feel cohesive and timeless in your home.
1. Measure Your Stairs
Before purchasing your rug stair runner, take the time to measure carefully. Measure the tread (the flat part of the step) and the riser (the vertical part), then multiply those measurements by the number of each you want to be covered. For example, our staircase has 13 treads and 14 risers, but I wanted the runner to end under the last tread, leaving the last riser uncovered where it meets the hardwood floor of our main floor.
Don’t forget to add a few extra inches to be safe.
You can either buy one solid-length rug stair runner or use multiple runners. For our staircase, I needed just over 19 feet, but finding a single runner that length, that I actually liked, and within my small budget was a challenge. Instead, I used two Loloi runners—rugs I love for their quality and have throughout our home. I snagged them second-hand on Amazon for about $40 each, and two 10-foot runners worked perfectly for our stairs.
If you’re working with multiple rug stair runners, pay close attention to the pattern. Stripes and plaids are ideal for easy alignment, but a solid color or a more random pattern can work well too. If you’re choosing a carefully patterned vintage rug, it would be best to go for the solid-length option if possible. If not, consider adding a full foot to your total length so that you have lots of wiggle room for cutting the runners to align the patterns.
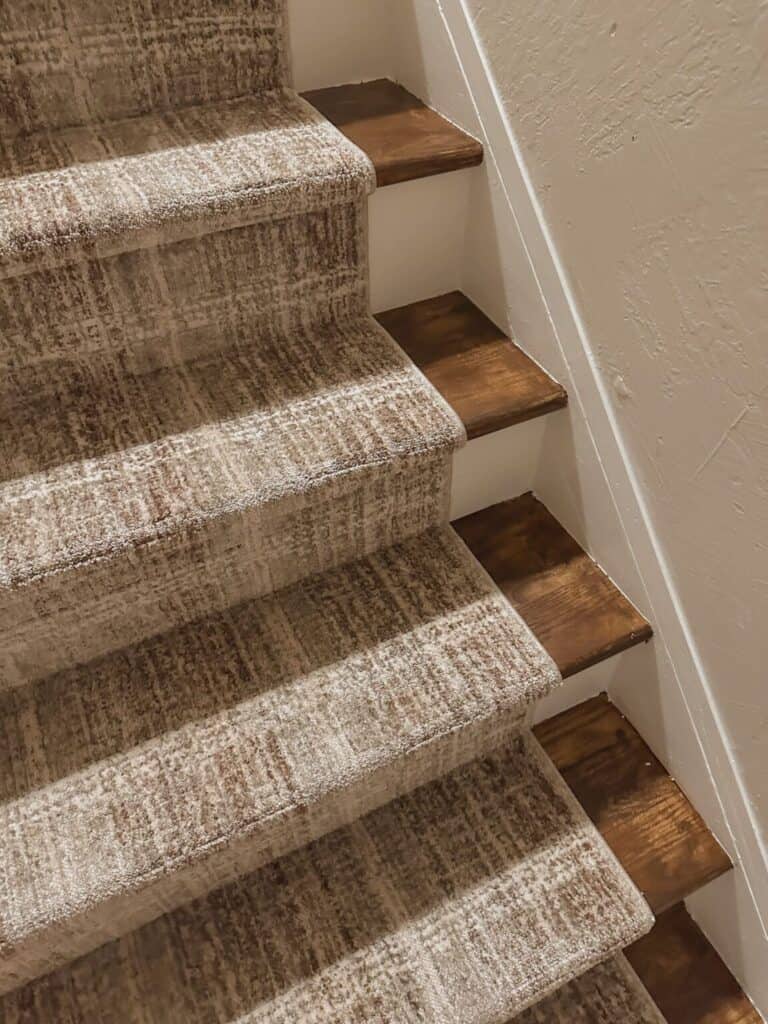
Texture is another important factor. We chose a soft yet tufted rug stair runner for the perfect mix of comfort, durability, and non-slip functionality. I opted against a printed rug, which I worried might be too slippery. Ultimately, the right rug stair runner will strike a balance between style and practicality for your space.
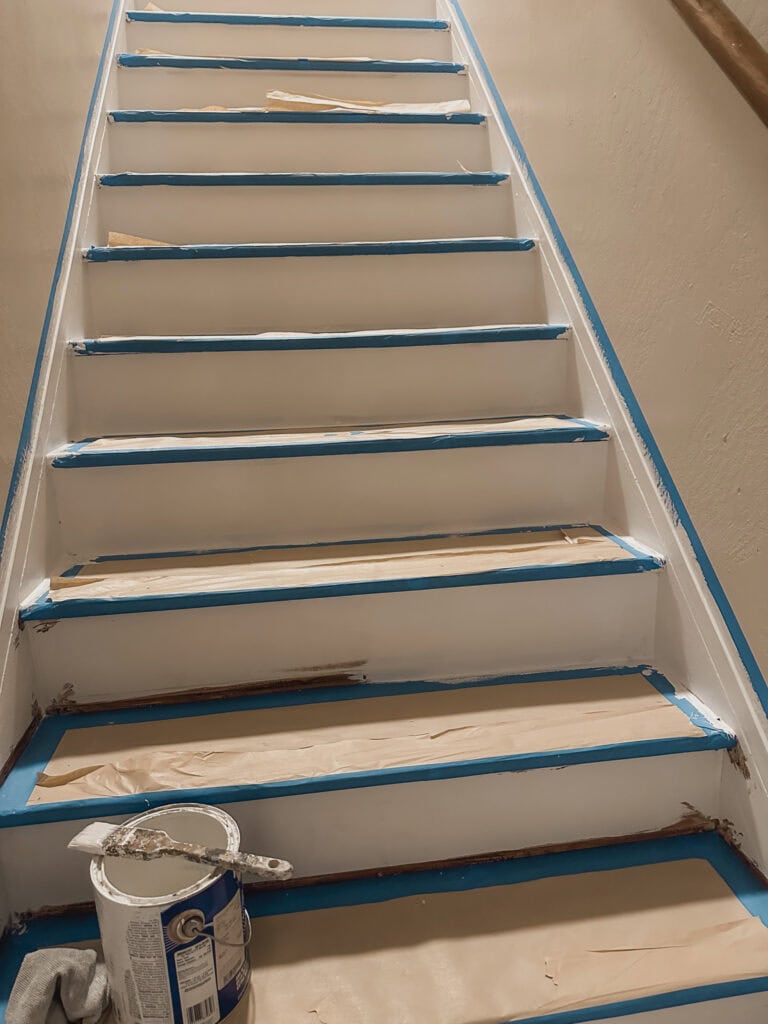
2. Prep the Stairs
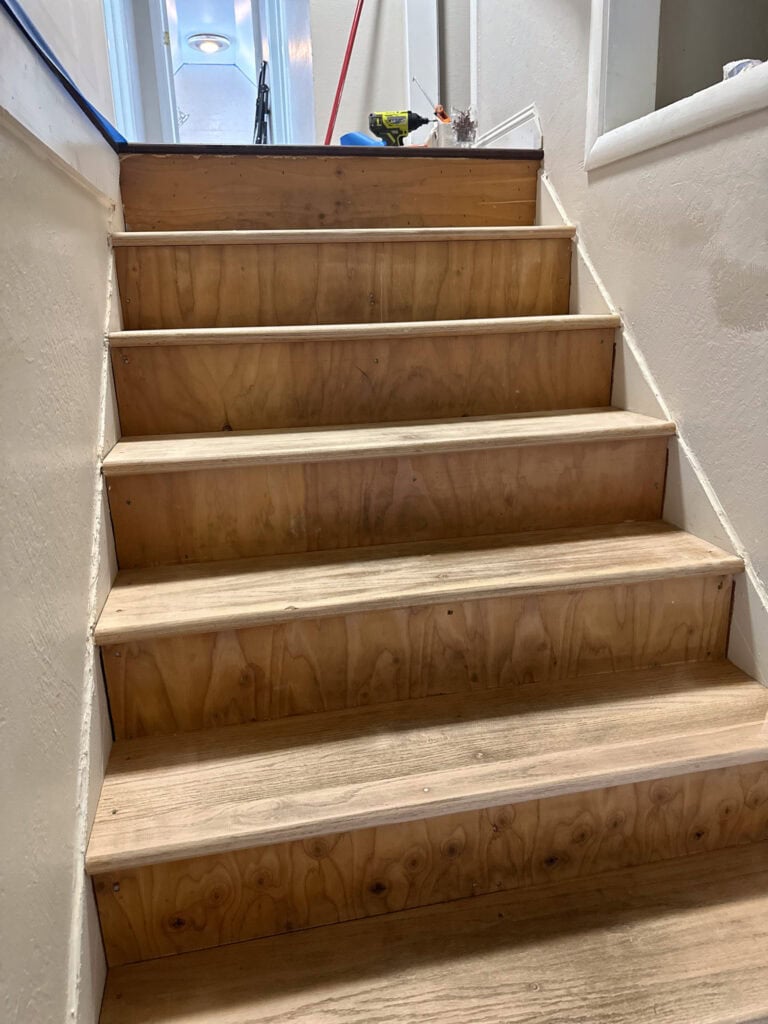
Start by thoroughly cleaning your stairs. If they’re unfinished or need repairs, take care of those tasks first—it’ll make a big difference in the final result and ensure your rug stair runner looks its best.
In our case, prepping the stairs was a project in itself. We had to sand off old, yellowed polyurethane, remove 4-inch screws from the treads, and patch the resulting holes. We also tackled a gummy mess of silicone that had been used as a trim substitute on the skirt board, which took hours to remove with a razor blade.
Once the heavy lifting was done, I restained the stairs with a watered-down walnut stain to match our flooring, caulked the gaps, and added new trim on top of the skirtboard to hide imperfections. Finally, we painted the risers and skirtboard white and sealed the steps with water-based polyurethane for durability.
If your stairs are already in good condition, a thorough cleaning to remove dust and debris is all you’ll need before installing your rug stair runner. While you’re at it, assess for creaks, loose boards, or structural issues. Addressing these now will ensure your rug stair runner stays secure and performs well over time. Use wood filler for gaps or cracks, and secure any loose nails with a hammer before moving on.

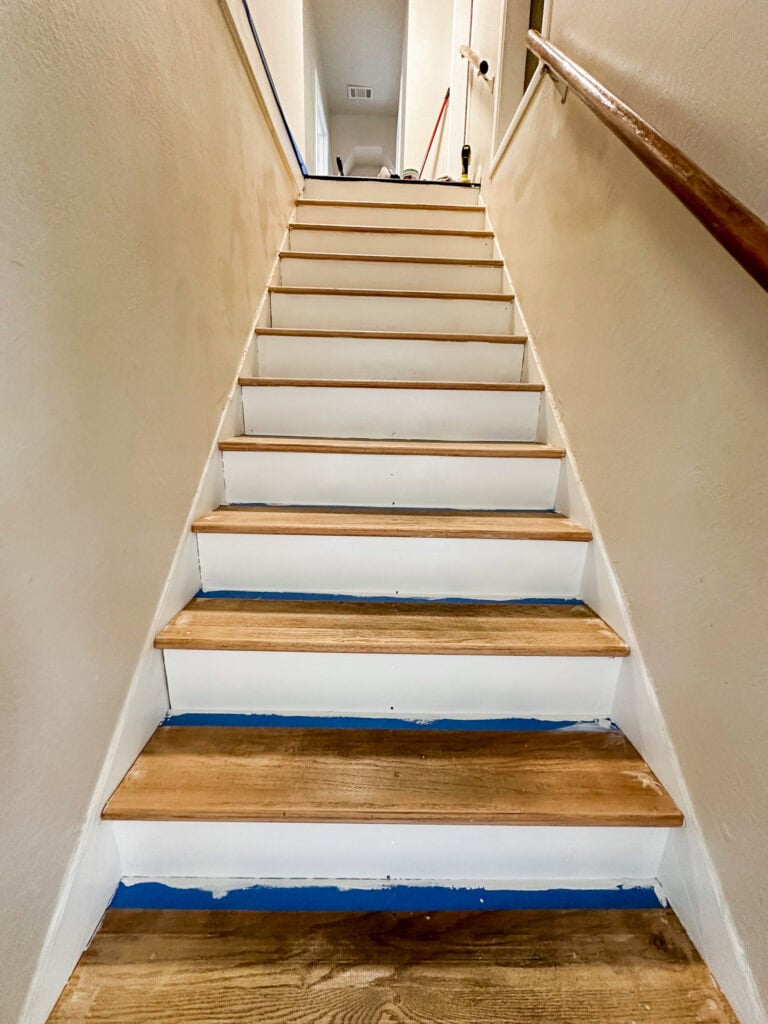
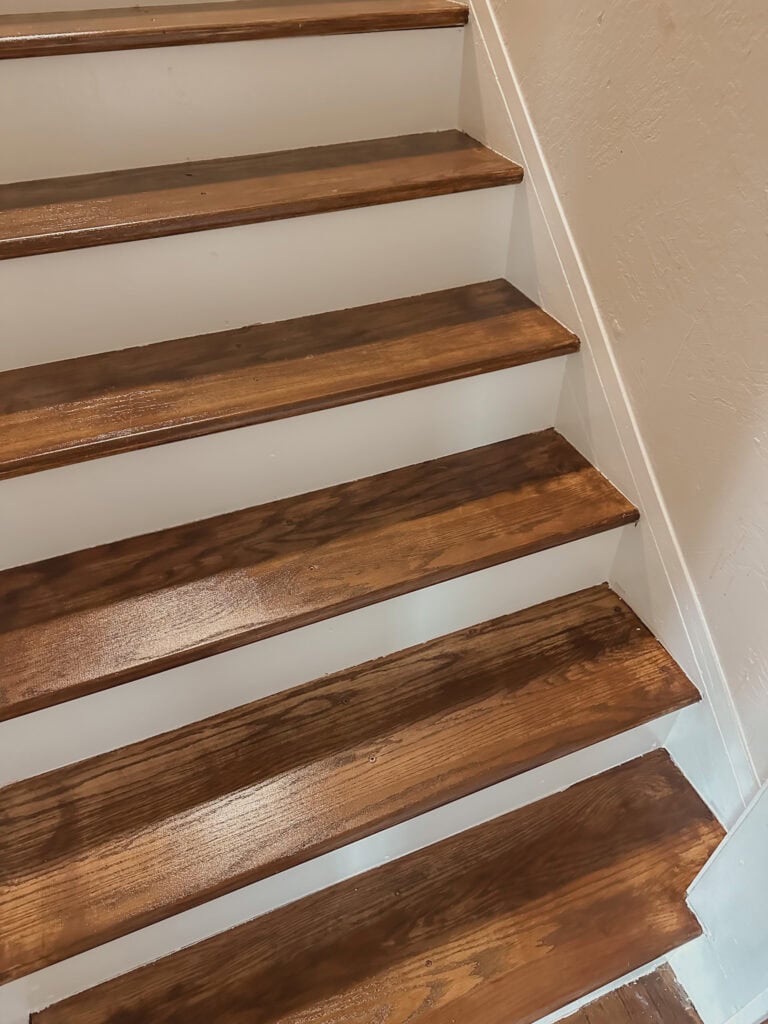
The stairs were so pretty at this point, that I almost didn’t want to install the stair carpet runner!
Installation Steps
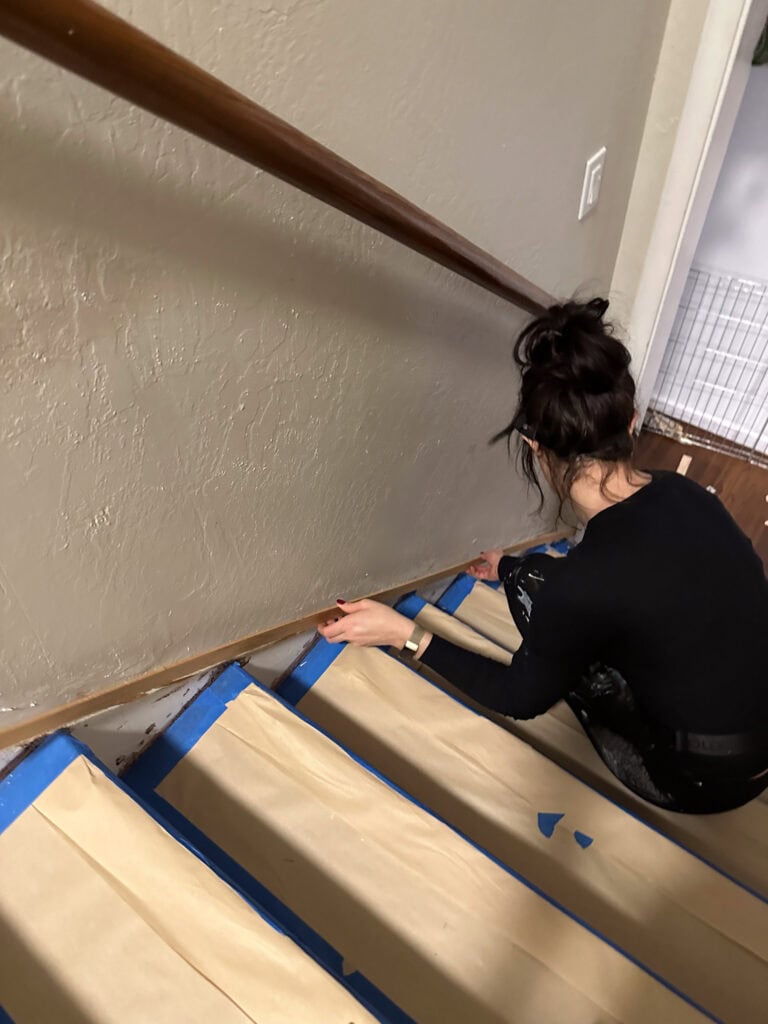
1. Mark Placement with Painter’s Tape
Do as I say, not as I do! We skipped precise measurements because we discovered our staircase wasn’t exactly symmetrical—some treads were a full 2 inches wider in the middle! While it’s not noticeable in person, the staircase subtly bows out. To make it work, we aligned the rug stair runner in the center at the top and bottom, meeting as closely as possible in the middle.
If your stairs are more even than ours (lucky you!), take the time to measure carefully. Use a tape measure to find the center of each step and mark it with painter’s tape. This ensures consistent placement and a symmetrical appearance, which is especially important if your rug stair runner has a bold pattern or stripes.
For perfectly aligned stairs, mark the edges of the rug stair runner with painter’s tape so it can sit snugly between the lines, then remove the tape as you go.
For our uneven stairs, we measured as accurately as possible and placed the foam tread covers before continuing. The extra effort helped create a smoother base for the rug stair runner and made installation easier.
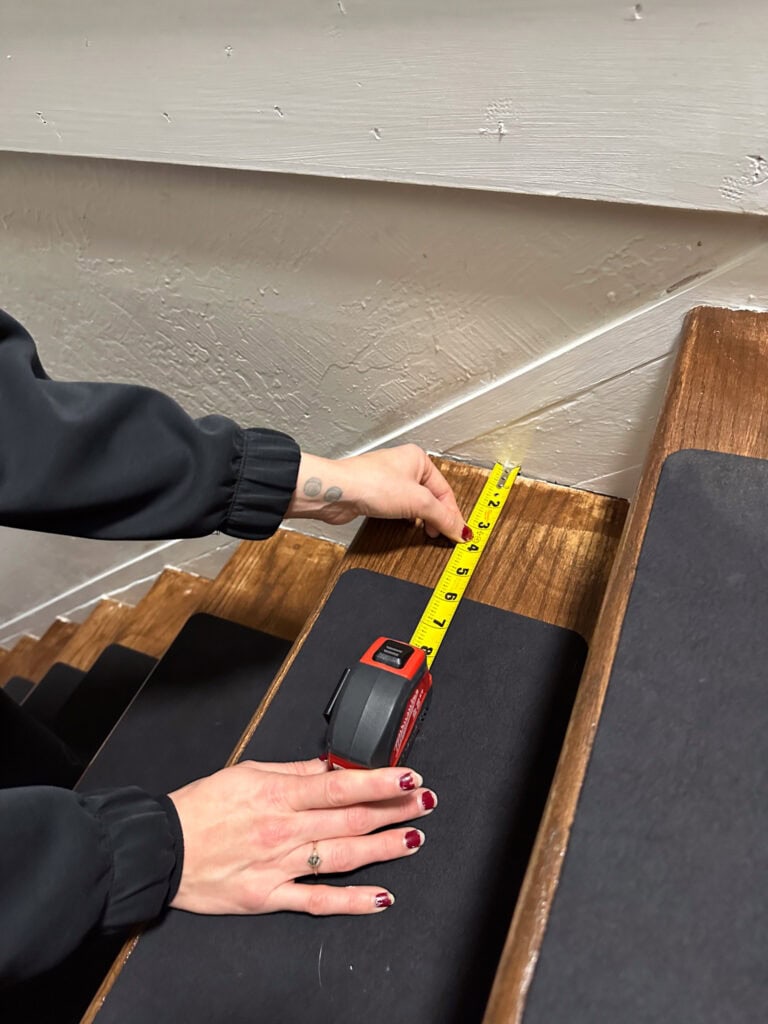
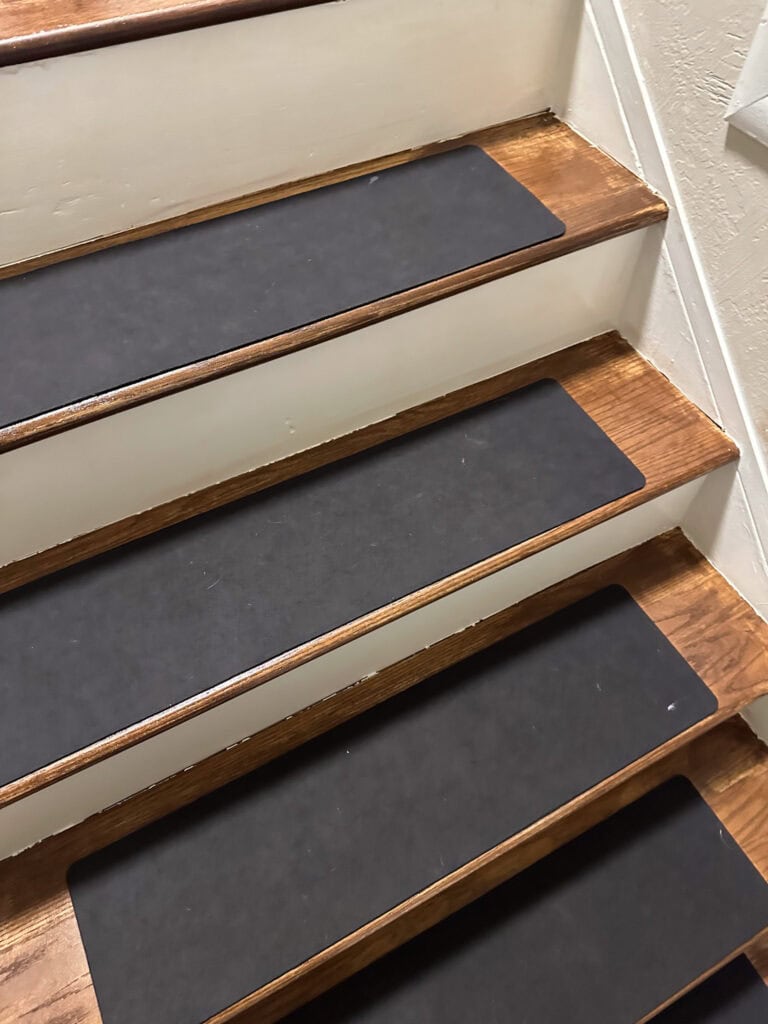
2. Lay Down the Carpet Pad
For added comfort and safety, use a carpet pad or no-slip tread covers under your runner. Cut them to size and secure them to each step with double-sided carpet tape.
The carpet pad should be approximately 1-2 inches narrower than the runner. This way the edge of the runner will directly stairs.
Carpet pads not only provide extra cushioning but also help extend the life of your runner by reducing wear and tear. Be sure to align the pads evenly within your tape lines.
We repurposed memory foam, non-slip stair pads from our old house instead of buying and cutting new rug pads to size. They worked perfectly and saved us a little money in the process!
Your rug pads should be approximately the same size relative to your stairs.
Quick Note About Styles for Securing the Runner
When attaching a rug stair runner, you’ll typically choose between two common methods: the Waterfall method or the Hollywood (Bullnose) method.
- The Waterfall method allows the rug stair runner to cascade over the edge of each tread, attaching at the point where the riser meets the next tread. This creates a smooth, clean silhouette and works best with thick, fluffy runners and stairs without a dramatic bullnose.
- The Hollywood or Bullnose method, which I opted for, involves tightly wrapping the rug stair runner around the bullnose (the overhanging front edge of the tread). This method highlights the architectural shape of the stairs and adds a touch of character, making it a great choice for more defined stair profiles.
There will be slight differences in application for each method. I will mostly describe the Hollywood or Bullnose process, as that is what I did, but I will note differences in methodology for the Waterfall method.
Let’s get into it!
3. Start at the Top
Place a strip of double-sided carpet tape under the bullnose of the top tread. I chose to add 12-inch strips for our 2’7″ inch runner. Align the edge of the runner under the bullnose of the upstairs floor’s top step. Press it firmly into the tape.
Take your time to ensure the alignment is straight. A crooked start at the top can throw off the entire installation, so double-check before proceeding.
If you are doing the Hollywood (Bullnose) method, place a strip of double-sided tape at the top of each riser, just under the bullnose.
If you are doing the Waterfall method, place a strip of tape at the bottom of each riser, just above the corner where the riser meets the tread.
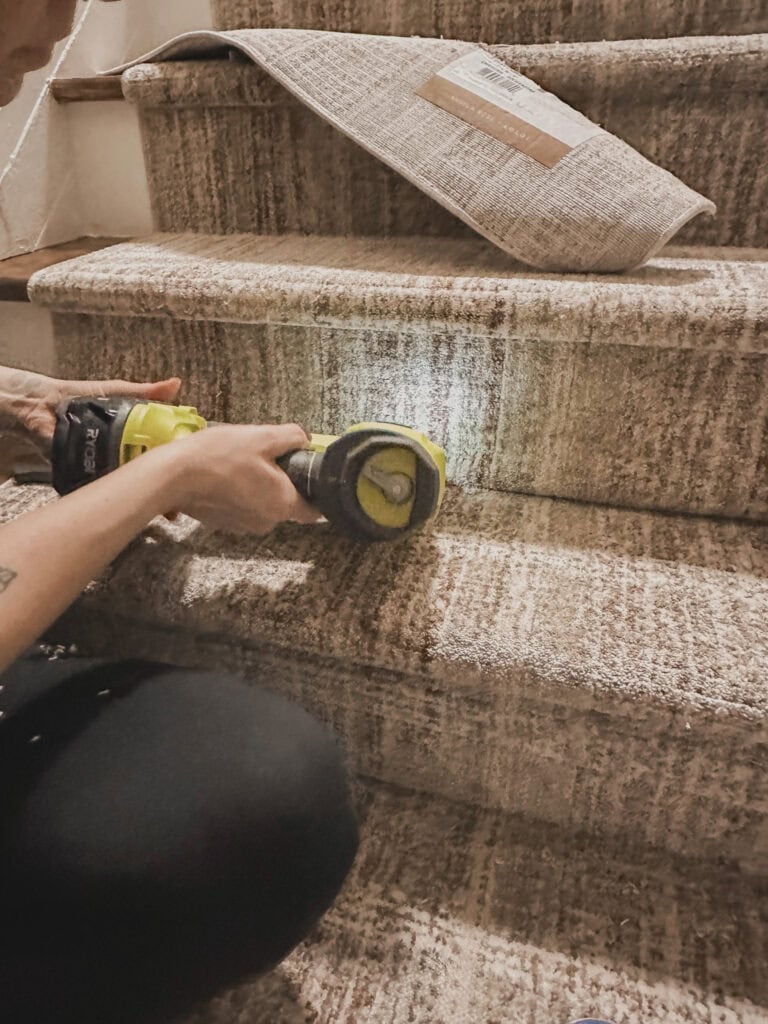
4. Staple the Runner
Using the electric stapler, begin stapling at the center of the top riser, working outward every 3-4 inches.
Ensure the runner is taut and straight before moving to the next step.
Stapling in a consistent pattern is essential for a professional finish. Keep a steady hand and use the carpet tool to smooth out any wrinkles before stapling. The electric stapler makes this process much faster and easier than a manual one.
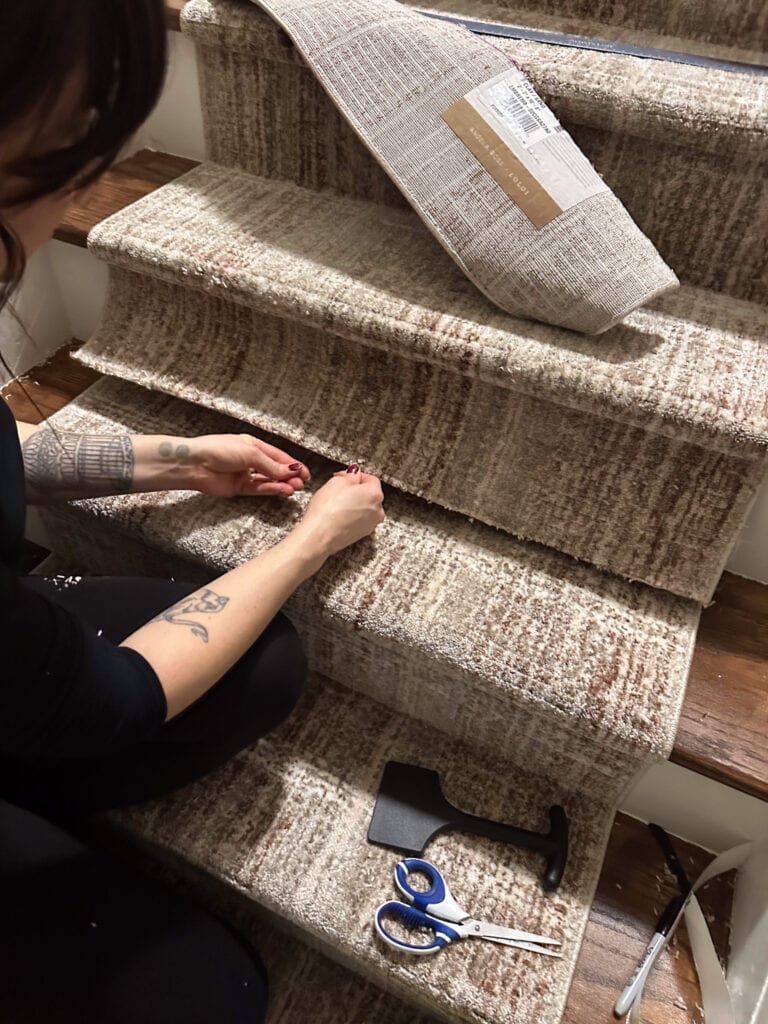
Once you have stapled a line across the top (where you placed the tape), it’s time to pull and press the runner into place using the carpet tool.

5. Press the Runner Into Creases
Use the carpet tool (black tool in the picture above) or a sturdy plastic spatula (blue tool) to press the runner into the crease where the tread meets the riser. Pull the runner tight and staple it along the riser. Depending on your preference, you can also add a few staples on the tread for added security, especially in high-traffic areas or homes with kids and pets.
For optimal results, staple close to the edges of the runner to ensure a snug fit. Be mindful of any patterns on the runner, ensuring they remain straight and aligned as you work.
If you are using the waterfall method, you will only staple the outer edges of the runner and the crease at the bottom of each riser.
If you are doing the Hollywood or Bullnose method, you’ll use the carpet tool to firmly press the runner under the bullnose to create a crease. Staple across the width of the runner, along the top of the riser, down the sides of the runner, and at the bottom of the riser (where it meets the next tread).
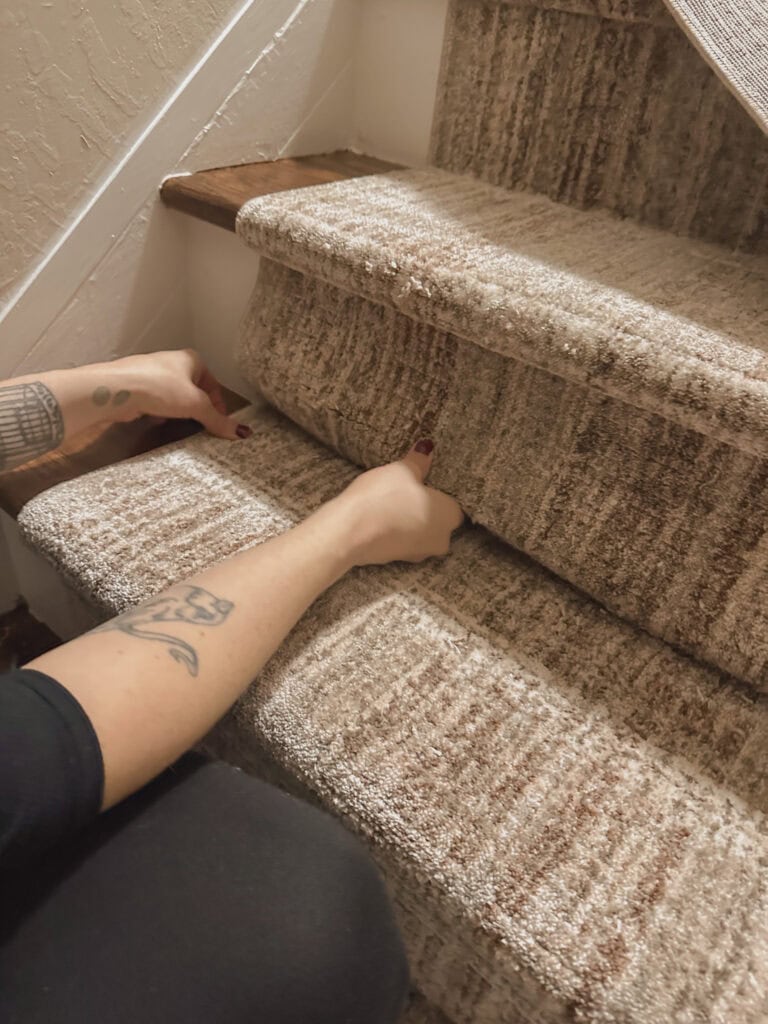
6. Continue Down the Stairs
Repeat the process for each step. Pull the runner tight, press it into the crease in the corner and under the bullnose (if doing the Hollywood or Bullnose method), and staple it securely.
If you’re using two runners, leave the bottom 10-12 inches of the first runner unstapled. This overlap will help you join the two runners seamlessly.
7. Joining Two Runners
Start the second runner from the bottom of the stairs, working your way up. This ensures the clean, finished edges are at the visible top and bottom of the staircase. When you reach the overlap point, carefully measure and cut the runners so they meet precisely at the corner of the tread and riser. Use extra tape and staples to secure the joint.
To create a seamless transition, fold the edge of the runner inward slightly before securing it. This will hide any frayed edges and give the joint a polished appearance. Take your time with this step, as it can make or break the overall look.
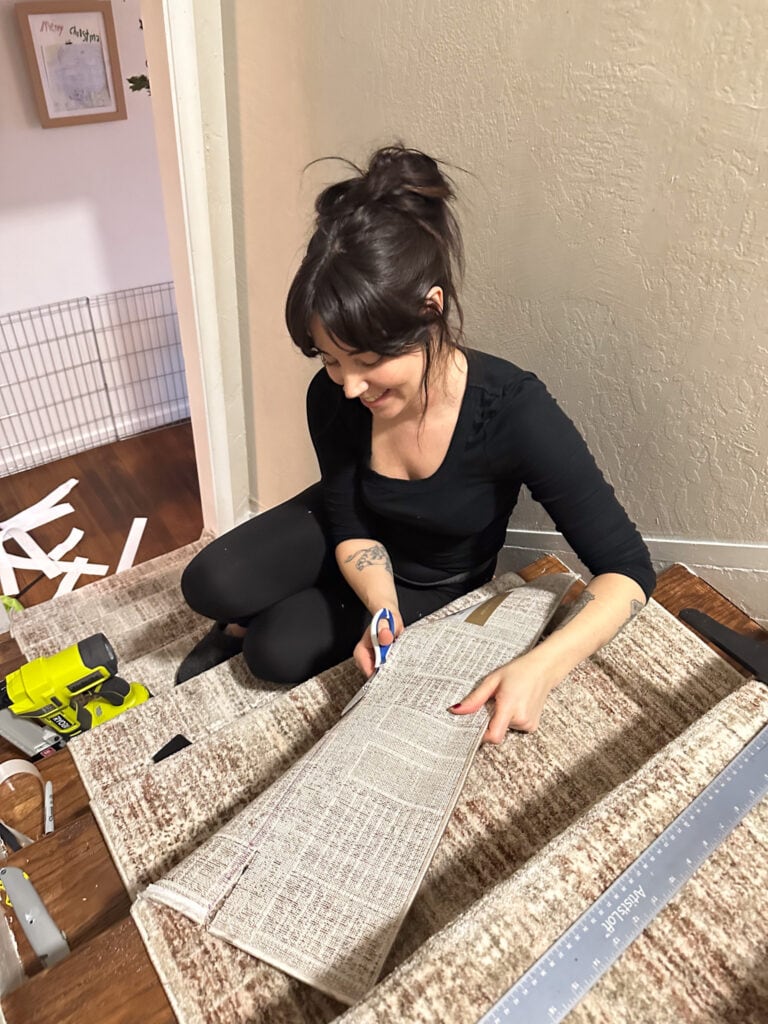
Just Like Cutting Your Bangs, You Can Always Cut More, But You Can’t Add It Back
So take your time, with this step! To get the cut right, I firmly pressed the top runner into the corner with the carpet tool. This creates a line in the carpet backing. I added about 1/2 inch to the line so that I could tuck the frayed cut edge under slightly. Leaving it long meant I could go back and trim more if needed. I used a T square to draw a straight line across with a sharpie. I then cut that line with standard craft scissors. If you have heavy-duty fabric scissors, those will probably work better, but I made it work!
To cut the bottom runner, I did the same thing, but I cut that one exactly where it met the corner. I wanted the part on the stairs to be perfectly flat and straight. After that, I secured it with two strips of double-sided tape on the tread.
I first secured the bottom runner, tucking it into the corner and using tape and staples to secure it. I then pulled some loose thread from the upper runner and began to fold it under to hide the cut edge.
Once it was folded over and I felt good about the positioning, I began stapling it into place. I started stapling in the middle and used the carpet tool to press and smooth it as I went.
8. Finish at the Bottom
When you reach the bottom steps, secure the end of the stair carpet runner with tape and staples. If you need to cut the runner, make sure to cut straight and hide the raw edge in the crease or just under the bullnose of the tread.
For an added touch, consider using decorative stair rods at the base of each riser. These can enhance the aesthetic appeal and help keep the runner in place.
Project Notes: Installing a Rug Stair Runner


Time and Effort
The actual installation of the stair carpet runner took only about two hours. However, because we had to prep our stairs (sanding, staining, painting, and adding trim), the entire project spanned several weeks. If your stairs are already complete, this project will be much faster.
Safety and Noise Reduction
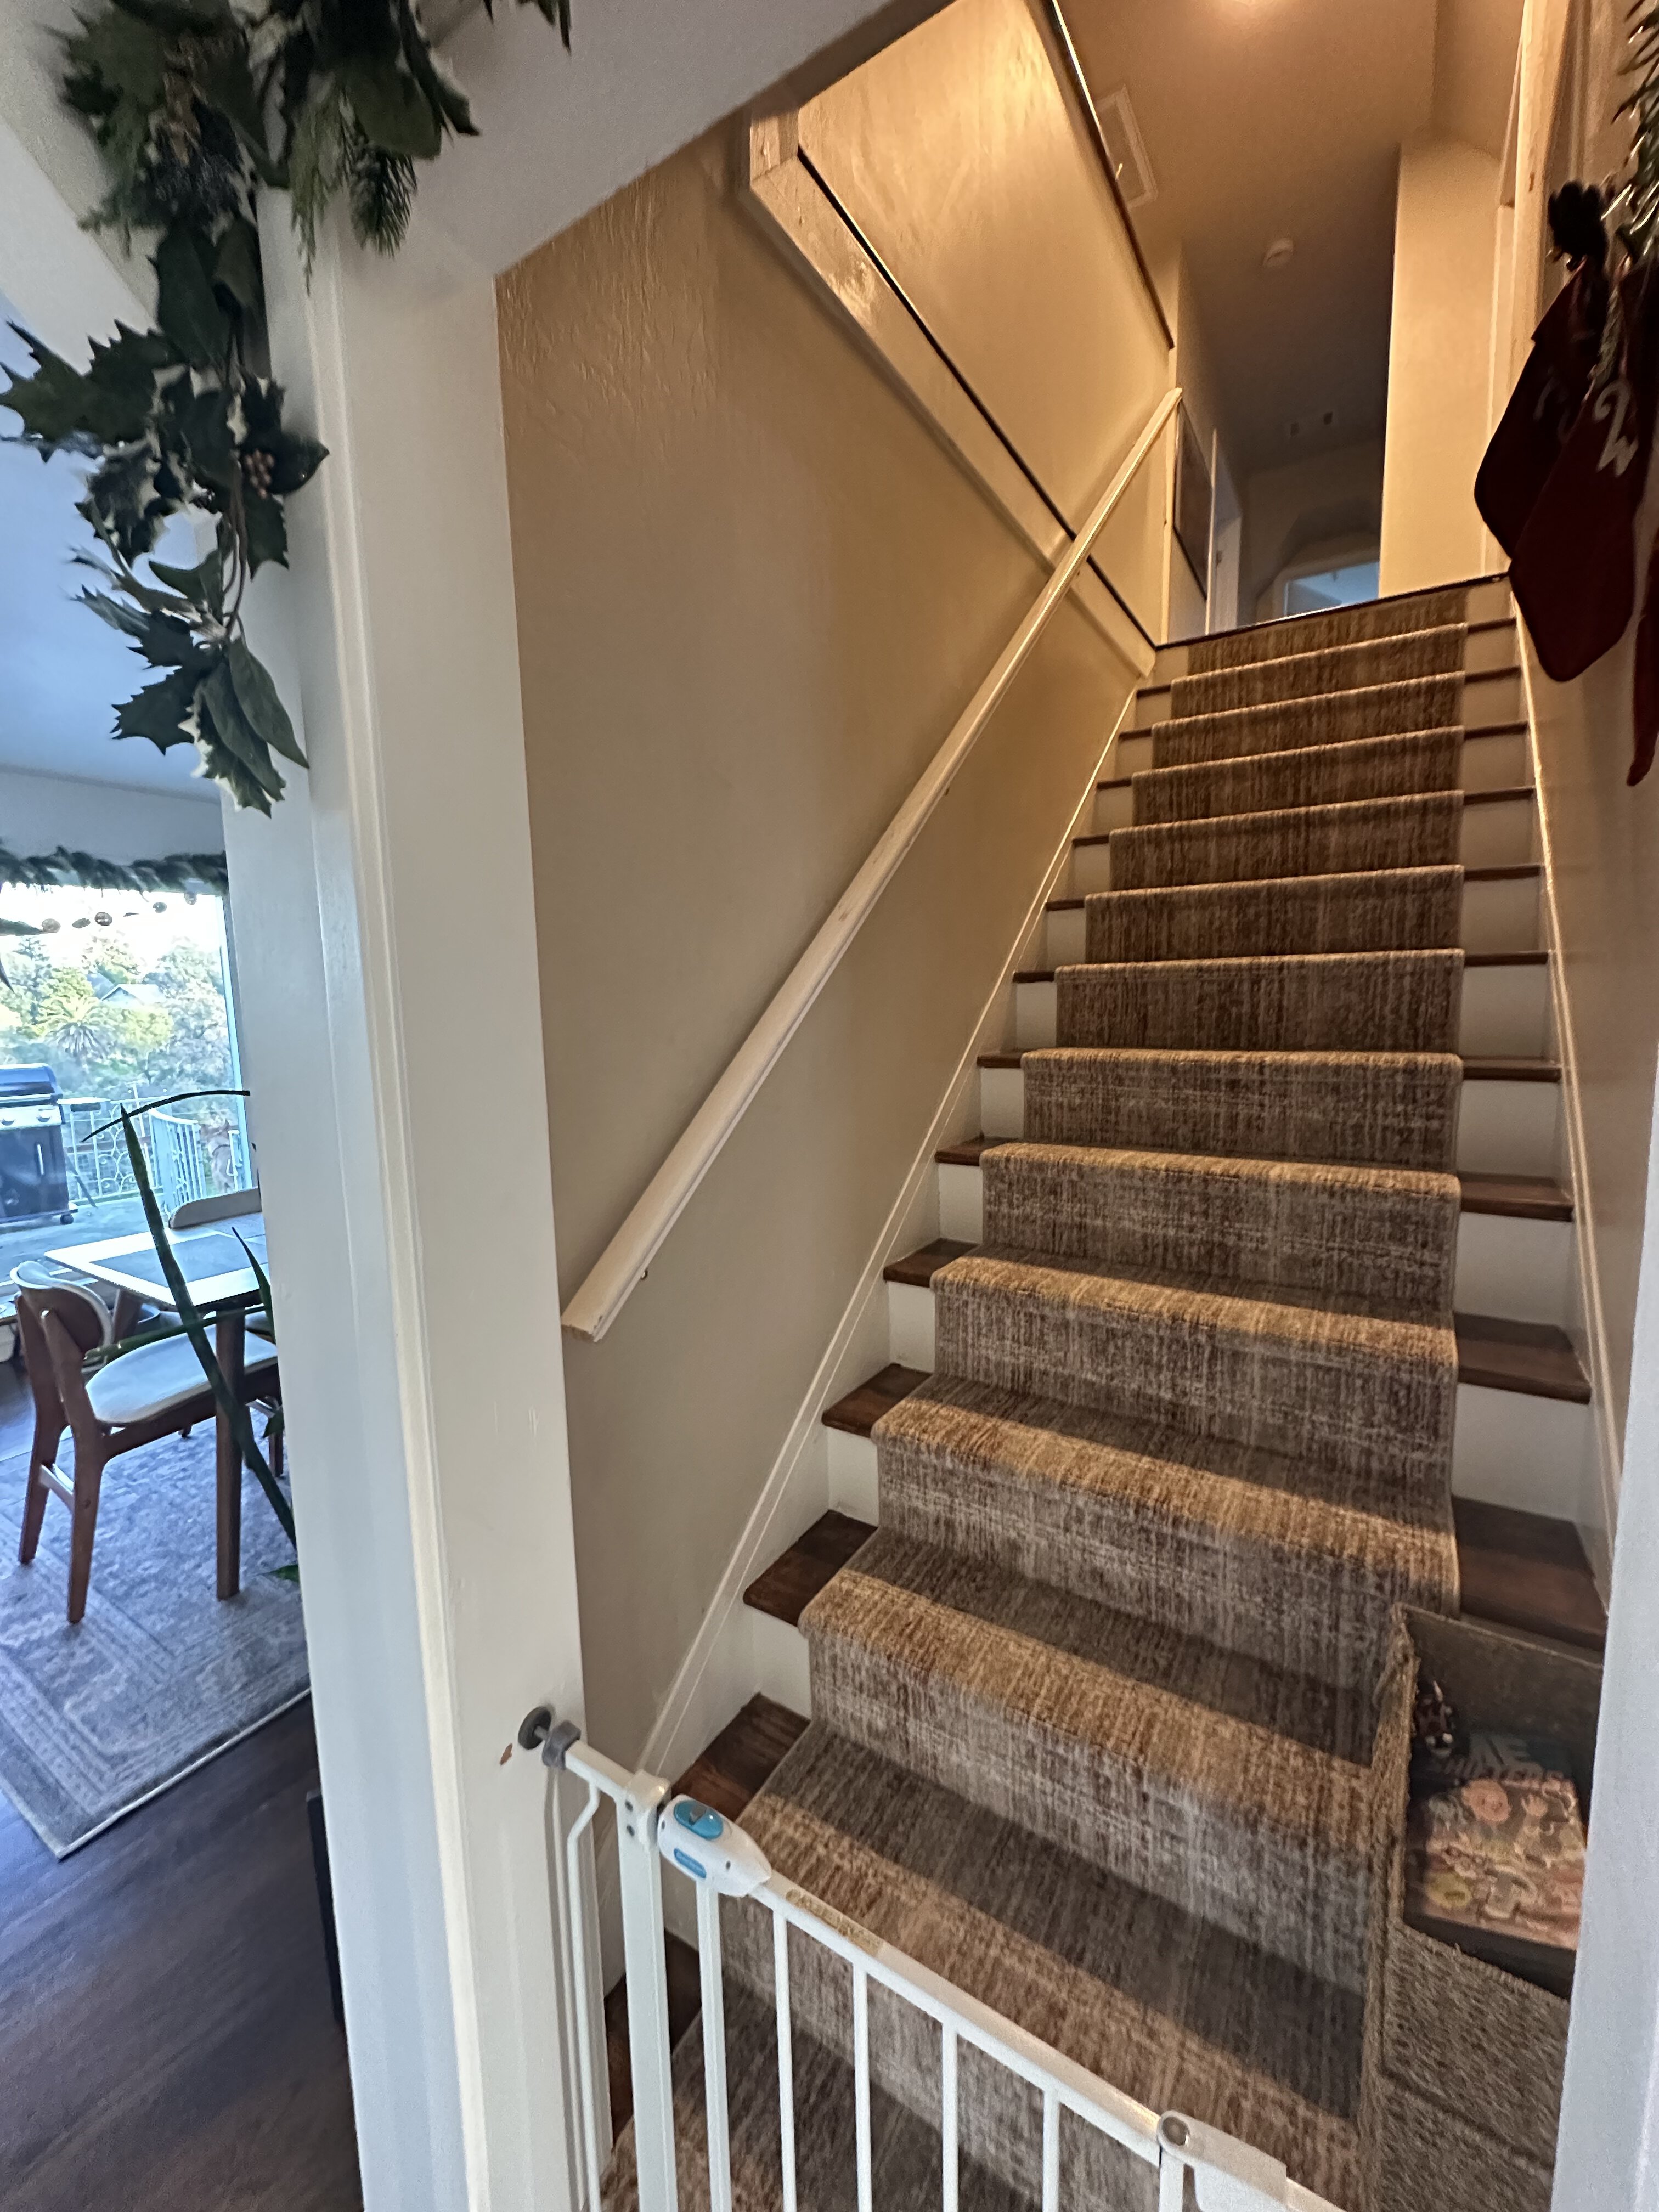
We’re thrilled with the results. The runner has made the stairs much softer and quieter. The kids can now run up and down without the thunderous noise of footsteps echoing through the house.
Additionally, the added traction from the runner has significantly improved safety. The combination of carpet pad and double-sided tape ensures the runner stays firmly in place, even with pets and children in the house.
Troubleshooting Tips
- Wrinkles or Bubbles: If you notice any wrinkles forming as you go, stop and adjust the runner. Pull it taut and staple again. Don’t fret too much about imperfections.
- Uneven Alignment: Use painter’s tape to mark a straight line down the center of the stairs as a guide.
- Loose Staples: If staples aren’t holding securely, switch to slightly longer staples or check that the stapler is functioning properly.
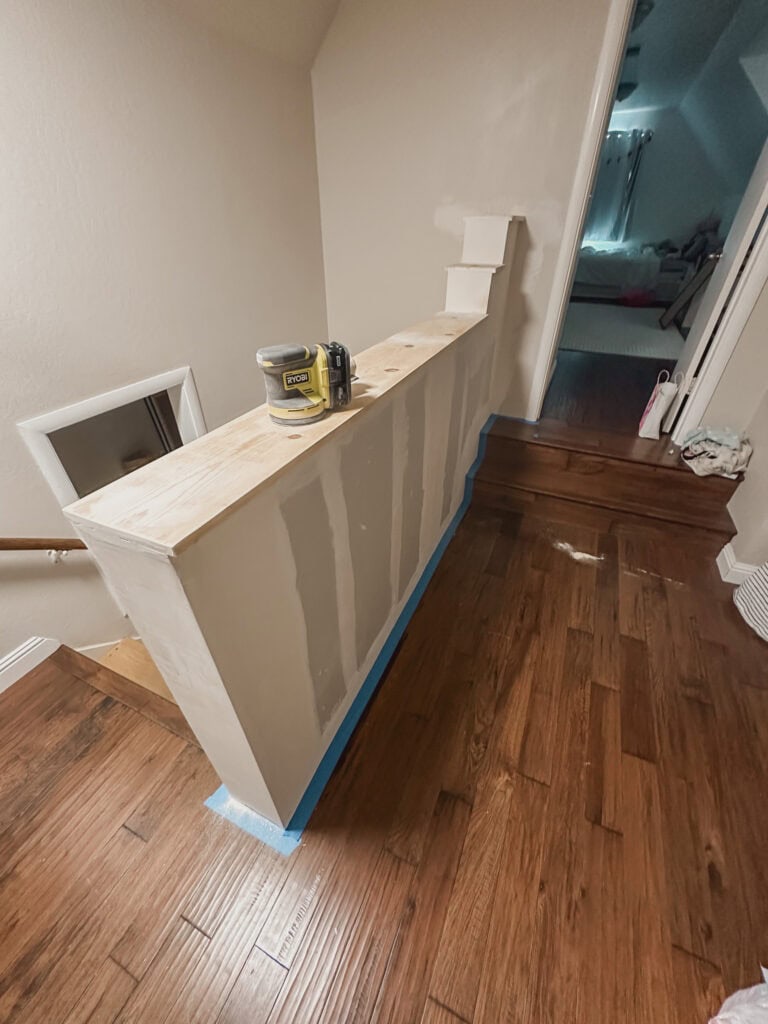
Why We Built a Pony Wall
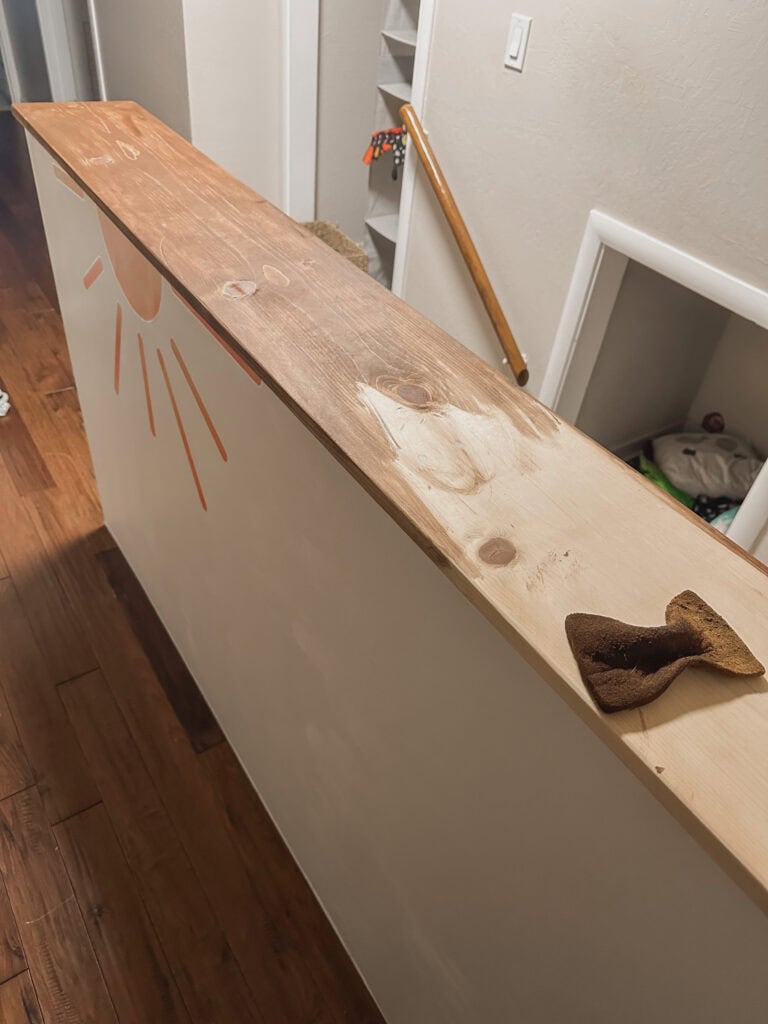
When we moved in, our staircase featured an old metal banister with wide gaps between the spindles—a major safety hazard for our kids and definitely not up to code. To fix this, we designed and built a pony wall. I painted and stained it to match the stairs, and it’s made a huge difference in both safety and aesthetics.
The pony wall also gave the staircase a cohesive look, tying it seamlessly into the rest of our home’s design. If you’re considering a similar project, it’s a relatively simple way to add both charm and functionality to your stairs.
It also solved a long-standing issue with the handrail. As you can see in the photo, there’s a quirky little storage nook tucked under the staircase. It’s about 5 feet deep and 3 feet tall—perfect for our kids to hide in, or for one of our dogs, who loves claiming it as her den. But this nook had interrupted the original handrail, and the previous owners’ solution was to add two separate sections of railing at different heights and angles. One section was oddly low, making it both impractical and unsafe.
By adding the pony wall, we were able to install a continuous handrail for the stairs. I still need to paint it (a project for another day!), but it’s already made the staircase much more functional.
This was a manageable DIY project that solved multiple issues while adding a lot of charm. If you’re dealing with an outdated staircase, a pony wall might be the perfect upgrade
Final Thoughts
When we moved into our house last year, I knew prioritizing the kids’ space was non-negotiable. The upstairs was the most outdated—and honestly, the most unsafe—area in the entire house. Over the past year, we’ve painted, decorated, built new furniture, and tackled the kids’ bathroom makeover. This stair project was one of the final items on my to-do list for their space.
There’s still more to do, but for now, they have a cute, clean, and—most importantly—safe area to call their own. That means I can finally shift my focus to other parts of the house.
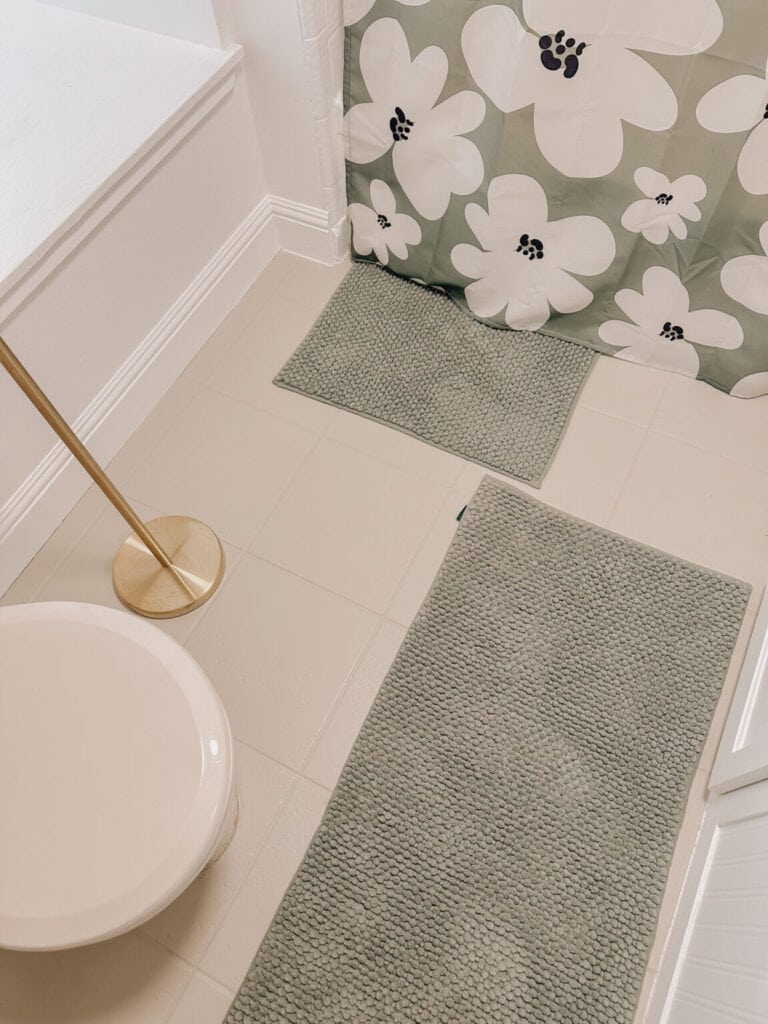
If you’re working on similar projects, check out their bathroom makeover for inspiration:
If you’ve been hesitating to install a rug stair runner because it seems overwhelming, trust me—it’s not as hard as it looks! With the right tools and a little planning, this is a project you can tackle yourself. Just remember: invest in an electric stapler and take your time to ensure each step is secure and evenly aligned.
By following these steps, you can transform your staircase into a stylish and functional focal point for your home. Whether you’re adding warmth or style, reducing noise, or improving safety, a staircase runner is a worthwhile project that delivers almost immediate results and lasting benefits. So roll up your sleeves, gather your supplies, and enjoy the process of creating a staircase you’ll love for years to come!

Join the List
Stay up to date & receive the latest posts in your inbox!