How to Build a DIY Raised Gardening Bed for About $35
If you’ve been thinking about starting a garden but aren’t sure whether the soil in your yard is any good, a raised gardening bed is one of the easiest ways to get started.
Raised beds let you control the quality of your soil, improve drainage, and make gardening more manageable without spending days tilling hard ground. They’re also beginner-friendly and can be built on a surprisingly small budget.

Start With a Plan and Budget!
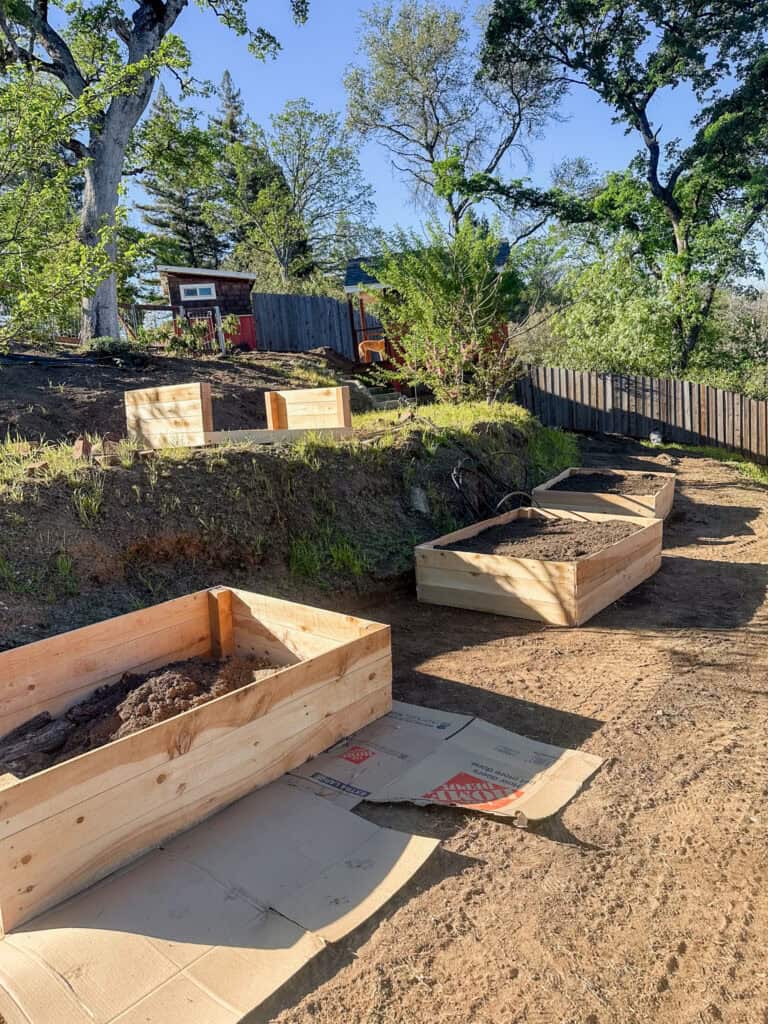
This year, we decided to tackle the lower half of our property, a fenced-off section of our yard that we call our “back backyard.” When we moved in, the area was completely overgrown with foxtails, burrs, and thistles.
After spending a couple of years focusing on higher-priority home projects in the house, we finally decided it was time to reclaim the space. Naturally, I couldn’t stop at simply clearing weeds and leveling the ground. I decided to build a few raised gardening beds, too.
When I say “a few,” I actually mean nine.
And honestly, I already have plans for at least three more.
At first, both my husband and the contractor helping us level the area thought I had completely lost my mind. Even though this is my first year having a garden, I am no stranger to caring for plants, and I knew I would love it -and I do!
Not to mention, grocery prices aren’t getting any cheaper, and we are a family of five. So if we can offset even a small portion of our produce bill while creating a hobby I enjoy, the project is worth it.
That said, gardening can become expensive quickly if you’re not careful. Before building anything, I spent a lot of time thinking about where I wanted to invest my money and where I wanted to save.
For us, the priorities were quality soil and an irrigation system.
But this is where it is important to do your research and some soul-searching to determine which number of beds will add to your life, not take away from it.
As a busy family of five, I knew I didn’t want watering to become another daily chore. Installing irrigation costs more upfront, but it saves us a tremendous amount of time. To balance that expense, I decided to build the raised gardening beds as affordably as possible.
Planning a Productive Raised Gardening Bed
Before planting anything, I spent several weeks considering what our family actually eats and how to maximize production from a relatively small space per bed, without going overboard- something I may have failed at when it comes to zucchini. I hope my family is ready for zucchini to become the base of our food pyramid.
Deciding what to grow based on what we like to eat and what actually grows in our zone was step one in this process. But in order to make it all come together, two gardening concepts were especially helpful: companion planting and square-foot gardening.
Companion planting is the practice of growing certain plants together because they benefit one another. For example, tomatoes and basil are often planted together because they grow well under similar conditions and enhance each other’s flavor. Marigolds are another popular companion plant because they can help deter certain garden pests.
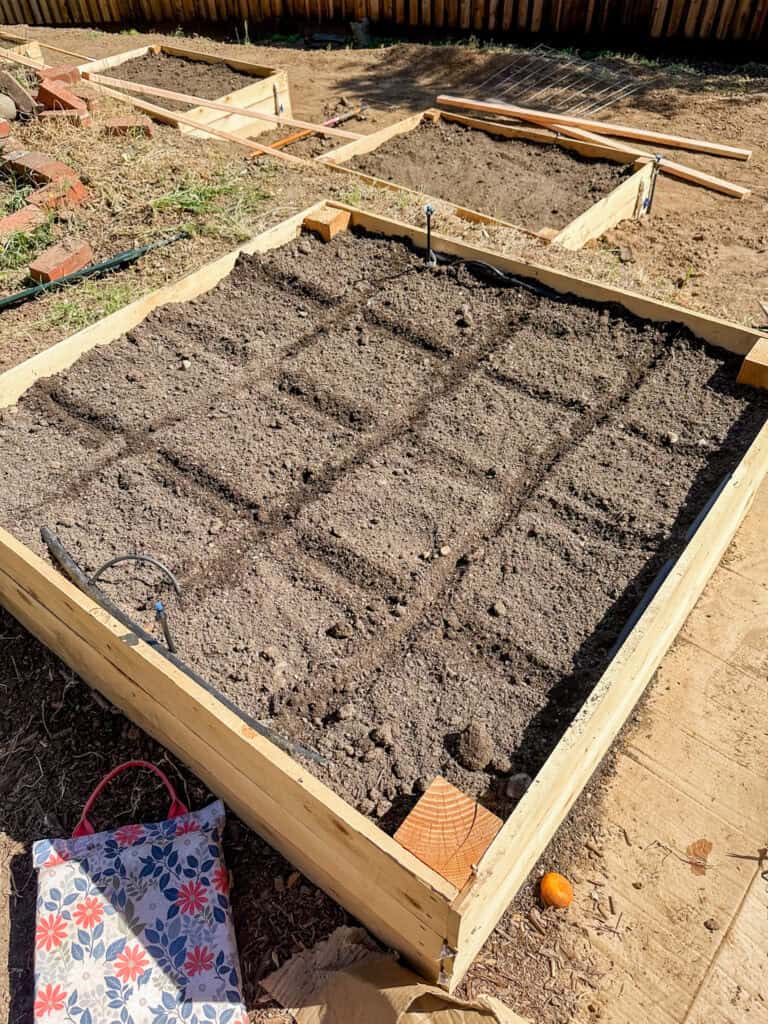
I also used square-foot gardening principles to map out every bed before planting. Developed by Mel Bartholomew, square-foot gardening assigns planting densities based on the needs of each crop. Instead of guessing how much space plants need, you can follow a simple system that helps maximize production without overcrowding.
As a beginner gardener, I found this incredibly helpful.
You can use twine to create your 12×12-inch squares and keep them neat, or do what I did and just draw the lines in the soil.
Using these two methods, I created a planting plan for each raised gardening bed before I ever bought seeds or materials.
So far, the results have been encouraging. I planted at the end of March, and by early June we’ve already harvested salad greens, bok choy, snap peas, and more zucchini than I know what to do with.
And yes, everyone was right.
Six zucchini plants is absolutely too many zucchini plants.
Why I Chose Cedar Fence Pickets
Since I wanted to spend most of my budget on soil and irrigation, I needed a low-cost way to build the beds themselves.
After pricing several options, I settled on cedar fence pickets.
Each picket costs around $3, making them one of the most affordable materials available. Cedar also naturally resists rot and insects better than many other budget-friendly woods. Make sure to get non-pressure-treated pickets so the harsh chemicals used in those processes won’t leach into your food.
The result was a simple raised gardening bed that cost approximately $35 per bed to build.
Will these beds last forever?
No.
But depending on your climate, they should last between five and ten years, which felt like a reasonable return on investment for a first-time garden project.
Materials Needed
For one raised gardening bed, you’ll need:
- Cedar fence pickets
- 4×4 posts or 2x4s for corner supports
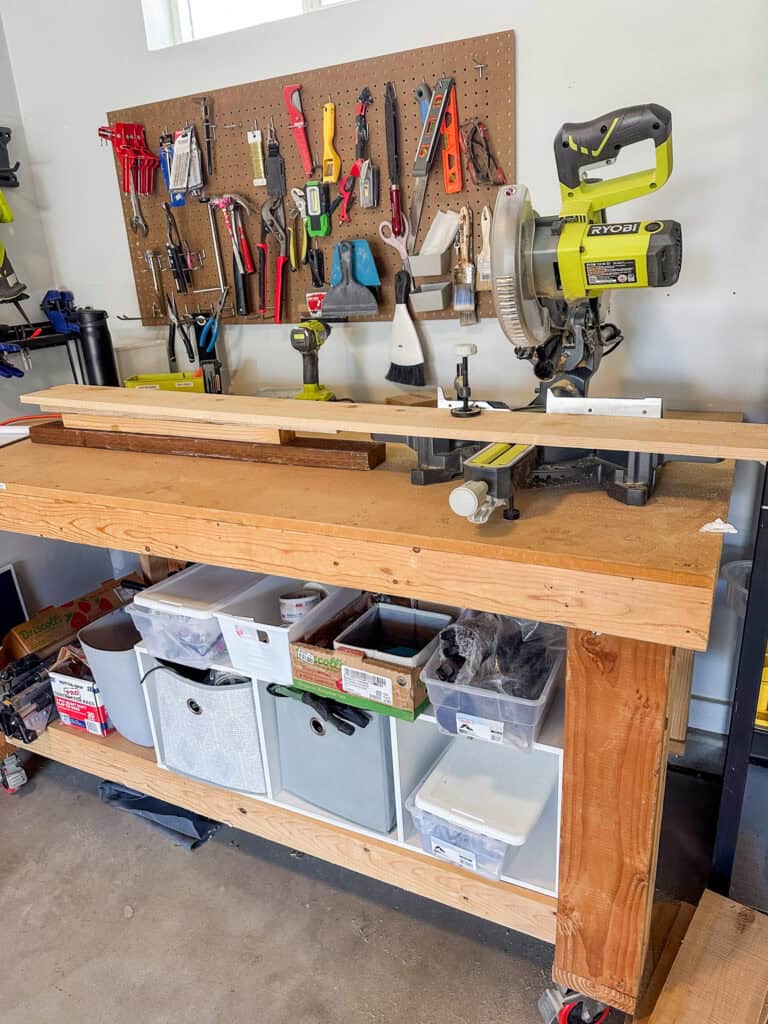
- Drill
- Exterior wood screws
- Circular saw, miter saw, or hand saw
- Tape measure
- Safety glasses
I initially used 4×4 posts for the corners, but after building several beds I realized 2x4s work just as well and are lighter, easier to cut, and less expensive.
Step 1: Decide on Your Raised Gardening Bed Size
Before purchasing materials, decide how many beds you want and what dimensions make sense for your space.
Most of my raised gardening beds measure 4 feet by 6 feet.
I chose this size because it allows me to reach the center of the bed from either side without stepping into the soil. Once beds get much wider than 4 feet, harvesting and maintenance become more difficult. And it utilizes most of the 6 ft pickets.
For height, I chose 18 inches.
This depth works well for most vegetables and provides plenty of room for root development. If you have mobility concerns or simply prefer less bending, consider building beds that are 24 inches tall or higher.
Just remember that taller beds require significantly more soil.
Find the average depth that will work for what you want to grow or build a variety. I chose 24 inches for my tomatoes because they like to build deeper roots and also love a lot of water. And I made my strawberry bed 12 inches deep because they have pretty shallow roots.
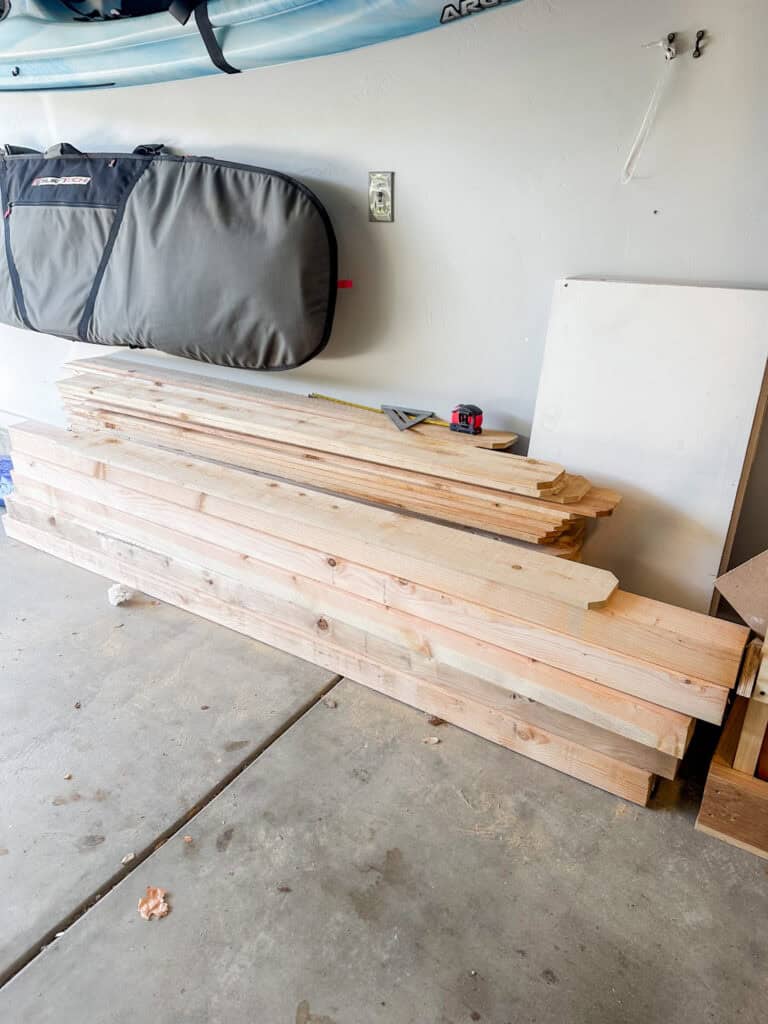
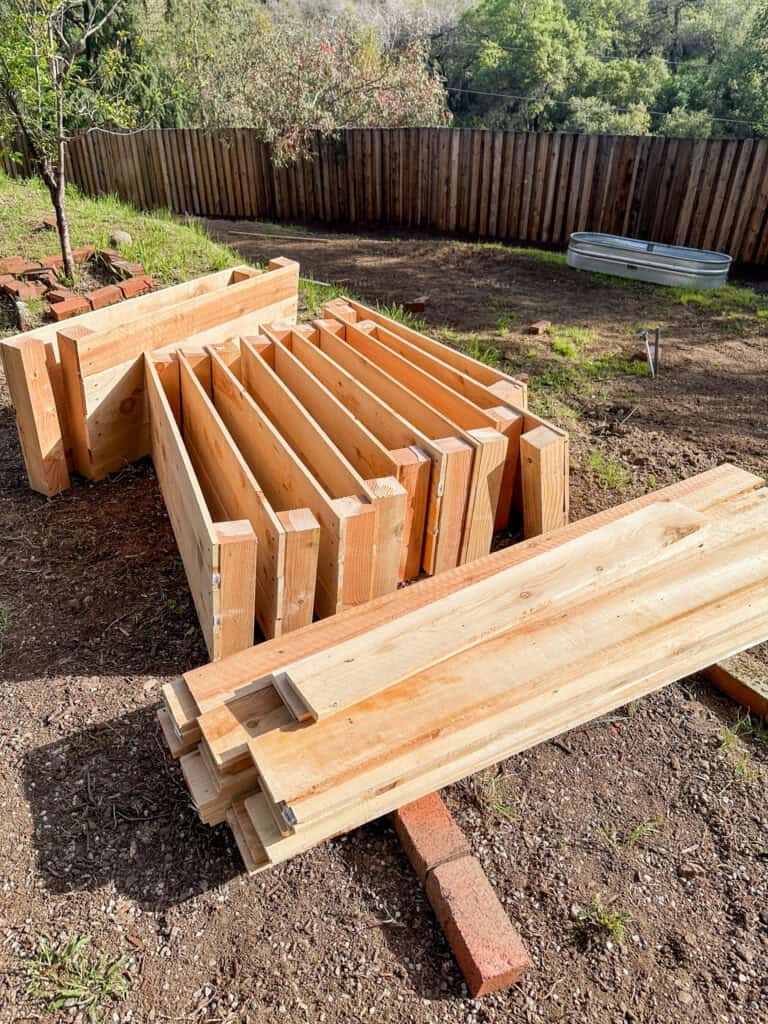
Step 2: Cut Your Materials
The basic structure is simple.
For an 18-inch-tall raised gardening bed, cut four corner posts to 18 inches long. I used my circular saw or my miter saw.
Next, cut your cedar pickets.
For a 4-foot by 6-foot bed, you’ll need:
- Six 6-foot boards
- Six 4-foot boards
The easiest way to create the 4-foot boards is to cut 2 feet off six of the pickets.
Don’t throw away those leftover 2-foot pieces. You’ll use them later as internal braces.
Many fence pickets have a decorative dog-eared top. I trimmed mine off for a cleaner appearance, but this step is completely optional.
Step 3: Assemble the Short Sides
Lay two corner posts on a flat surface.
Position three 4-foot pickets across them and secure each board using exterior screws.
Repeat the process to create the second short side.
Cedar is relatively soft, so I found pre-drilling unnecessary. However, if your boards begin splitting, either reduce your drill’s torque setting or pre-drill pilot holes.
At this stage, you’ll have two completed side panels.
If your garden area is far from your workspace, this is a great time to move the pieces into place before finishing assembly.
Trust me, they’re much easier to carry now than after they’re fully assembled.
Step 4: Attach the Long Sides
Once the side panels are in position, attach the 6-foot boards to connect the structure.
Secure each board to the corner posts using two screws per connection.
Don’t stress about achieving perfect precision. Fence pickets aren’t furniture-grade lumber, and some boards may have slight curves or imperfections.
Focus on creating a sturdy, functional bed rather than a perfectly square one.
By the time the bed is filled with soil, minor imperfections won’t be noticeable. Plus we are aiming for function, not perfection!
Step 5: Add Interior Bracing to Your Raised Gardening Bed
Remember those leftover 2-foot pieces?
Now it’s time to use them.
Attach several pieces vertically to the inside of the long sides of the bed.
These braces help resist outward pressure from wet soil and prevent the sides from bowing over time.
This simple step significantly increases the lifespan of the bed and only takes a few extra minutes.
I used the 2ft pieces vertically inside the box as shown, and for my deeper beds, I also added cross braces with additional 4ft lengths as pictured.
Filling Your Raised Gardening Bed
Once the frame is complete, it’s time for the fun part.
For our garden, I purchased bulk soil from a local nursery. If you’re building multiple raised gardening beds, buying soil in bulk is often much cheaper than purchasing individual bags from a big-box store.
You can estimate the amount of soil you’ll need using online soil calculators.
To reduce costs even further, consider using a technique called Hügelkultur.
This traditional gardening method involves filling the bottom of the bed with logs, sticks, branches, leaves, and other organic material before adding soil on top.
Not only does this reduce the amount of soil required, but the organic material gradually breaks down over time and contributes nutrients back into the bed.
For taller raised beds, the savings can be substantial.
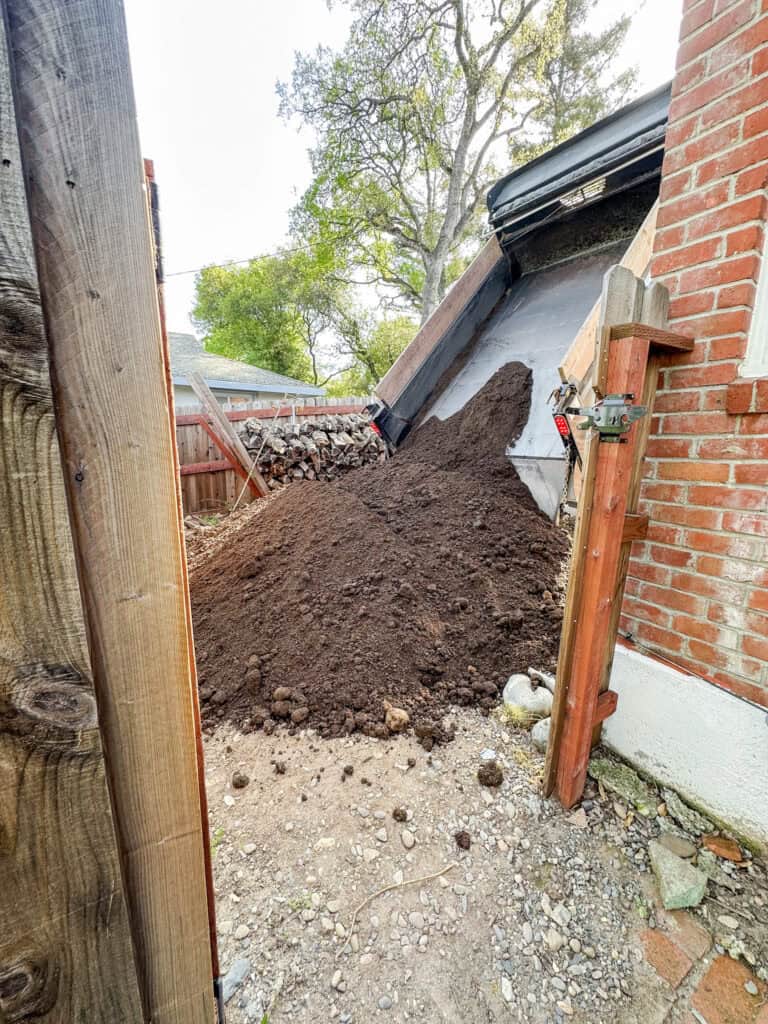
This is 5 yards of soil from my local nursery. This soil filled 8 raised beds and one very long flower bed.
Don’t Forget to Consider Irrigation
Irrigation can mean the difference between making or breaking for garden longevity. Watering is a wonderful and peaceful activity- unless you are like me and have kids that need dinner and help with homework, or a house to be cleaned, work, exercise, and all the other adult responsibilities. Watering can really become a chore when life is busy- and it always is for me- so we decided to invest in irrigation that would mean I didn’t need to be in the garden for 30-60 minutes twice a day.
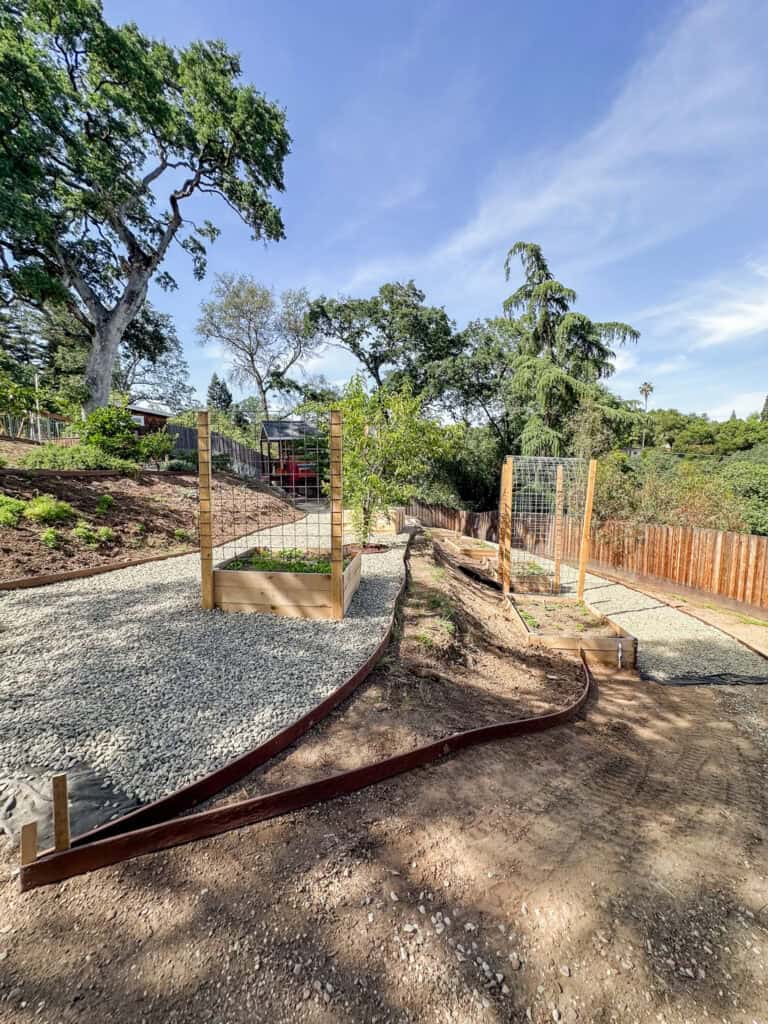
We opted for trenched PVC piping to avoid hoses all over the place, and I am beyond impressed with the ease of this setup. Each bed has its own spigot that can be turned on or off, and I can also increase or decrease the water pressure to each bed individually.
This is so helpful as certain crops require much more or much less water. And there will be times of the year when not all the beds are in use, and I simply turn off their water supply.
Irrigation is a great option if you can make it work. But if you can’t enjoy that watering time! If nothing else, it’s a bit of peaceful time alone, connecting with nature and enjoying the literal fruits of your labor.
Click below to see how I build my garden trellises!
The Reward of Growing Your Own Food
Building these DIY raised gardening beds turned out to be one of my favorite projects we’ve tackled this year.
They’re inexpensive, beginner-friendly, and easy to customize for your space.
Most importantly, they allowed us to transform a neglected section of our yard into a productive garden that’s already providing food for our family.
And as an added benefit, I cannot fully explain the feeling of pure, wholesome joy I get every morning when I walk out to my garden, coffee in hand, just to say hello to my plants. Truly the best feeling.
So I say, start a garden for the food, and your mental health.
If you’re interested in starting a vegetable garden but feel overwhelmed by the idea of digging up your entire yard, a raised gardening bed is a great place to start.
And once you’ve built one, don’t be surprised if you suddenly find yourself planning eight more.
Ask me how I know.


Join the List
Stay up to date & receive the latest posts in your inbox!