Floor Paint to Update Dated Tile the Easy Way
Floor paint is one of the easiest ways to update an old tile floor without ripping everything out or spending a fortune.
With a little prep and some patience, you can completely change the look of your space — turning tired, outdated tile into something that actually feels intentional.
Whether you’re freshening up a bathroom or just covering worn flooring, floor paint is a simple, affordable way to make it feel new again.
Keep reading to see how I painted my tile floor for a clean, durable finish that totally transformed the room — no remodel required.
Why Choose Floor Paint?
- Cost-effective: painting tile is significantly less expensive than replacing tile (it cost me about $35)
- DIY- friendly: this product was really easy to use. With a little bit of time, preparation, and some painting supplies, almost anyone can successfully take on this project.
- Quick: after the prep work, it took me about 20 minutes to do our small bathroom, and another 20 minutes to do the clear coat the following day.
- Customizable: For this room, and because I was short on time, I decided to keep it very simple and painted the floor one color. But you can use this product with a stencil and get any kind of pattern you’d like.
Why I Chose Floor Paint
The tile in this bathroom wasn’t actually that bad. If I weren’t chasing my vision of a clean, modern, minimal, bright, and colorful kids’ bathroom, I might have kept it. Travertine tile can work in a modern space — it’s just not the vibe I was going for.
In this tiny bathroom, though, everything combined to feel like a dark, depressing cave: 6½-foot ceilings, brown walls, brown floor, brown countertop, beige-and-gold tiles, and a grey vanity. Plus, it’s an upstairs bathroom in an 80-year-old house, and right now in Northern California, it’s insanely hot.
So yes — a hot, dark, depressing cave.
My makeover can’t fix the heat or stop global warming, but at least now it’s cute while you boil alive!
I knew changing the tile, along with painting the walls, would do a lot to brighten up the room. But I didn’t have the budget or the know-how to replace the tile (yet).
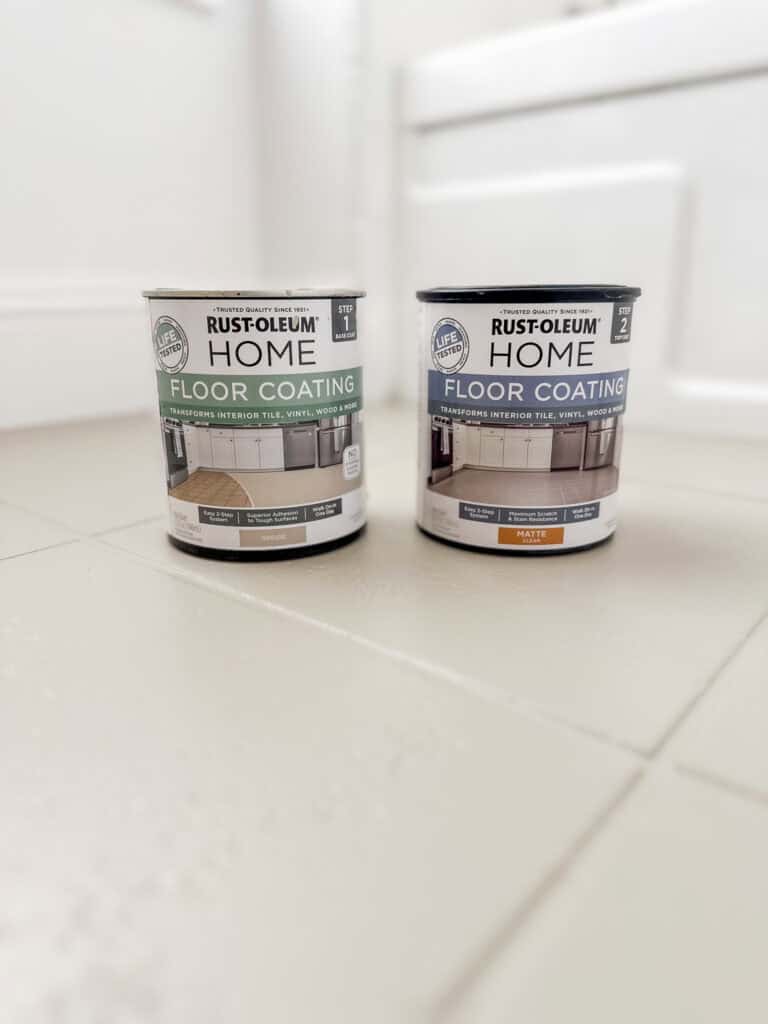
And since we plan to demo and renovate this tiny bathroom in a few years, I wanted to try to update the tile without replacing it. Enter Rust-Oleum Floor Paint System.
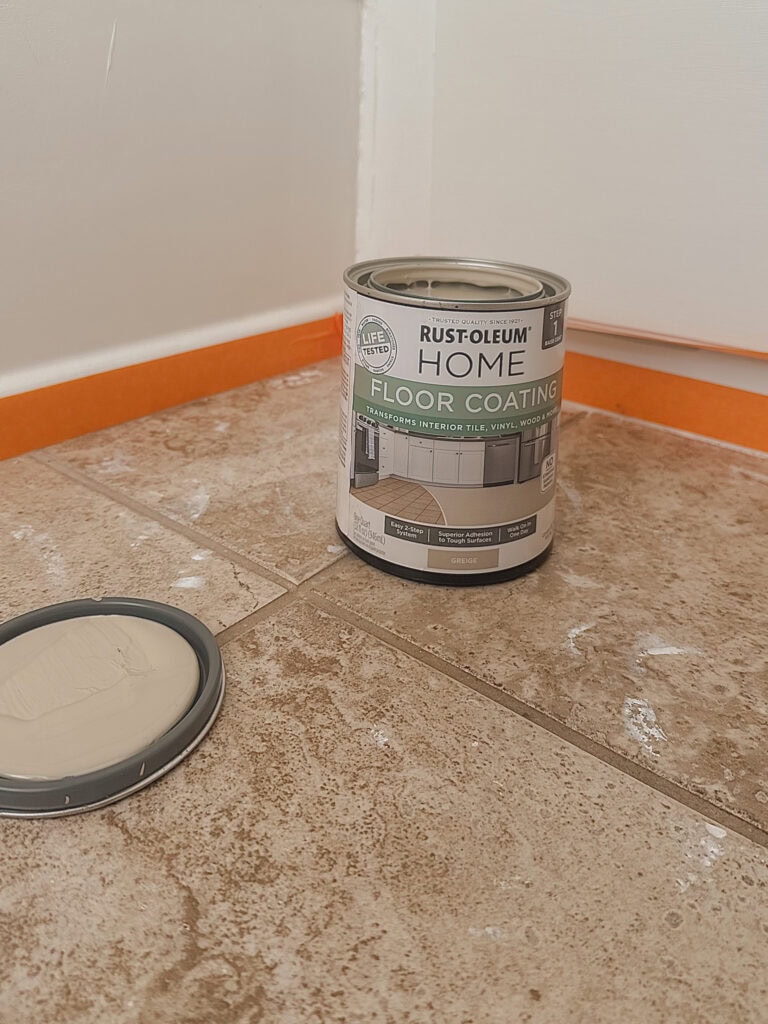
I opted for the color Greige in a matte finish. The griege color is really pretty. It is warm and neutral and could pair with just about any color scheme.
I also really love the look of the matte finish, and so far, 2 weeks out, it’s holding up perfectly against three kids.
I am a tiny bit worried the matte might not be as waterproof as the semi-gloss, but time will tell! (Spoiler Alert! It’s held up beautifully for almost 2 years now!)
How to Use Floor Paint?
This was my first time using floor paint, so I am by no means an expert. But, broadly speaking, most commercially available floor paints marketed for DIYers consist of a two-part system: a base coat and a top coat. The base coat will give the color and coverage, and the top coat will seal it.
Clean the floor thoroughly. Apply base coat. Allow it to dry. Apply top coat. Allow that to dry. Voila!
Which Floor Paint?
There were so many decisions to make while updating this bathroom, but when it came time to decide on floor paint, it was an easy choice.
I chose to use the floor paint system by Rust-Oleum because I have used their products for years, and I trust their quality. While using another product in the past, I had to call their customer service, and they were really helpful and stood behind their products. I appreciated that, and so now I stick with their products when possible.
I’ve also seen several other bloggers and DIYers who’ve had positive experiences with this floor paint system, so I felt good about giving it a go! And I am totally happy with how it turned out.
Materials You’ll Need to Paint Your Floors
Before diving in, gather your supplies!
- Cleaning supplies and tools to clean the floor
- Rust-Oleum Floor Paint System
- Tack cloth
- Painters tape
- 2 and 1/2 or 3-inch angled brush
- Paint rollers and tray *this bathroom is small, so I opted to use a small 4-inch roller because I had them on hand and knew it wouldn’t take me long. I also wanted really good coverage so I didn’t mind going slow with a small roller. If the space you’re making over is larger, you could certainly use a longer, standard 9-inch roller.
Before and After Using Floor Paint
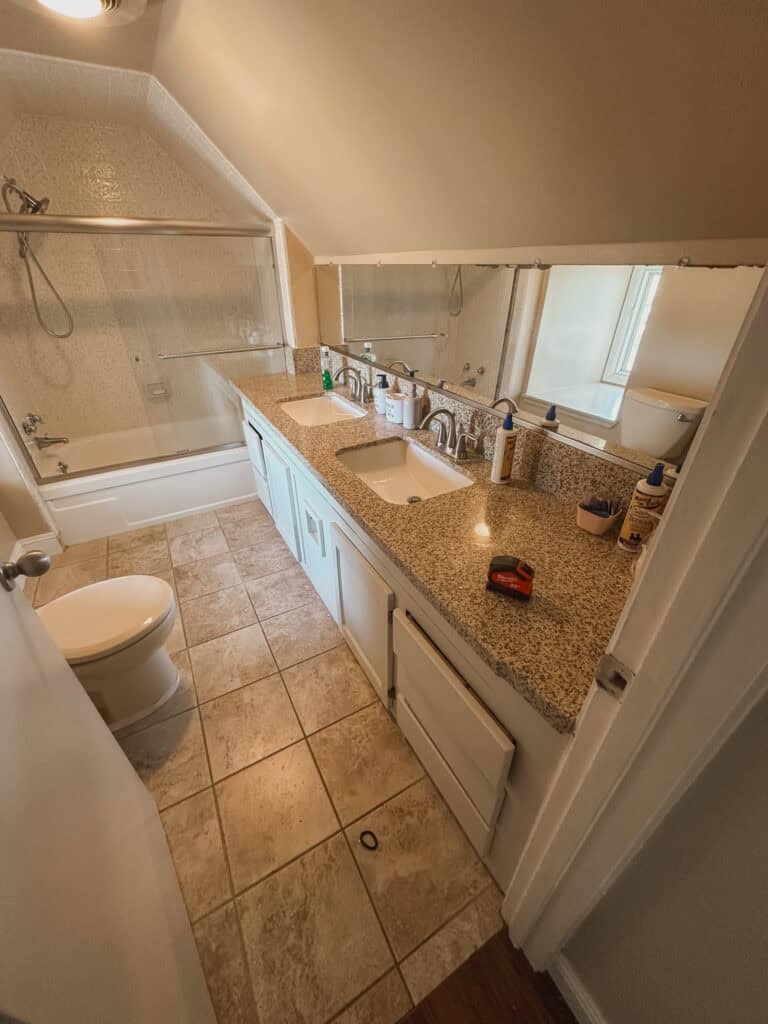
Floor paint was the perfect solution for us. The bathroom was old, dark, dated, and felt dirty- it did not feel like a bright, clean space, which is what I feel like a kids’ bathroom should be!
We won’t be able to swing a full renovation of this bathroom for at least a few years, so I wanted a temporary way to brighten up the space. I was able to do that with floor paint and a few other DIYs.
Check out this post if you want to see what else I did to brighten up my kids’ bathroom.
Step-by-Step Guide
For this project, preparation is key. It will also be the most time-consuming part. However, all in all, I still feel like this was a very easy DIY, and I am already starting to plan to paint the floor in our primary bath if it holds up in the upstairs bath!
Before you begin, you should read the manufacturer’s instructions.
Step One: Prepare the Surface: Clean and Degrease
With my long hair, three kids, and, until recently, four dogs (RIP Sweet Loki, our 16-year-old pup who just passed away), we have a lot of hair in our home. So I started by vacuuming, then sweeping, then Swiffering before mopping. After mopping, I used Simple Green Ready-To-Use Surface Prep Cleaner to clean the tiles.
I also used this before painting the walls. It cleans and removes oils, grease, and soap scum that could negatively affect paint application. I like to use this before painting in kitchens and bathrooms, where the walls are more likely to be dirty or oily.
I think this product is only available at Sherwin-Williams, so if you don’t live near one of their stores, you can use TSP. However, I have heard that it has a much stronger industrial cleaner kind of smell, so please use caution and follow the safety advice on the packaging. If it says to use a respirator, wear one! Protect yourself from those fumes! I used this respirator while painting the bathtub and shower tile, and it worked really well. That tile paint smelled absolutely terrible, and the smell lingered for days, but this respirator saved me from the worst of it.
Thoroughly clean the floor, removing all dirt, dust, hair, and debris. Allow it to dry.
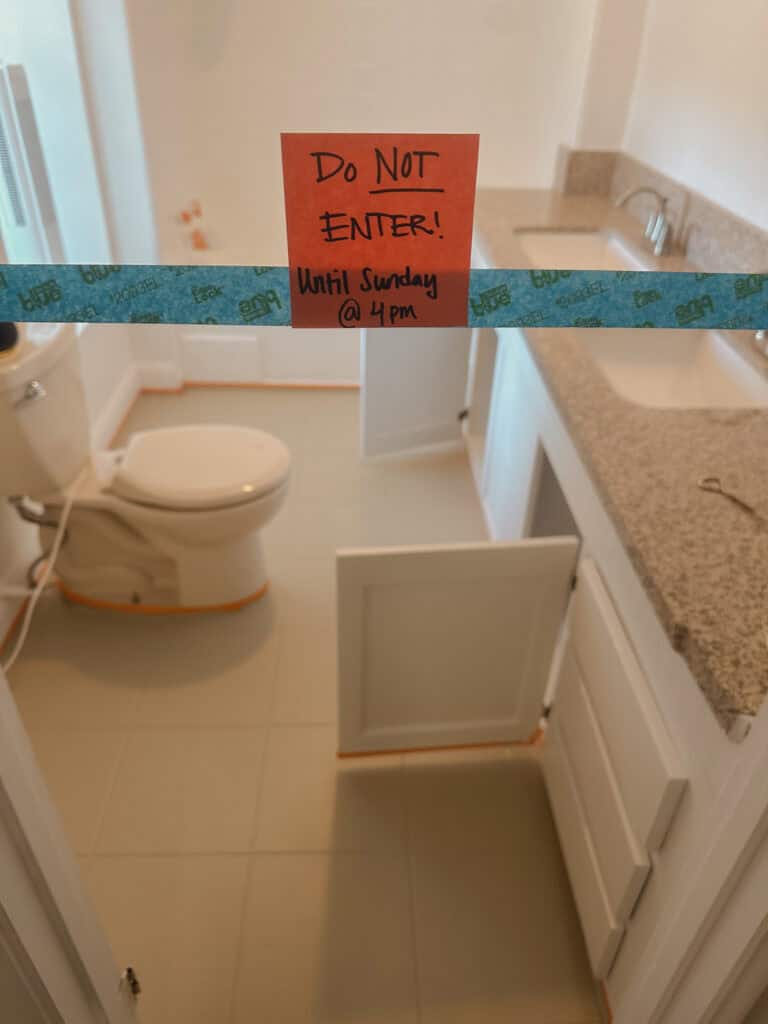
Step Two: Tape off Surrounding Areas
Tape off anything you need to protect- baseboards, the vanity or cabinets, the toilet, etc.
Note: take off the door if at all possible! If you are painting a room with an inward-swinging door, I highly recommend removing the door unless you have at least 1-2 inches of clearance between the bottom of the door and the floor. Learn from my mistake!
I skipped this step, and the door scratched the new floor paint. I blame this oversight on exposure to the aforementioned noxious tile paint.
Normally, I am pretty good at thinking things like that through beforehand, but that was not the case on this day.
Panicked and unable to take the door off without stepping on the wet paint, causing more damage, I played the “floor is lava” and climbed on the counter, then over to the toilet without touching the floor. From there, I carefully moved the door to the driest part of the floor and touched up the scratches.
Good thing I had my water bottle and my phone in there because I had to sit in the dormer window for about 40 minutes until it was touch-dry so I could open the door again. Truly one of my finest moments.
Step Three: Clean the Floor Again!
Clean the floor again with a tack cloth or Swiffer to remove any dust or hair that will get trapped in the paint. Despite my best efforts, there are a few hairs trapped in the paint. I learned this the hard way, so I hope to warn you so you won’t have to deal with that!
Use a tack cloth (sticky microfiber cloth you can get at any hardware store, usually bright yellow) to get rid of any last debris before painting!
Step Four: You are Ready to Paint!
Pour part one, the base coat, into your roller tray.
The floor paint has a really interesting and thick texture, and coverage was awesome. As promised on the package, I only needed one coat to cover the tile completely!
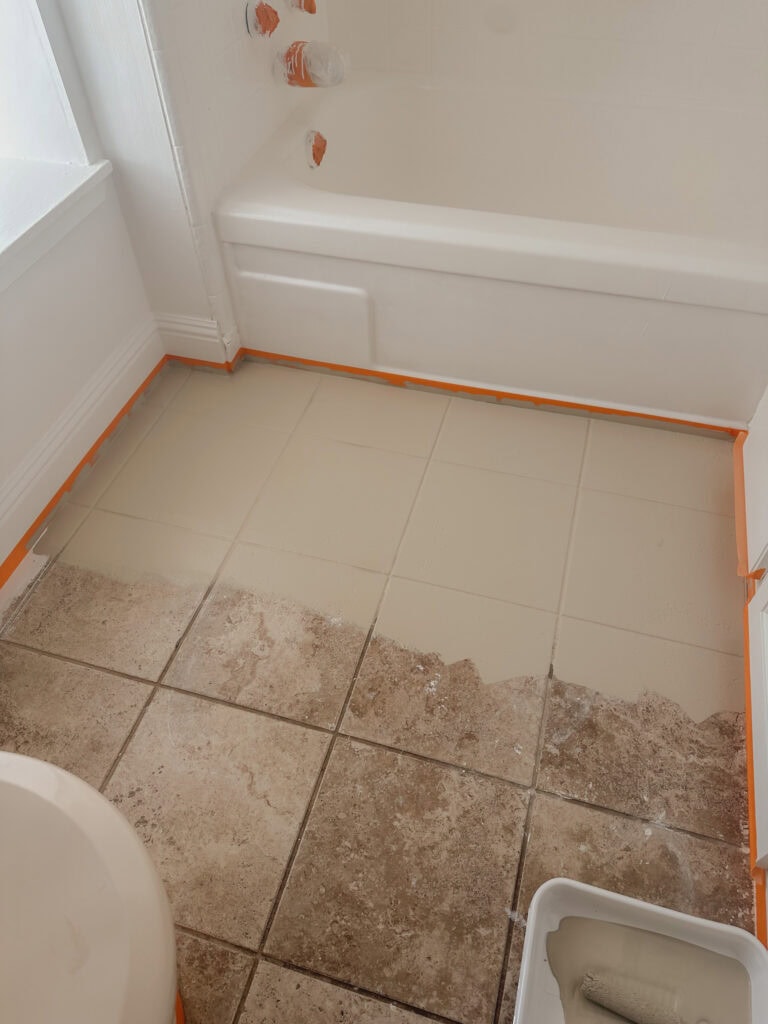
Per package instructions: work in small 2×2-foot areas, keeping a wet edge as you roll. I like to use a small angled brush to cut in around edges and grout lines, and then I used a 4-inch foam roller because I thought the foam would get into the crevices in the tile better, and it did so very well.
But honestly, the product was so forgiving, any roller would do.
This is probably obvious, but be sure to start away from the doorway and work your way backward so you don’t get trapped!
As I was applying, I wasn’t sure if I would need another coat as it looked a little patchy and mottled. However, due the the thick consistency of this paint, it leveled nicely and I ended up with a smooth, even finish with one coat. So trust the process!
Check the Finish and do Touch-Ups if Necessary
I will say, because this bathroom is going to be torn out eventually, I wasn’t too worried about achieving a perfect finish, and there was one area where I accidentally scratched it before applying the second coat. I definitely could have done a few touch-ups to correct those issues, but since I was trying to do this project as quickly as possible and not too concerned with perfection, I opted to just go for the clear coat. Maybe I’ll go back and do those touch-ups later.
If you aren’t pressed for time, I suggest doing your first coat and then examining the finish for marks and scratches. Touch up any mistakes before adding the clear coat.
Wear clean socks during this step to avoid oils or dirt from your feet from marking the floor!
It is prone to showing dirt before the clear coat is applied. If you do get something on it, like I did when my husband stepped on the floor barefoot, just use a gentle multi-purpose cleaner and paper towel to remove it.
Allow at least 6 hours to dry!
Step Five: Add a Stencil (Optional)
I opted to keep the floor a simple solid color, but you could buy two kits in different colors and use a stencil to add a design to the floor. This is something I plan to do on our patio at some point.
After stenciling, allow time to dry.
Step Six: Clear Coat to Seal and Protect Your Floor
I opted for the matte finish, but there is also a semi-gloss version.
I used the same painting technique above to apply the clear coat, but for this part, I used a regular nap roller.
Just as above, cut in the edges and then roll. Still working in a small area and keeping a wet edge, then rolling it out to smooth.
Note: The color changes as you apply the clear coat, but it will go back to the matte finish once it dries!
Step Seven: Let it Dry
Wait at least 24 hours before allowing foot traffic. And a full 7 days for a full cure before moving heavy items like furniture over the floor. Even then, be careful, it is just paint after all.
The Bathroom Before and After
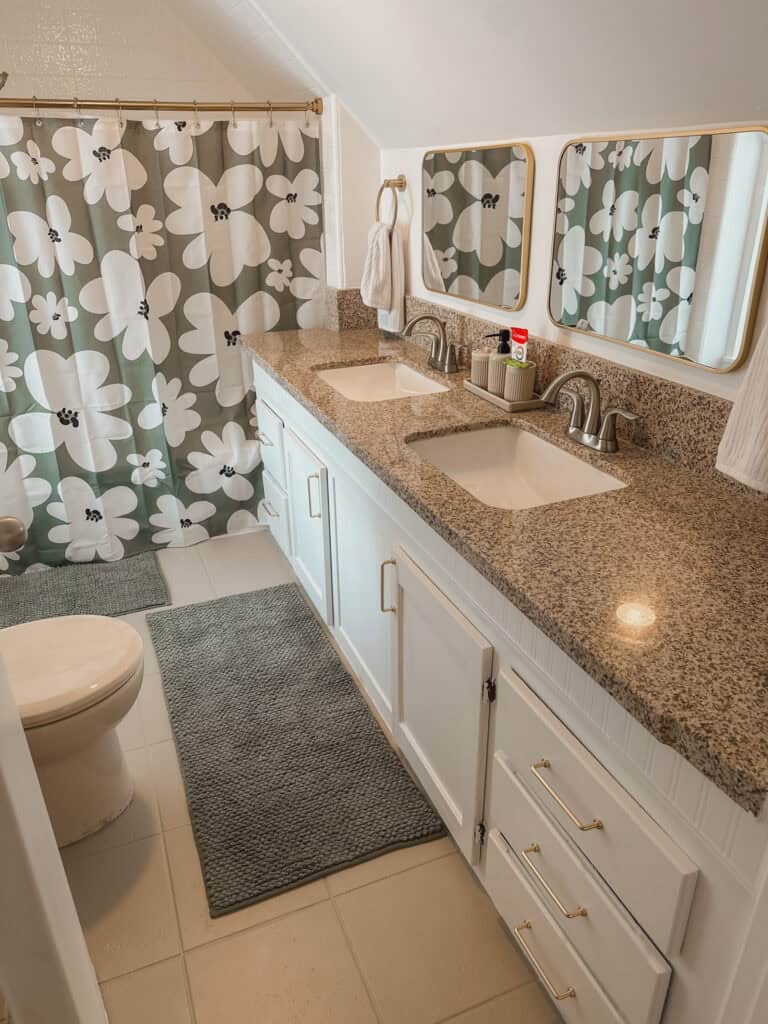
Follow the link below to see the full makeover!
Tips for Success
- Ventilation: This product does not have a strong odor, but as with all painting, it is best to ensure proper ventilation during the painting process by opening windows or using fans.
- Maintenance: Use mild cleaners and avoid harsh chemicals to prolong the life of your painted tiles.
- Touch-ups: Keep leftover paint for future touch-ups as needed.
Final Thoughts on this Quick Update With Floor Paint
I really love the look of this floor! I didn’t hate the tile before, but I wanted to brighten the room quickly and cheaply — and this did the trick.
The application was super easy, and the coverage was great. There was no terrible, toxic smell (no worse than regular paint). I made a few minor mistakes that could be fixed with a touch-up, but you’d only notice if you were really looking.
Honestly, the whole project was fast. Cleaning and taping took about an hour, the first coat about 20 minutes, six hours to dry, then 15 minutes for the clear coat, with another 24 hours of dry time. I used less than half the kit for this 8 x 6-foot bathroom, making the total cost around $35 plus a couple of new rollers.
Update a year and a half later: The floor still looks amazing — no chips, no scratches, no damage — despite the fact that the kids still get out of the shower and shake off like wet dogs, leaving puddles everywhere, like they don’t know how towels work. Is it just me? Just my kids?
Somehow, it’s holding up beautifully.
So if you’re staring at a tile floor you dislike but can’t afford to replace, I’d say go for it!
Painting dated tiles with floor paint is an easy, affordable way to give any bathroom, kitchen, or tiled area a fresh, modern look.
Ready to transform your space? Gather your supplies and get started today — and feel free to share your own experiences and tips in the comments below. Happy painting!

Join the List
Stay up to date & receive the latest posts in your inbox.
One Comment