DIY Plant Stand: Easy Wood Bench for Houseplants
If your houseplants are starting to take over the floor or windowsills, this project is for you. I built a simple DIY plant stand in under two hours using just a saw, a drill, wood glue, and some scrap wood. It’s sturdy enough to hold multiple plants, customizable to any size, and beginner-friendly if you’ve never built furniture before.
This design is basically a low wooden bench with clean lines that lets you group several plants while keeping them off the floor. It works especially well in front of a sunny window, in an entryway, or even tucked into a small corner to add a layered look to your plant collection.
Because My 50+ Pandemic Plants Were Taking Over My House
If you’ve been here before, you may already know that I have a bit of an obsession with houseplants. It started with just one during the pandemic, and now I have over 50 scattered throughout our 1940s home. Unfortunately, our main living areas, where I keep most of my plants, aren’t very big, and the plants were starting to pile up on the floor.
With family coming over soon to see our newly renovated kitchen, I went into cleaning and decluttering mode. I realized I needed a way to get my plants off the floor and into a proper home.
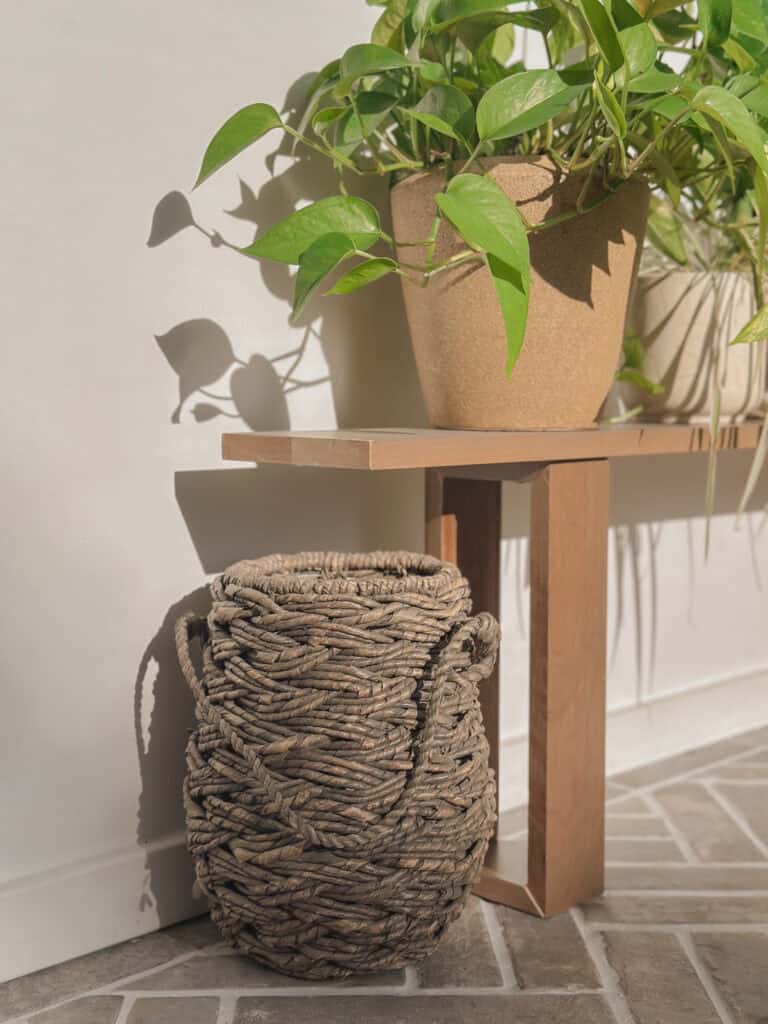
That’s when I came up with the idea to build a DIY plant stand—a low wooden bench that could hold multiple plants at once. Even better, I built it entirely out of leftover scrap wood from our kitchen renovation. The project took less than two hours, cost me nothing, and added the perfect little “plant atrium” in the hallway between our living room and bedroom, where we get amazing natural light.
Why Build a DIY Plant Stand?
- Saves floor space and declutters small rooms
- Creates a designated spot for plants to thrive
- Inexpensive to build, especially if using scrap pieces
- Fully customizable height, length, and finish
Materials I Used To Build My DIY Plant Stand
Note
Your measurements will vary based on the height, length, and width that will fit your space.
- 1×6 board, 5 ft long (for the tabletop/bench top)
- 1×3 boards (for the legs)
- Wood glue
- 1 ½ inch wood screws
- Sandpaper (120–220 grit)
- Drill and wood screws (I used 1and 1/4 inch)
- Miter saw or handsaw. My all-time favorite hand saw is the Pull Stroke Handsaw by Vaugn.
- Stain and polyurthane or sealer of choice
Planning Your DIY Plant Stand
First, you’ll need to plan out your design. For me, because I was using scrap wood, my dimensions were sort of predetermined. I had one really nice piece of 1×6 stained wood left over from our kitchen renovation, so I used that as my tabletop. I also knew that I only had about five or six plants that I wanted to put on it, and that five feet would be plenty for me.
You might have more plants to store and more room in your home, so you might opt for six feet—or less space, and go for a four-foot tabletop. If you go longer than six feet, I’d suggest adding three legs instead of two for additional support.
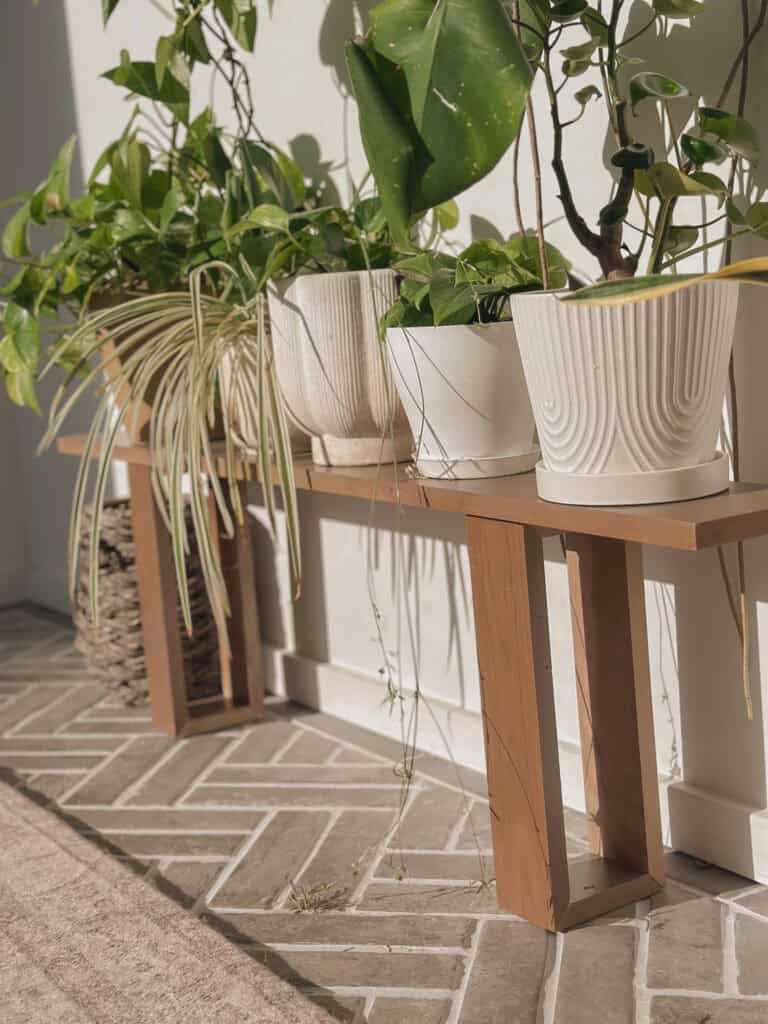
Next, consider how wide you want the tabletop to be. Think about the size of the planters you’ll be placing on it. In my case, most of my planters—even some of the larger ones—fit fine on the 1×6 board. If you’re putting exceptionally heavy or wide plant pots on your DIY stand, you might want to go with a 1×8 or even a 1×10 board. Just note that a wider, heavier top will require wider, more substantial legs and possibly a center support.
Lastly, determine the height. This design is meant to be a low bench for plants. In my hallway, I wanted the bench to sit about 15 inches high so it could fit neatly under floating shelves that were already mounted fairly low.
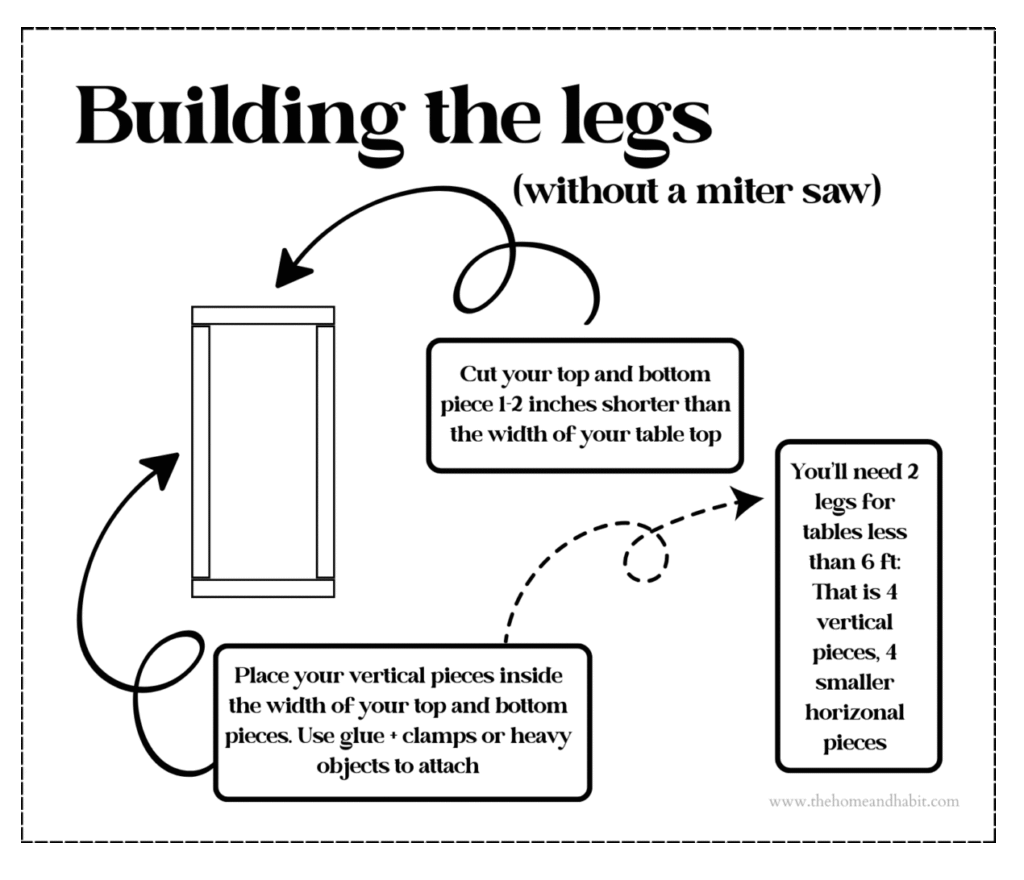
A Quick Note on Cutting
If you don’t have a miter saw, no worries. When you construct the legs, cut the top and bottom pieces to your desired width, and then place your vertical supports inside that width. This gives you the most stability without requiring specialty cuts. (See the drawing below.)
Step 1: Cut and Sand the Pieces
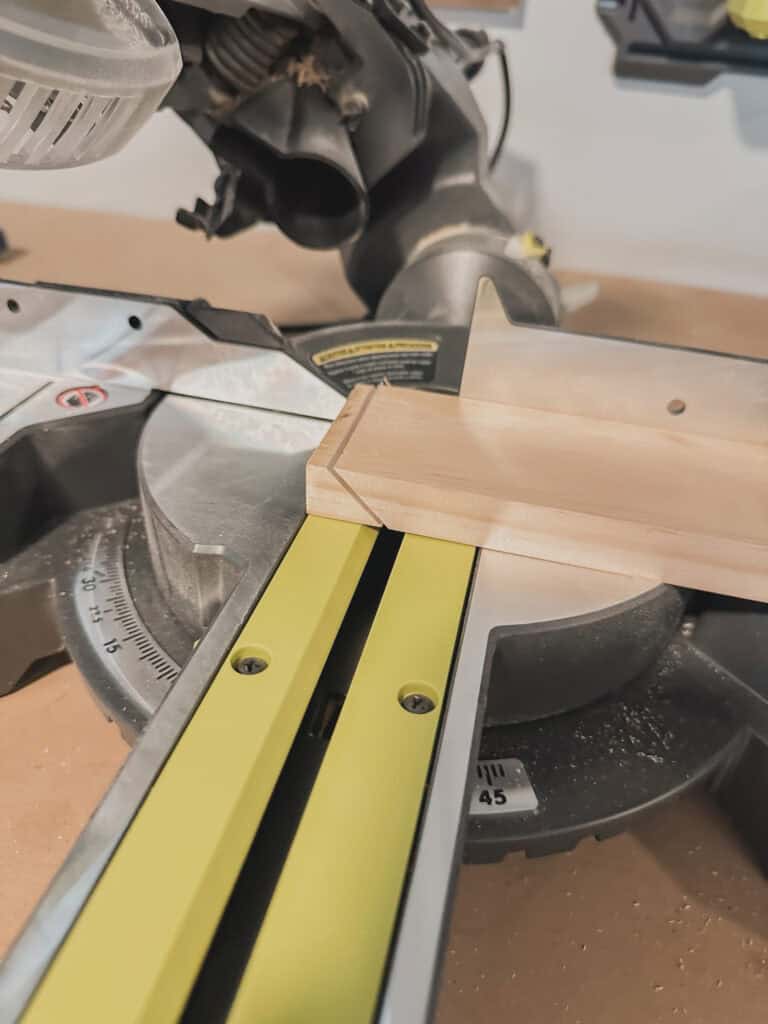
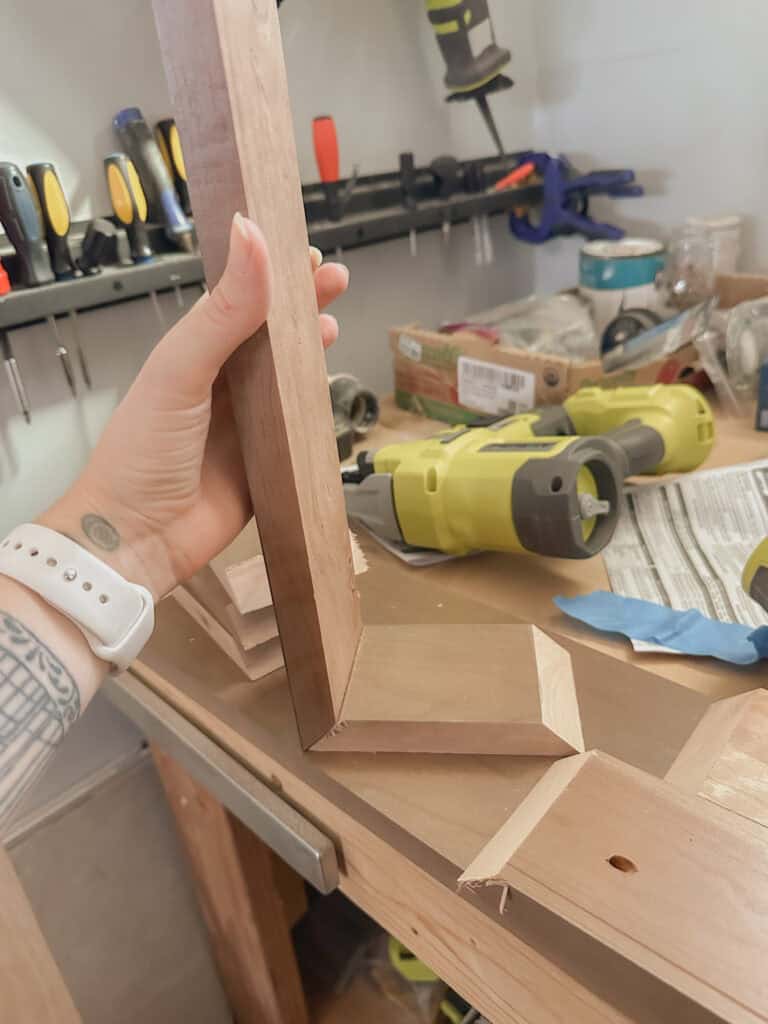
For the tabletop, I used a 1×6 board cut to about 5 feet. I cut the end of the table top board straight with a 90-degree cut. For the legs, I built two small rectangular box frames from 1x3s with mitered cuts at 45 degrees to create a little box.
For my build, each leg was made of 2 14-inch pieces plus two 5-inch pieces ( all with mitered edges).
After cutting, I lightly sanded all the edges to remove splinters. On mitered edges, sand carefully so you don’t change the angle—if you’re new to power sanders, sand by hand to avoid mistakes.
Before staining, start with 120-grit sandpaper, then 220-grit sandpaper for a smooth finish.
My sweet husband bought me this miter saw for Christmas because he’s the best and so supportive of my DIY dreams!
Step 2: Stain or Seal the Wood (Optional but Recommended)
Because plants need water, you’ll definitely want your DIY plant stand sealed against spills.
Apply a pre-stain conditioner if you’re working with soft woods like pine, then add your stain and finish with polyurethane.
Lately, I have been loving using a stain + polyurethane combination for a time-saving solution. I used one by Varathane that I got from Home Depot, but I can no longer find it on their website. But I found this (new to me) line from Behr with beautiful colors. I am going to try this deep, rich brown stain color for my next project.
I skipped this step since my scrap wood was already stained, but if you’re using raw wood, I’d recommend staining or sealing for durability.
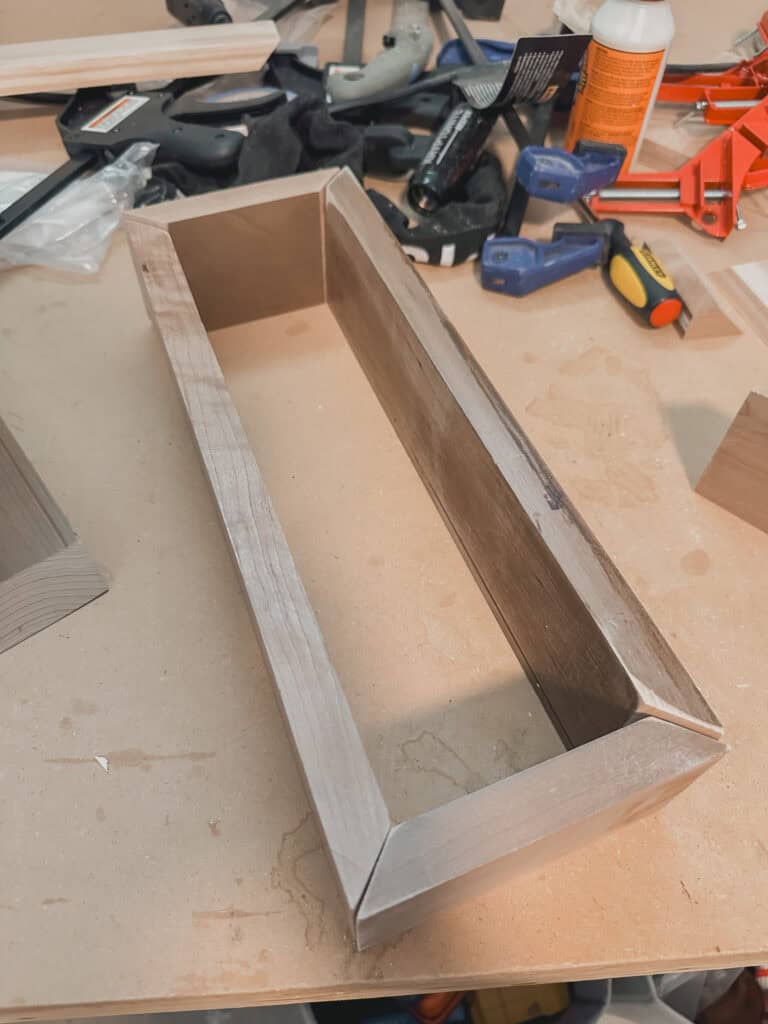
Step 3: Assemble the Box Legs
Glue the mitered edges together in “L” shapes, then join them to create two small rectangular box frames. Use corner clamps if you have them, and let each section dry for at least 30 minutes before moving on. Once both legs are assembled, make sure they’re square and sturdy before attaching them to the top.
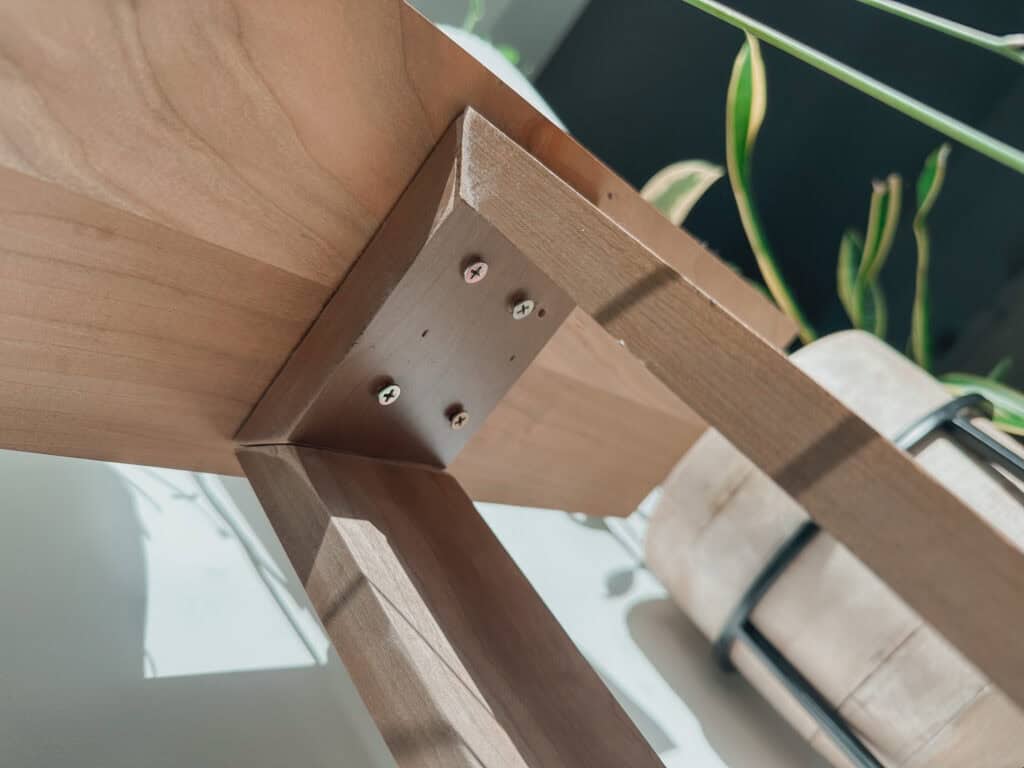
Step 4: Attach the Legs to the Tabletop
Flip your board good-side down (because you want the best side visible). Measure and mark your leg placement—I set mine 8 inches in from each end. Apply wood glue to the top of each leg, press into place, and use painter’s tape or, preferably, a nail gun to hold the leg steady while you pre-drill screw holes.
For stability, I pre-drilled four holes per leg and used 1 ½ inch wood screws (adjust your screw size depending on your board thickness). Once the screws were in place, I wiped away any glue residue and dust.
Step 5: Style Your DIY Plant Stand
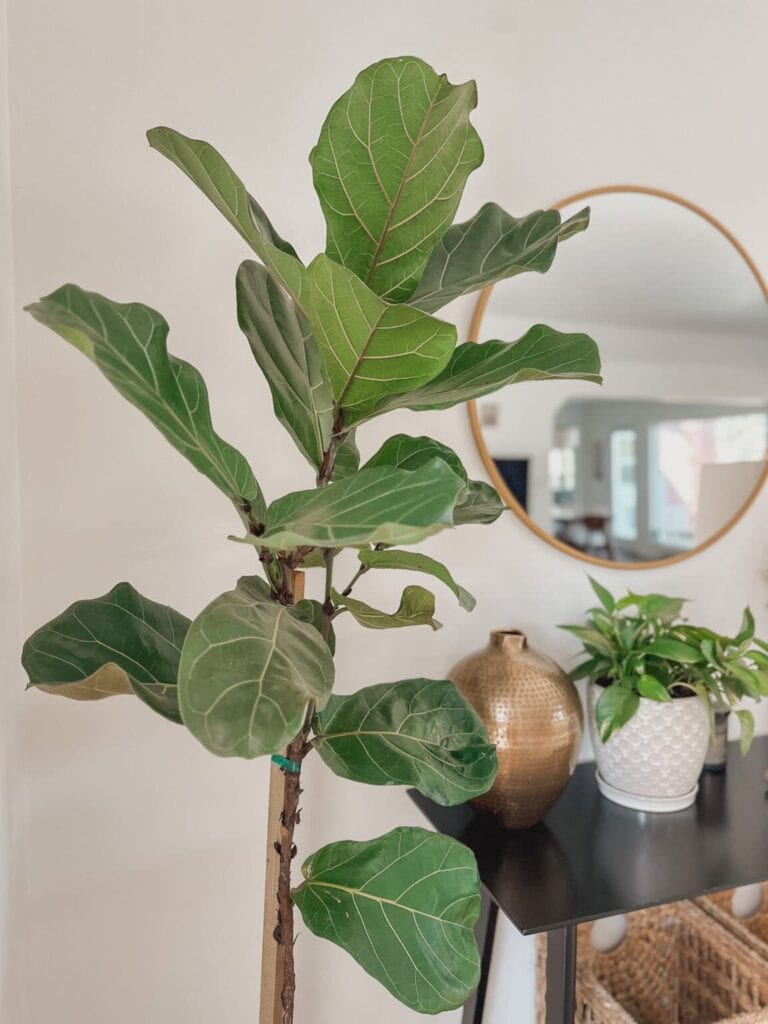
Flip it over, and you’re ready to style! I love how this little bench instantly decluttered the floor and gave my plants a layered look. It turned our little hallway into a lively and green atrium.
Now That You Have More Room for Plants
Since you’ve made some more space for your plants, if you should find yourself wanting more, check out this post on pothos propagation to keep growing your collection (pun intended!).
Easy & Functional DIY Plant Stand
This DIY plant stand was:
- Free (thanks to leftover wood)
- Quick (less than 2 hours start to finish)
- Custom-sized for my space
- Solved my problem by getting my plants off the floor
It’s a super simple woodworking project, even for beginners. If you’ve been looking for a way to organize your plants without spending a lot, give this one a try.
Have questions about this build? Drop them in the comments—I’d love to help!


Join the List
Stay up to date & receive the latest posts in your inbox.