Furniture Flipping: How to Get a Wood Look on Any Surface with Liquid Wood
When we bought our home, the previous owners left behind a pair of gray MDF nightstands and some other furniture. I bought them sight unseen, and when I finally saw them in person… let’s just say, they we underwhelming. But rather than toss them, I figured, why not try a little furniture flipping?
With a little creativity, a bit of trim, new hardware, and an amazing product called liquid wood (more on that later), I transformed these plain and dated nightstands into stylish, wood-look pieces I’m proud to display. Keep reading to see the full furniture flipping process from start to finish.
I’m an Amazon Associate, which means I may earn a tiny commission if you shop through my links (no extra cost to you!). I only link to stuff I’ve actually tried and liked. Thanks for supporting my little corner of the internet—it seriously means a lot.
What Is Liquid Wood?
Liquid wood is a paintable material made from real wood fibers. Allowing you to give nearly any surface the look and texture of real wood. After applying it, you can stain it just like you would natural wood, following the directions from the manufacturer.
While there may be other brands out there, the one I used—and have been eager to try for a while—is Retique It. I chose the light wood liquid wood paint and the pecan gel stain for this project. I was so excited to finally test it out.
The Furniture Flipping Vision
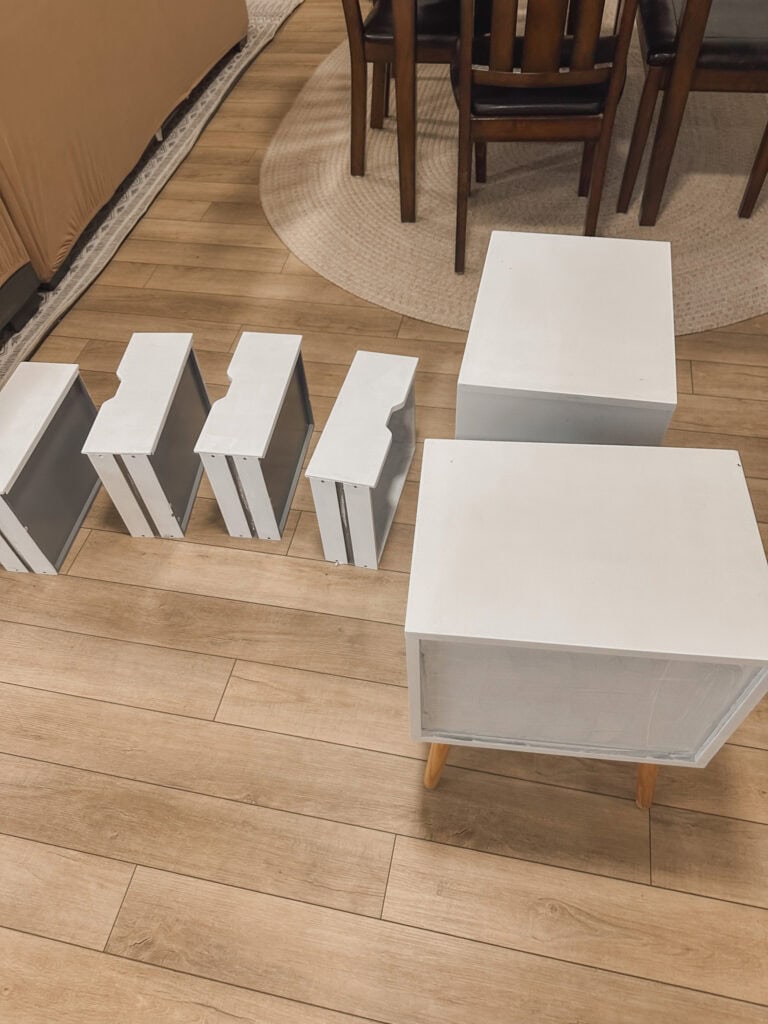
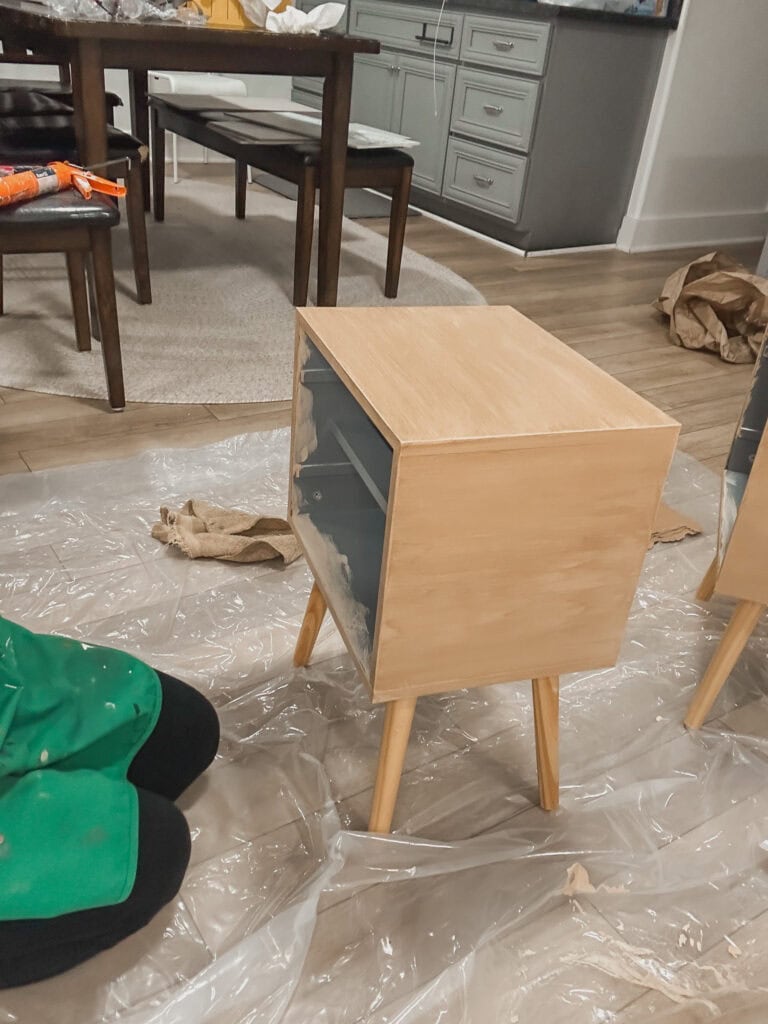
These gray MDF nightstands (that I forgot to take a before photo of but you can see below) looked like they belonged in a kids’ bedroom during the sad grey days of the early 2000s—definitely not my vibe. I wanted to give them an elevated but homey look that would blend better with the rest of our space.
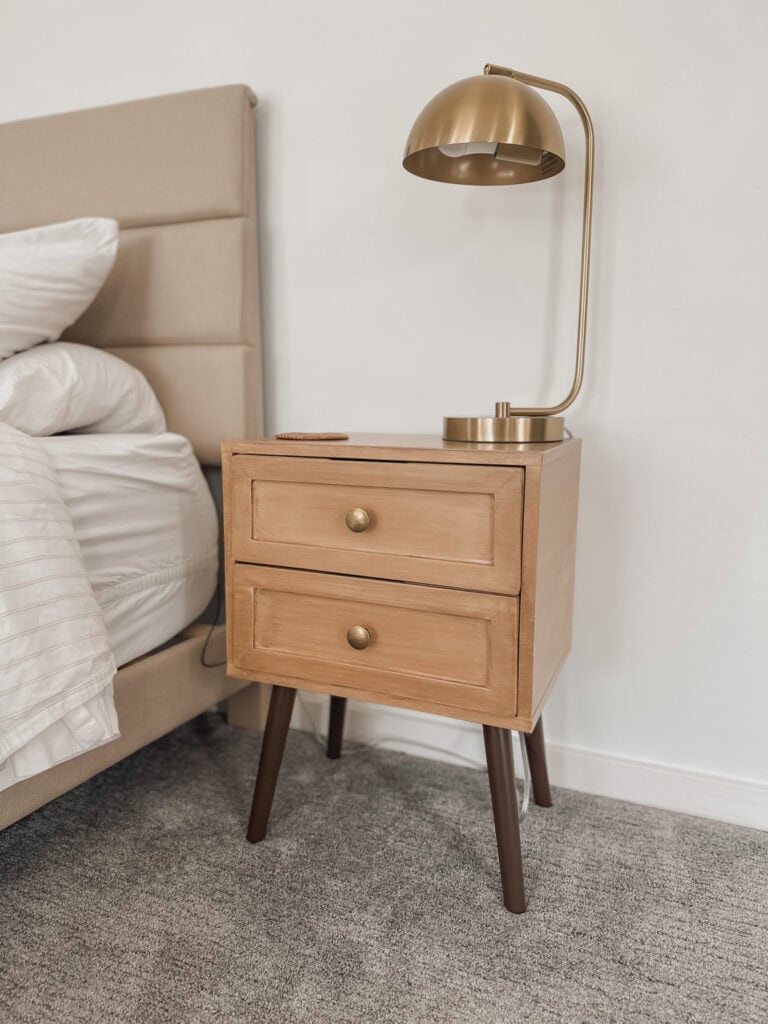
They are still pretty mid-century modern, which I love but is also not the vibe of our home, but they blend better now with the wood tone look.
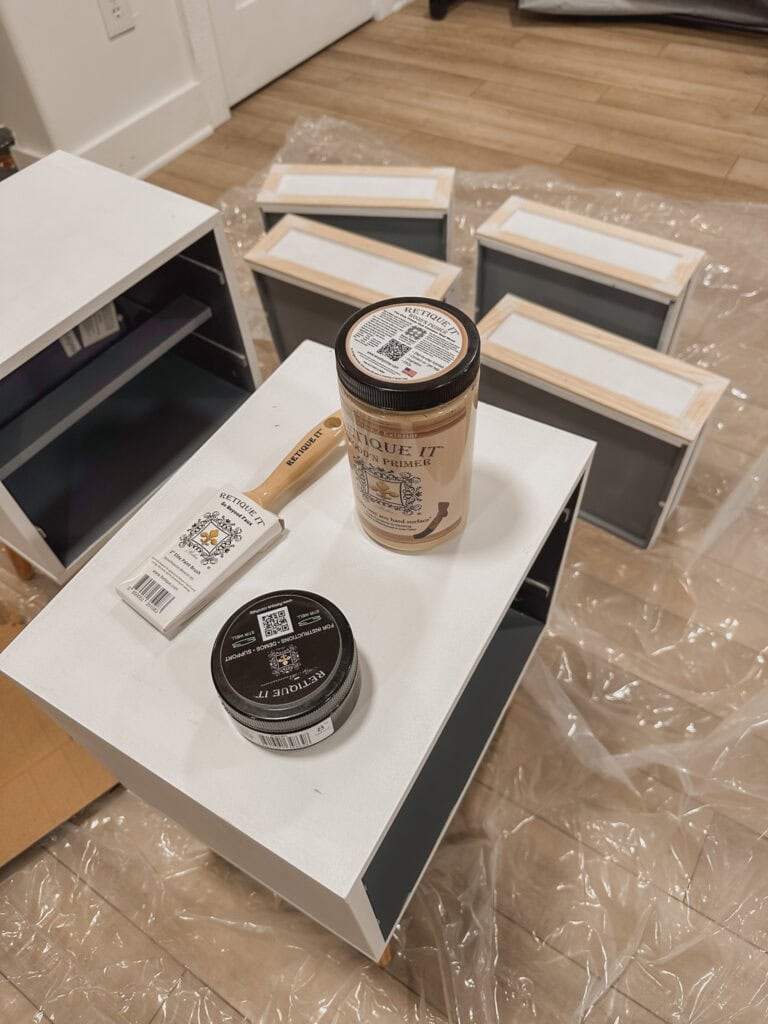
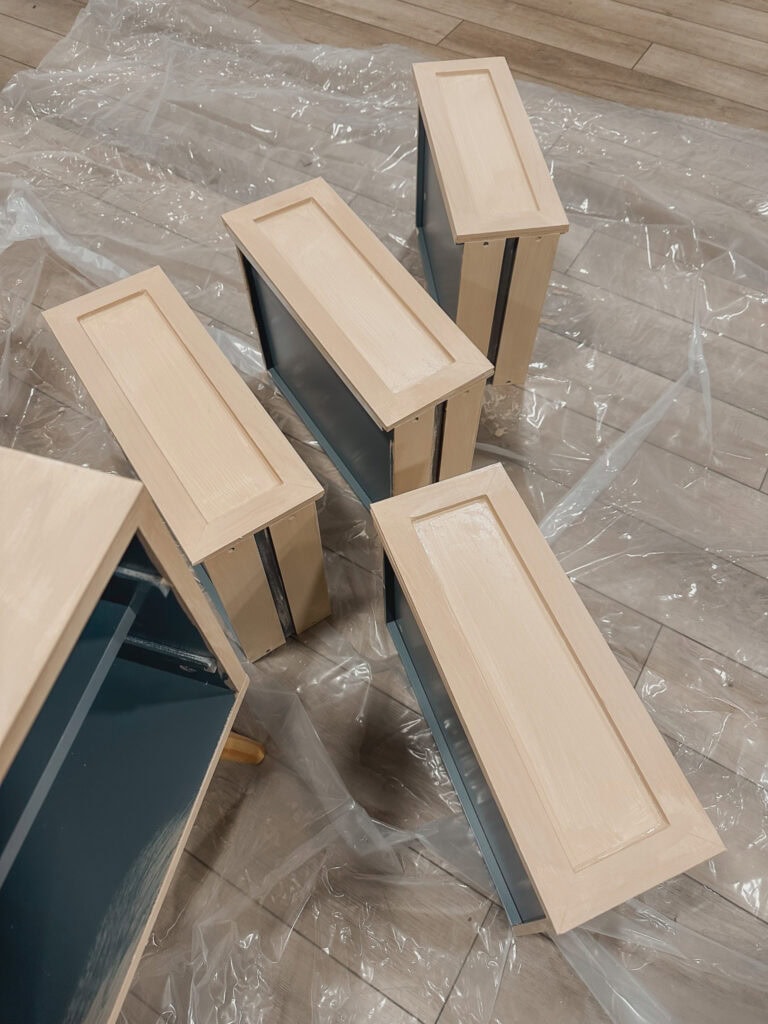
To achieve this furniture flipping transformation, I picked up 1″ flat trim pieces and cut them at 45° angles to create a shaker-style frame around each drawer front. I also added new simple brass hardware to complete the look.
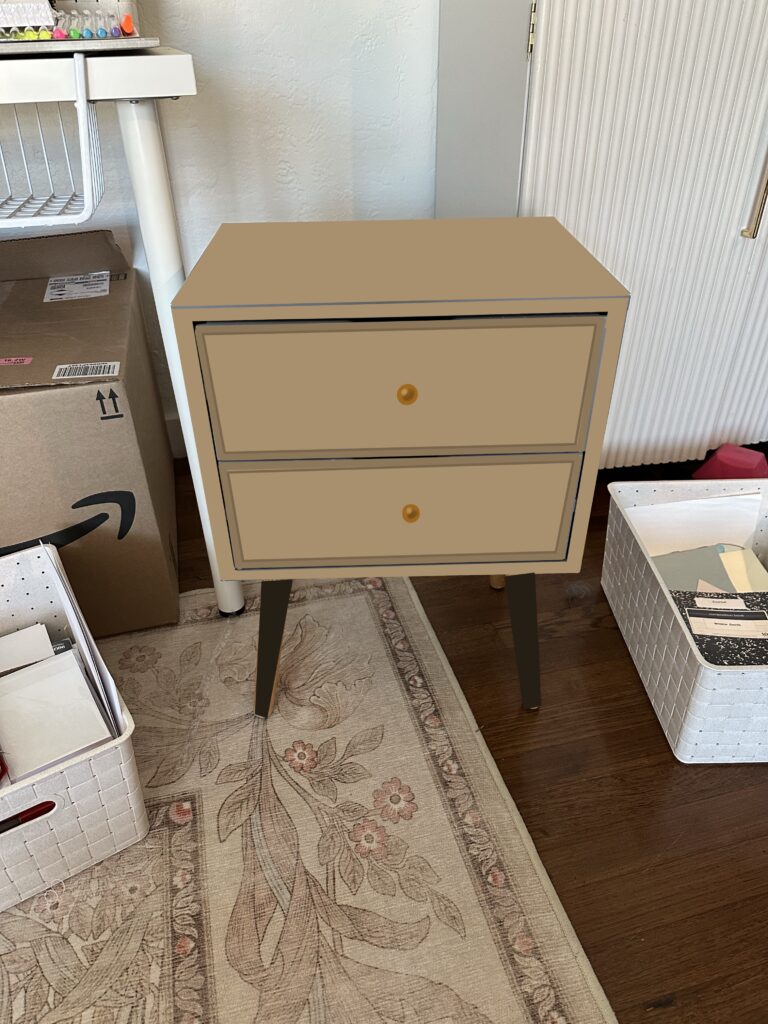
I like to start projects with a simple digital drawing so I can visualize the finished project. This is what I was going for and the end result turned out pretty similar!
The Furniture Flipping Process
Here’s a step-by-step breakdown of how I gave these nightstands a completely new life:
Cleaning & Preparation
One: Clean the Surface
Before doing anything else, I cleaned both nightstands thoroughly using a degreasing surface cleaner and a microfiber towel. Prepping the surface is always key in furniture flipping projects.
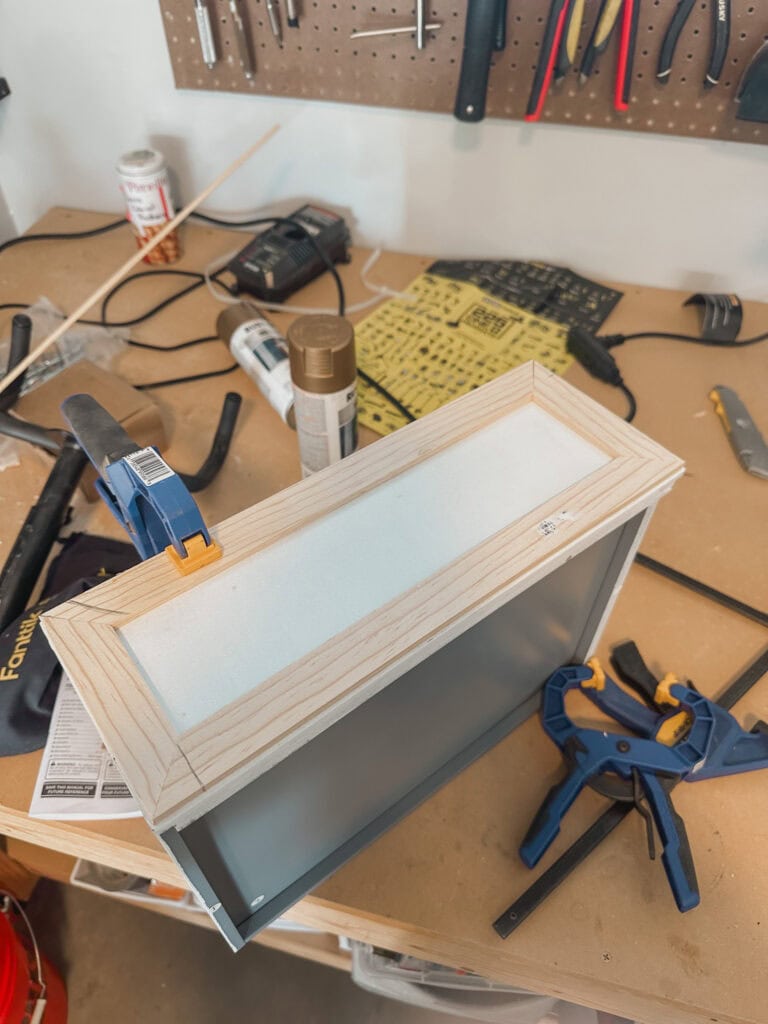
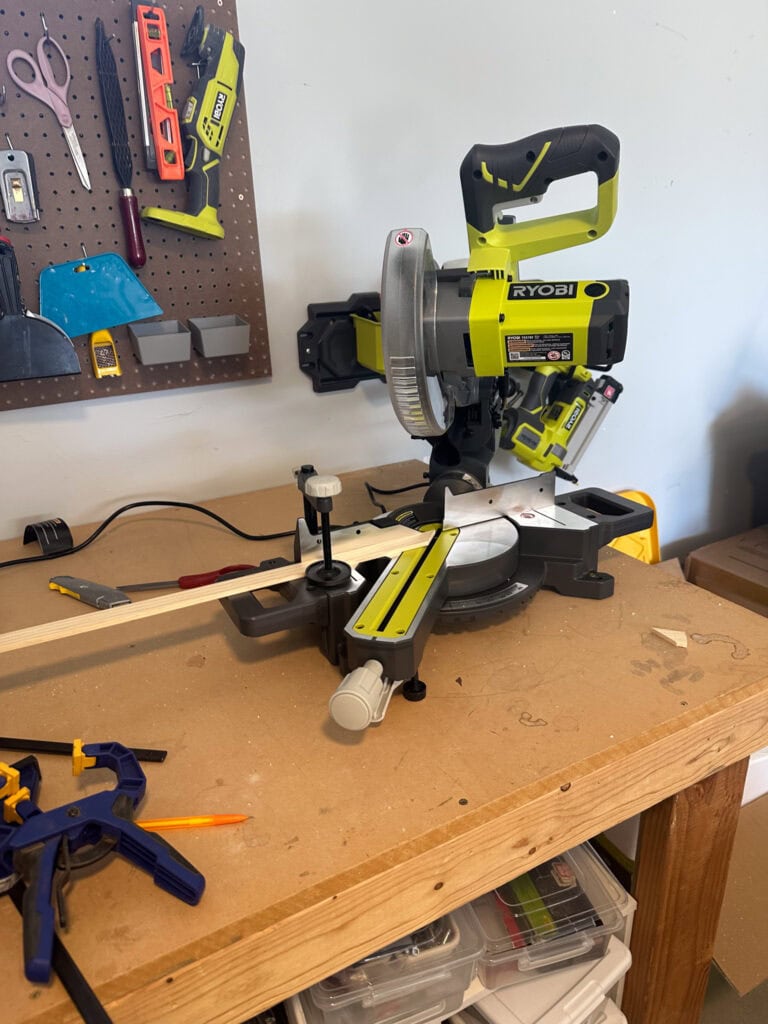
Two: Add the Trim
I cut the trim pieces with my miter saw at 45° angles and glued them onto the drawer fronts using wood glue. I clamped them where possible, or used heavy objects to hold them in place while drying overnight.
Three: Caulk the Trim
For a seamless finish, I caulked around all the trim pieces.
PRO TIP: Make sure to use paintable caulk—this is crucial if you plan to paint or stain over it.
Painting & Sealing
Four: Prime the Surface
Even though Retique It might not require primer, I didn’t want to risk scratching or peeling later on. I used Behr cabinet primer to ensure long-term durability. Because I have made the mistake of not using cabinet primer in the past!
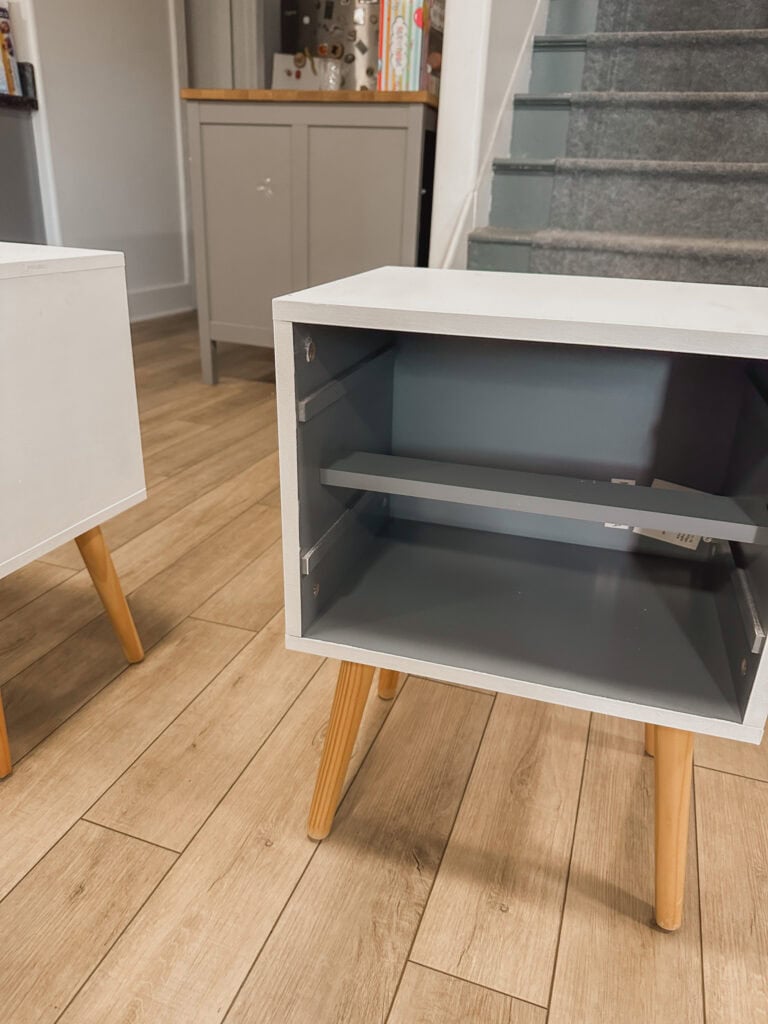
As mentioned, I forgot to take before pictures, but you can see the original grey color on the inside here.
Five: Apply the Liquid Wood Paint
I brushed on two coats of the Retique It light wood liquid wood paint. It went on smoothly and dried quickly between coats. I sanded between coats as needed if there were any drips, but the material goes in smoothly.
The liquid wood had a very thin consistency—much thinner than regular paint. Even though it went on light, it had surprisingly good coverage.
After just one coat, the primer was already completely covered. I added a second coat to see if it would deepen the color and enhance the wood-like texture, and it definitely helped.
Six: Stain the Surface
Once the liquid wood dried, I applied the Retique It pecan gel stain. This step really brought the wood grain look to life!
I believe you can use any gel stain with Retique as well, meaning you will have more color options.
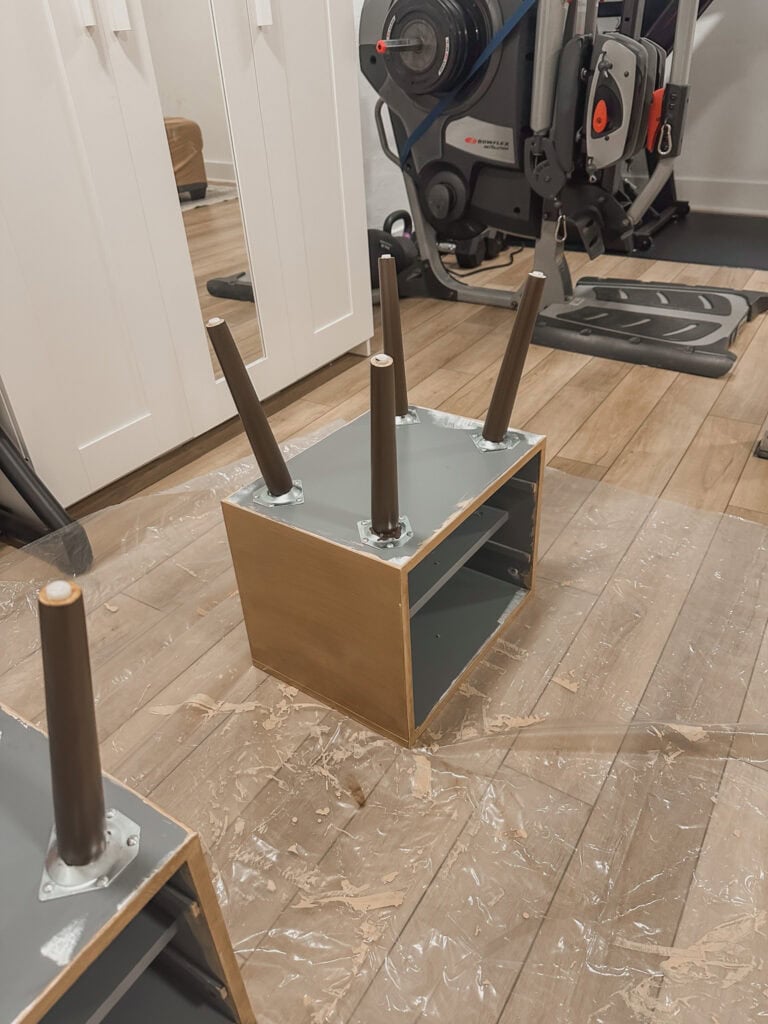
Seven: Paint the Legs
To contrast the wood-look drawer fronts, I painted the legs with leftover Behr Truffle Brown paint from a recent bathroom makeover.
Read more about that makeover here!
Eight: Seal with Polyurethane
I used two coats of a water-based polyurethane for protection. It has less odor than oil-based options and tends to yellow less over time.
Styling & Hardware
Nine: Drill Holes for New Hardware
After everything dried, I carefully measured and drilled new holes for the drawer knobs
Ten: Install the New Knobs
The updated hardware gave the nightstands a clean, polished finish.
Eleven: Style and Enjoy
I brought them upstairs and styled them simply with lamps, coasters, and a little vase of baby’s breath.

Final Thoughts on This Furniture Flipping Project
I really love how these turned out. Furniture flipping is such a fun way to make something your own, save money, and avoid buying new if you don’t have to. This was a pretty simple weekend project—most of the time was just waiting for things to dry between steps.
I still have over half a bottle of Retique It left, so I’m already thinking about using it on our hutch next.
If you’re into DIY or just want to see how this stuff holds up, follow along on Pinterest for updates and more home projects!


Join the List
Stay up to date & receive the latest posts in your inbox!