90s to Now: Budget-Friendly Bathroom Makeover Magic for 2024
A blend of 90s and 60s vibes and DIYs left this small upstairs bathroom long overdue for a refresh. If your bathroom feels outdated but a full renovation isn’t in the cards, don’t worry! In this guide, I’ll show you how to transform a dated bathroom into a bright, clean, and modern space. With a little paint, some simple fixes, and creative DIYs, you can achieve a stunning bathroom makeover on a budget.

Our three kids share this tiny (and I do mean tiny) attic bathroom. And while we’re so fortunate to have an upstairs bathroom for them, it was more than a little bland. To make this space more kid-friendly, I wanted to brighten it up and add some color!
Since a full renovation is not in our budget right now, I had to get creative. The kids (my stepkids) were about to go on a long vacation with their mom, so I knew this was the time to makeover their bathroom!
I had two rules for this makeover. One, I had to do this as quickly as possible before the kids came back. And two, I had to do it on a relatively tight budget of around $500.
I was able to do both and I think it turned out really well! Read on for the details of my attempt to brighten things up and make the space work for a few more years!
As an Amazon Associate, I receive a small commission (at no additional cost to you) for qualifying purchases on items purchased through the links in this post.
Bathroom Makeover on a Budget
Since we are about to start an expensive kitchen renovation in 2025, I needed to do this bathroom makeover on the cheap!
In total, I spent about a little more than $500. I already had some of the supplies on hand like paint, brushes, rollers, and drop cloths. The biggest expense (and the most difficult part) was painting the bathtub and surrounding tile. I ended up needing three Rust-Oleum Tub and Tile kits to cover the tub and old tile and they were about $45 each.
- Mirrors, hand towel bars, towel rack- $140
- Hamper, soap dish set, in drawer organizers- $70
- Shower curtain, rod, rugs- $90
- Tub and Tile Kit- $45 x 3
- Floor Paint- was on sale for $60, but I only used half.
- Frames and art- I bought some art prints from Esty for about $9 and made the rest myself on Canva. The frames were from Dollar Tree- not great, but I am on a budget for this project!
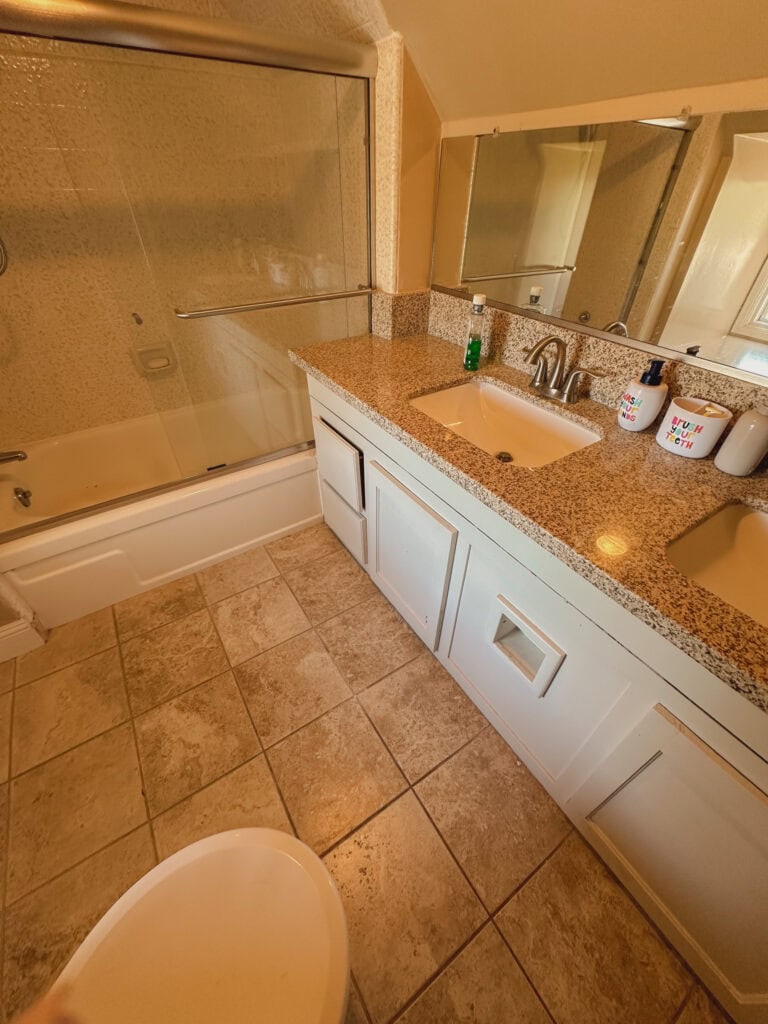
Before the Bathroom Makeover
When we moved into our home, every single room was painted brown and grey- walls and ceilings. Over the last 6 months, we’ve been painting every room white and this is one of the last spaces left to paint. I personally love white walls right now and firmly believe white walls do not have to be boring with the right art and decor. But we’ll gradually add color back in, we just had to brighten things up.
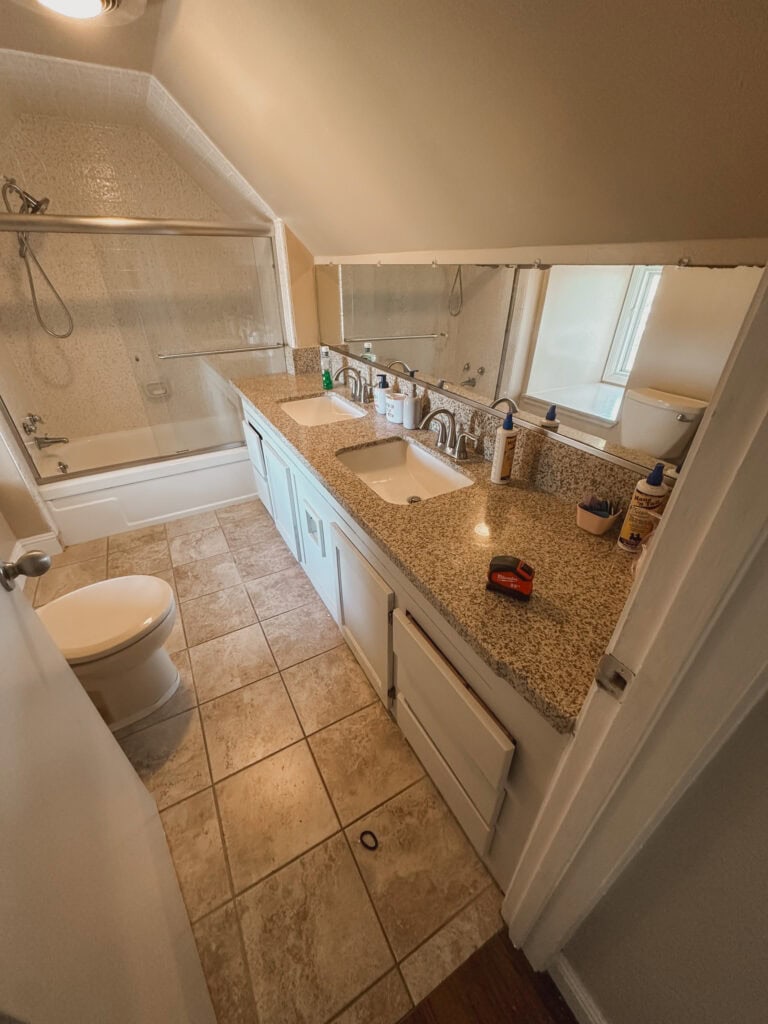
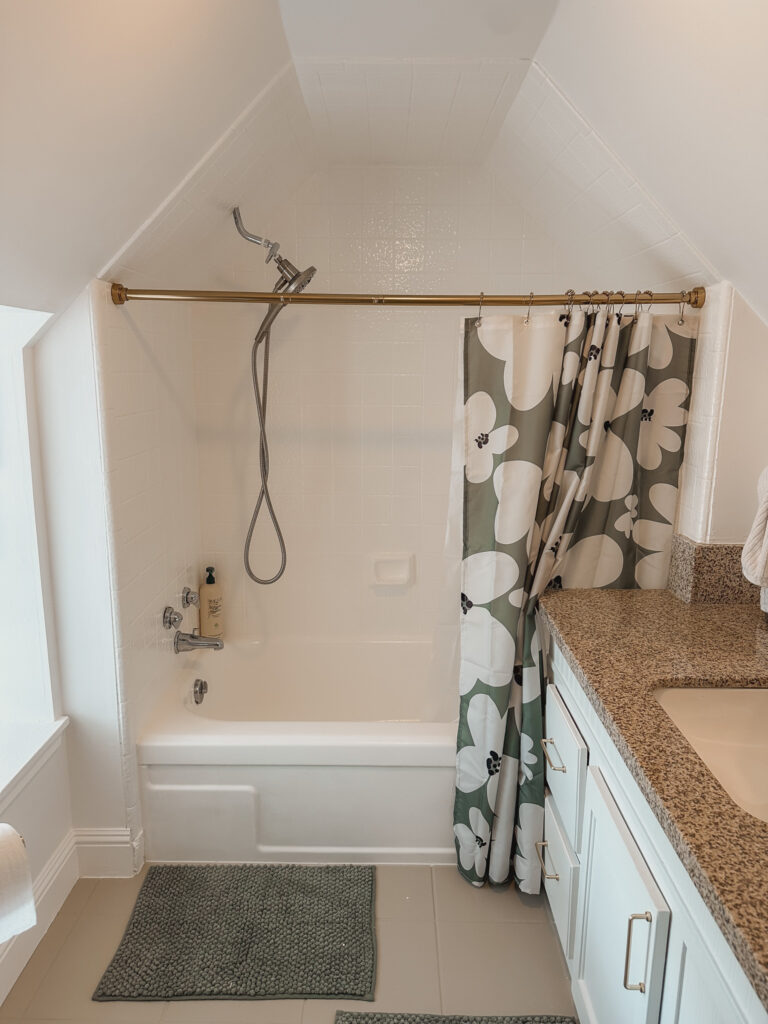
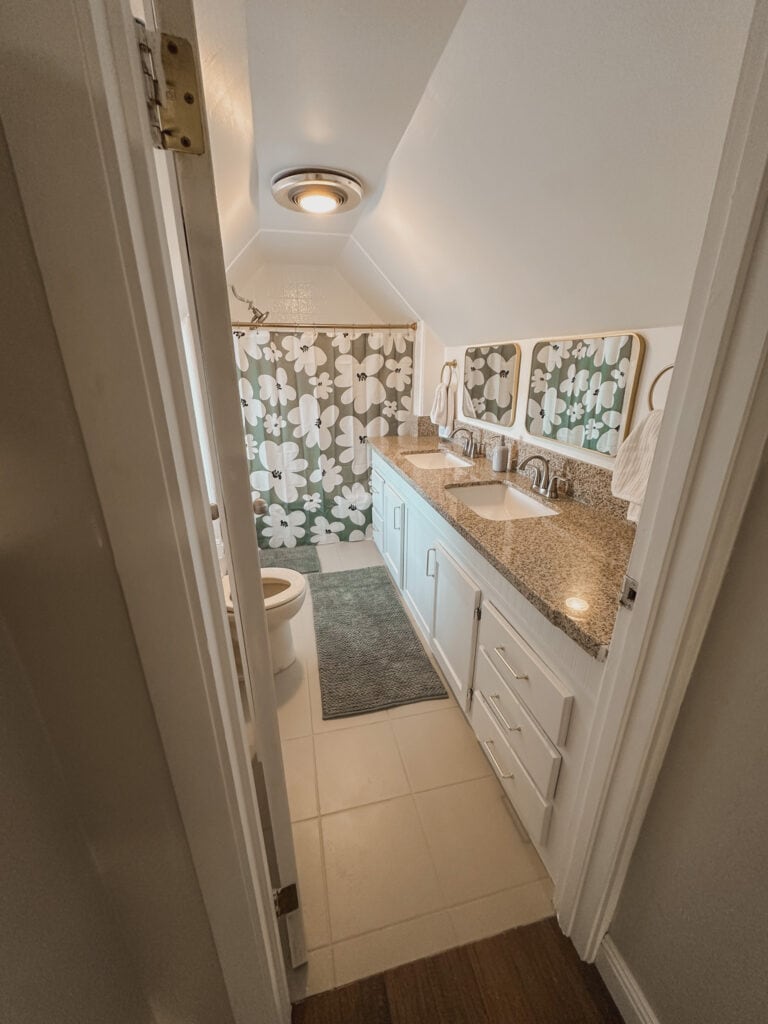
Back to the bathroom! While we are very glad that some previous owners of the home added a functioning bathroom upstairs, it was unfortunately very poorly designed and haphazardly done. Because it is an attic bathroom, the ceiling is only about 6’4″ and there is a significant slant of the ceiling on both sides. This leaves a very small space for mirrors to be hung. You can really only see yourself in the mirror if you are under 5 feet tall.
Everything in this bathroom is small. The toilet is smaller than the standard size. The countertop is a few inches shorter than average. The shower head and shower curtain rod sit at only 58 inches above the floor! It is very difficult for anyone over approximately 4’10” to shower in this bathroom. We are currently giving the kids copious amounts of coffee in an attempt to thwart their growth and extend the time this bathroom will work for them, but children are resilient and they just keep growing!
So it works for now, but since the kids insist on growing up, we will eventually need to renovate this bathroom to make it a little more accessible for taller people. Luckily, there is about 10 feet of attic space behind the shower wall so we can expand the whole bathroom backward and reconfigure the layout. But that’s a problem for another day!
So the design wasn’t great, and the execution wasn’t either. There are random mismatched tiles around the base of the shower surround where they clearly ran out. They used concrete to fill the gap between the shower and the vanity and left it rough and messy looking. The vanity was bespoke and built into the wall. it had weird gaps and broken drawers. It also had a built-in toilet paper holder that was too small for modern rolls and placed just far enough away from the toilet for it to be inaccessible for kids. So that had to go!

Initially, I had hoped to replace the vanity with a shorter one to make more space for hanging towels or a hamper, but it is built into the wall and the tile is cut around it. So my hopes of replacing the vanity were dashed since the job of redoing the flooring and the shower tile was a little more than I could handle. For now, I have to work with what we have! That means a DIY makeover for the vanity.
Bathroom Makeover Overview and Timeline
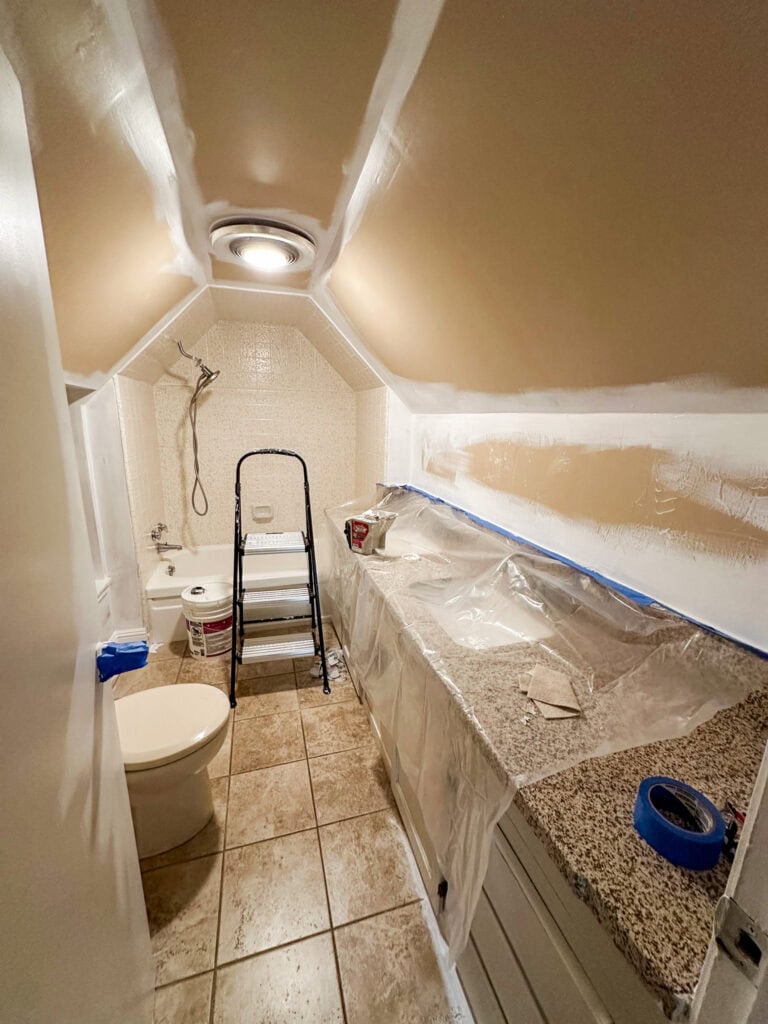
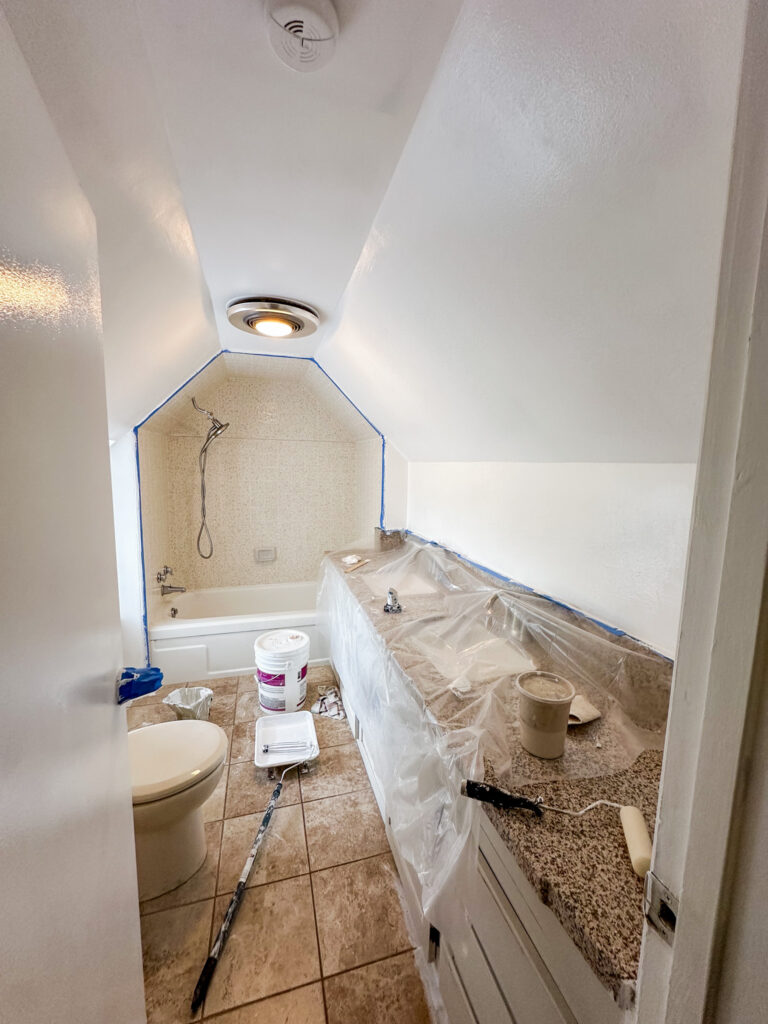
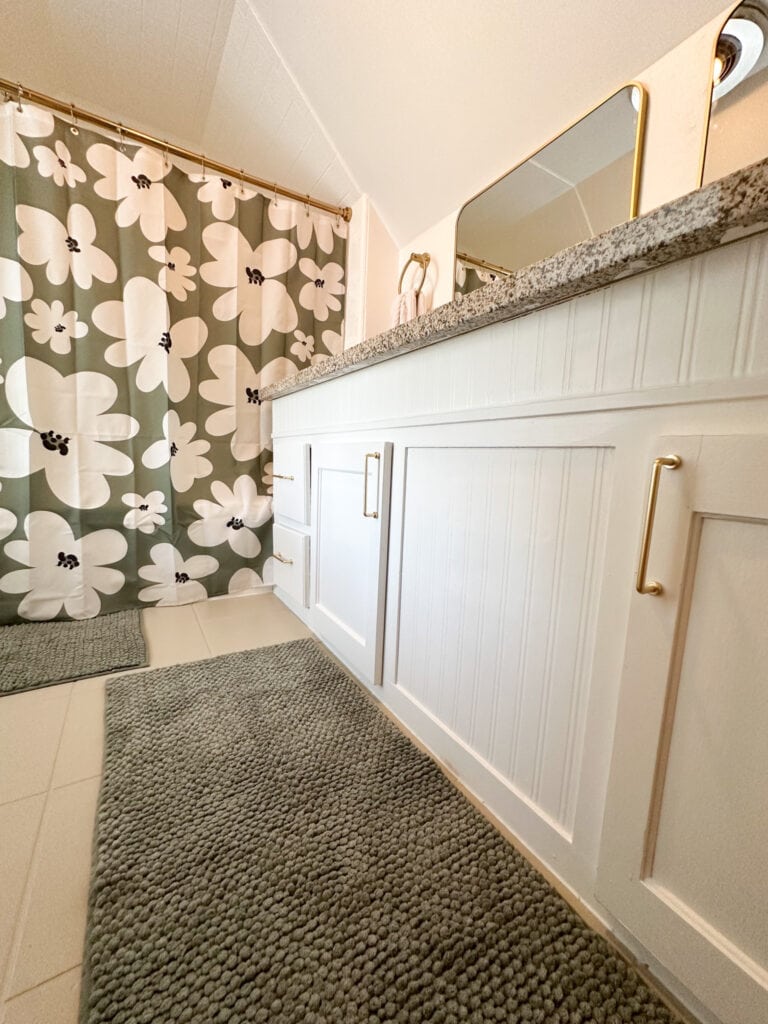
I painted the walls, the floors, the tile, added new decor, and removed the glass shower door, and replaced it with a curtain. The entire project took me about 6-7 very long days.
Painting the Walls
I am always shocked by the difference a couple of coats of white paint can make. With that one change, their bathroom went from feeling small and dark to open and bright. It also instantly felt cleaner.
I used the same color that I used for the kid’s bedrooms. One of my favorites is Chantilly Lace by Benjamin Moore. Chantilly Lace is a go-to classic white that in my home, reads as neutral and clean.
Vanity Makeover
This part of the bathroom makeover was a little more complicated, so I wrote a separate post on how I made over the vanity and you can find that here. But in short, I cleaned and sanded it smooth. I removed the too-small toilet paper holder and patched the hole it left behind. Then I added some decorative wallpaper and trim and painted. Lastly, I added new hardware.
Painting the Floors
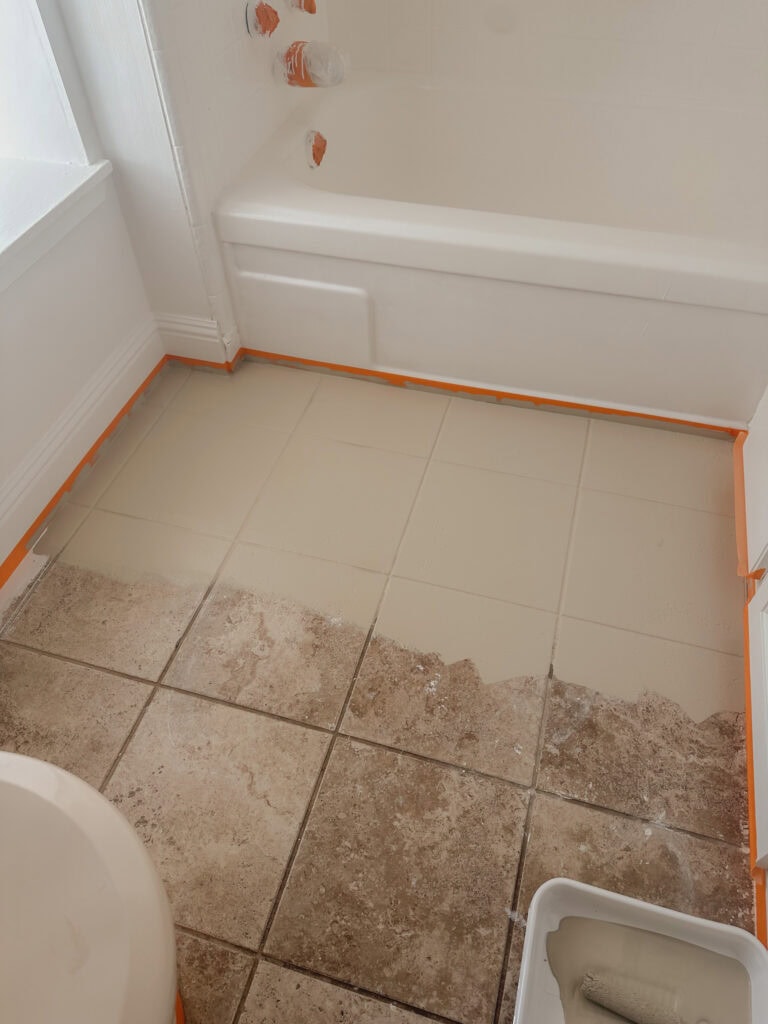
Like I said, I am not quite skilled enough to retile, though I definitely want to try to DIY that one day!
But also, I am on a tight timeline and budget with this bathroom makeover, so retiling wasn’t an option.
I’ve tried peel-and-stick tile in the past with some success, but it wasn’t very waterproof. I didn’t want to risk it since this is a kid’ bathroom, which means lots of water everywhere. Although I’ve heard you can make peel-and-stick tiles more waterproof by actually grouting them.
For this project, I wanted to try floor paint. It seemed like a quick and inexpensive solution and because we plan to renovate in a few years, I wasn’t too worried about making a mistake. I used Rust’ Oleum Interior Coating Kit in a matte griege.
Read the article below for the full process and my experience with floor paint!
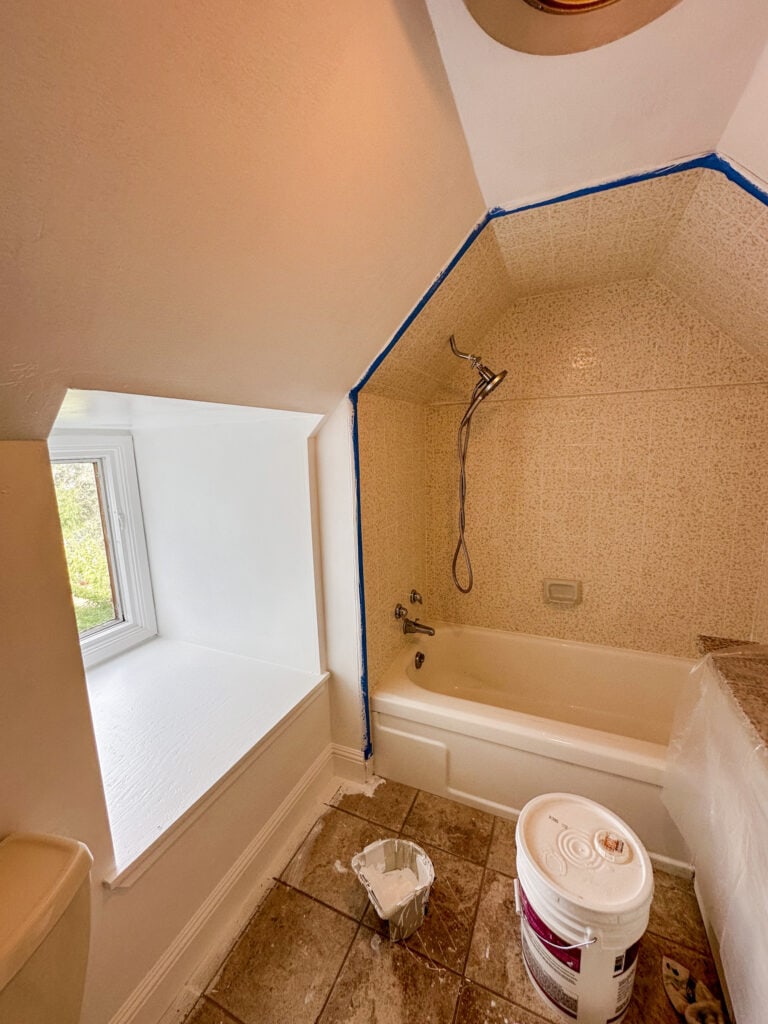
Bathtub and Tile Update- The Worst Part
Painting the tub and shower tile was the absolute worst part of this makeover. I used Rust’Oleum Tub and Tile Kit to paint the tub and the surrounding tile. And this stuff smells bad.
It took three kits to cover the tile completely without streaks, and it looks and feels like porcelain. I do love the final result and it seems pretty durable so far, but the smell was truly terrible. You need to wear a respirator when using this, okay? Please don’t hurt your pretty lungs and brain with these toxic fumes. If you plan to try this product, I highly recommend you use this tile paint on a cool day when you can keep all your windows open. I also suggest using several box fans, ideally with one positioned so it is blowing out the window, taking some of the fumes with it.
$75 and a Migraine, But It Worked Out
I suffer from migraines and was worried this was going to trigger one. And it did. Even with windows open, fans blowing, the whole house fan running, and wearing a respirator, I still got a terrible headache that lasted for days and I just generally felt awful. And my whole house smelled like chemicals for days.
This sounds bad, and it was. But the result was great and way cheaper and easier than replacing the tiles. So if you want to try this, please use caution and wear the appropriate safety gear. Do it on a day or days when everyone you live with is out of the house if possible. But if you can’t do that, at least get yourself and any pets out of the house for a few hours while the fumes clear. Please avoid using this if you are pregnant or have young kids in the house who might be affected by the fumes. (My stepkids were with their mom when I did this).


All that said, the cast iron tub really needed some TLC. It was chipped, stained, and honestly pretty gross. As for the tile, I was actually conflicted about painting it because I actually kind of liked the pattern. If I were redoing this bathroom for adults I might have kept the tile and used the colors in the rest of the room. But for this space, I am going for bright, bold, and clean. We are going to change the tile in a few years anyway, so I wasn’t too worried about this fix lasting for years and years to come.
Adding Decor and Finishes
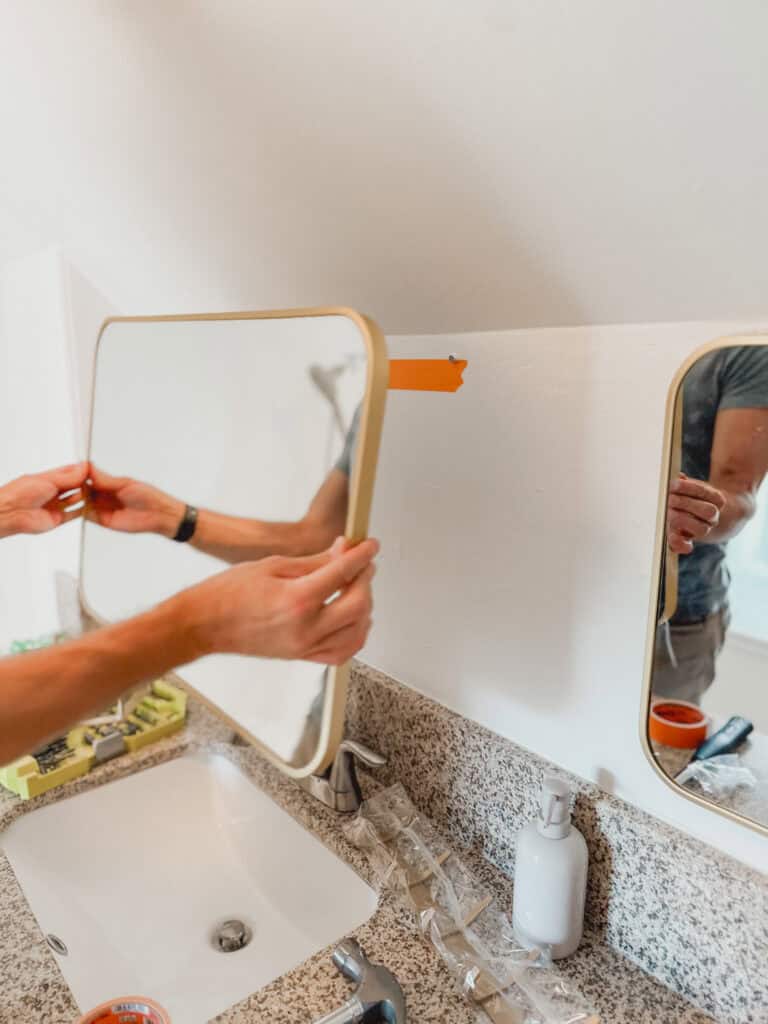
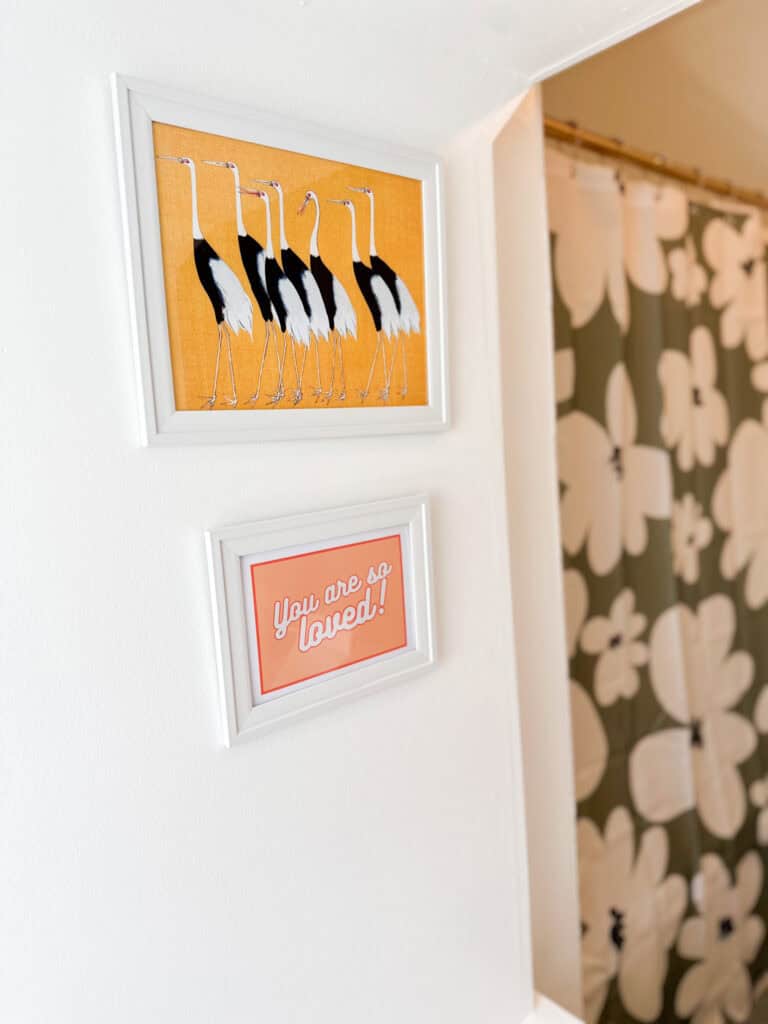
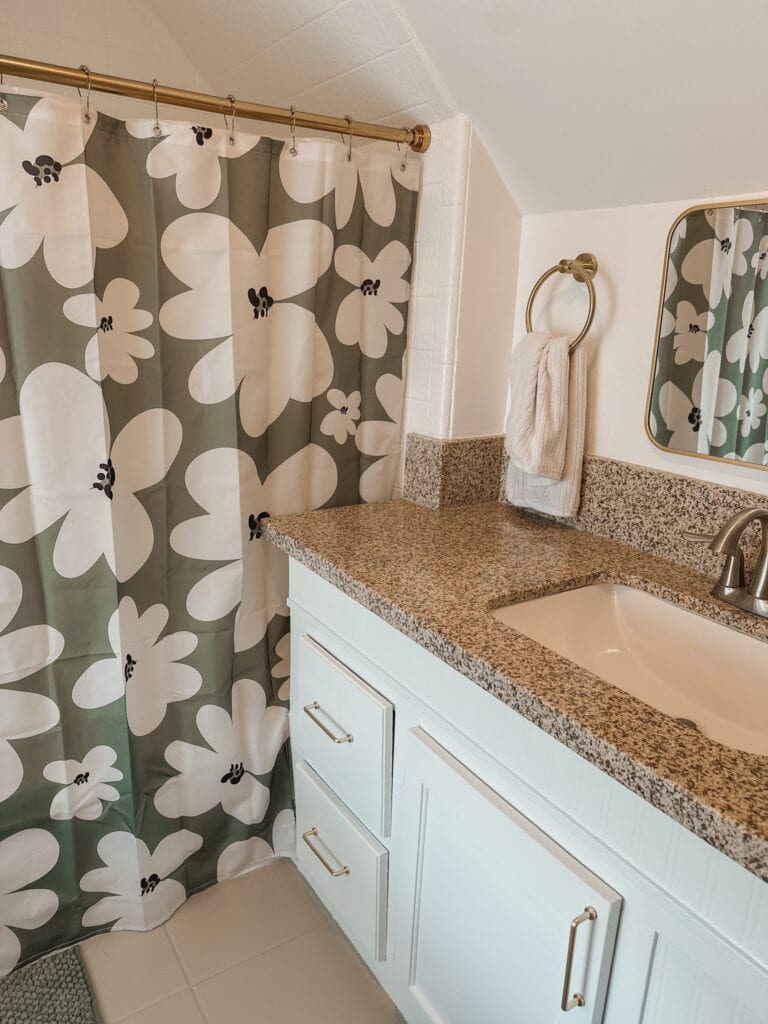
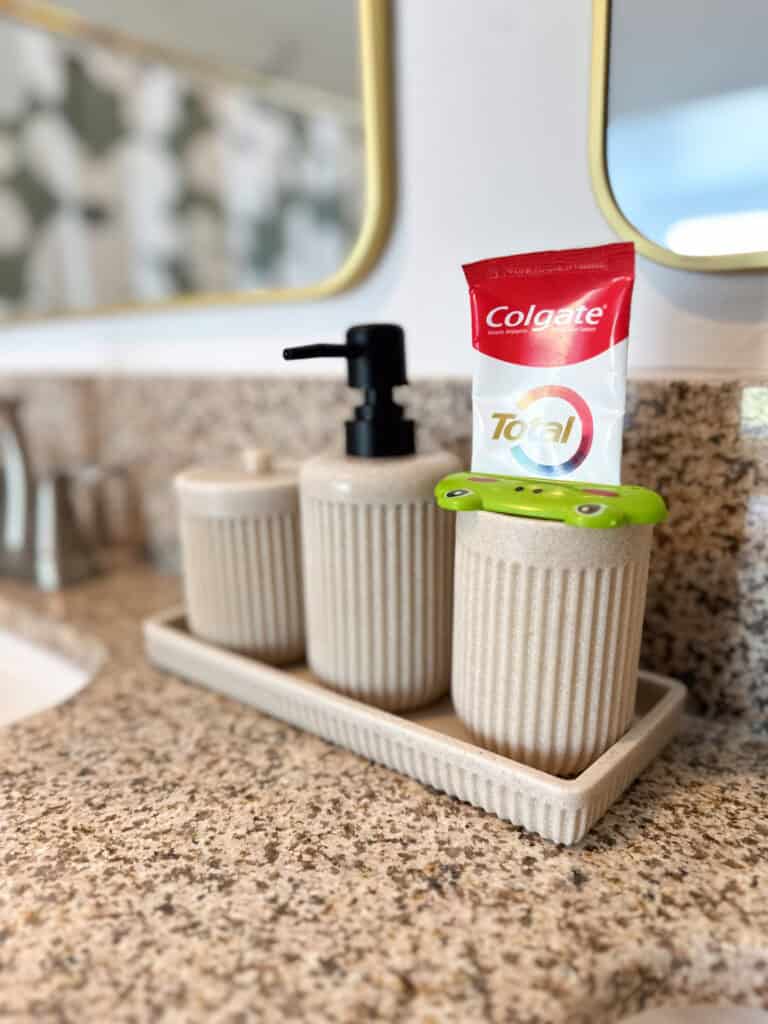
The fun part! After all the cleaning, sanding, repairing, and painting it was finally time to hang the hardware and decor! Starting with the mirrors! The space on the flat wall above the sinks is only 17 inches, so I had to find mirrors less than 16 inches wide. The old mirror was a builder-grade, frameless sort that ran the length of the wall leaving no room for a hand towel rack. These two 16 x 24-inch mirrors worked perfectly and I am really happy with how they turned out.
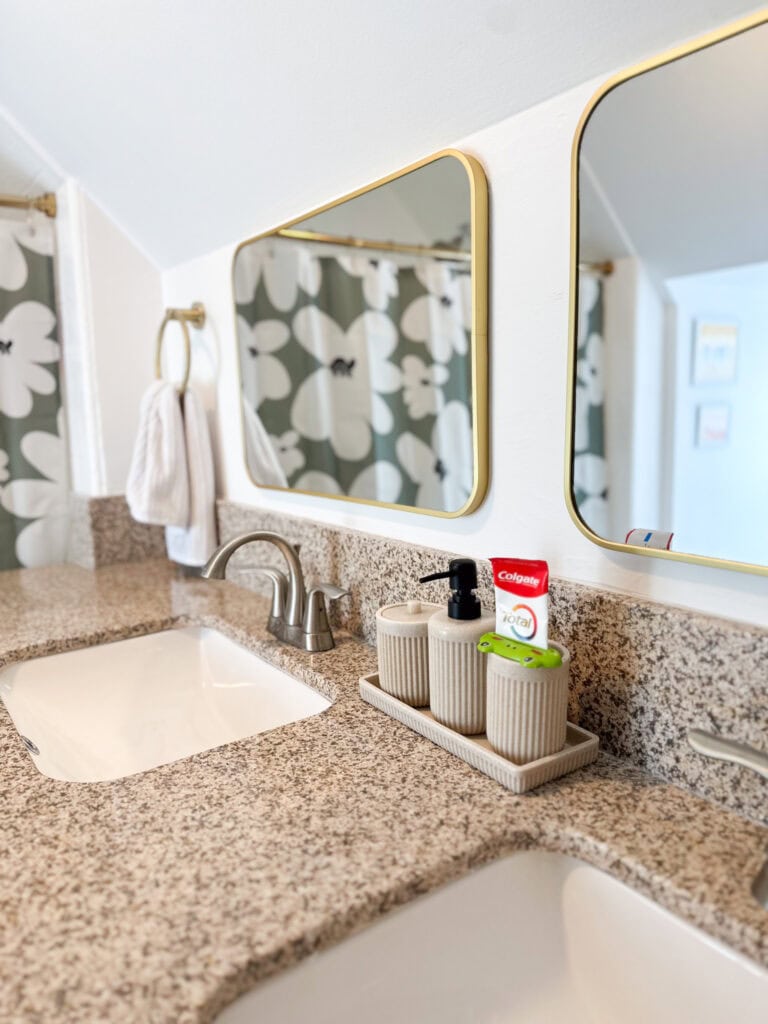
I opted to lean into the mixed metal look since the polished nickel faucets and showerhead were in good shape. But I went for polished brass for the mirrors and towel racks. I chose black metal for the soap dispenser because I couldn’t find a perfect match to the other finishes. One decor rule I live by is to avoid things that look almost the same, but not quite.
If you can’t get matching finishes, then make them different in a way that is obvious and intentional.
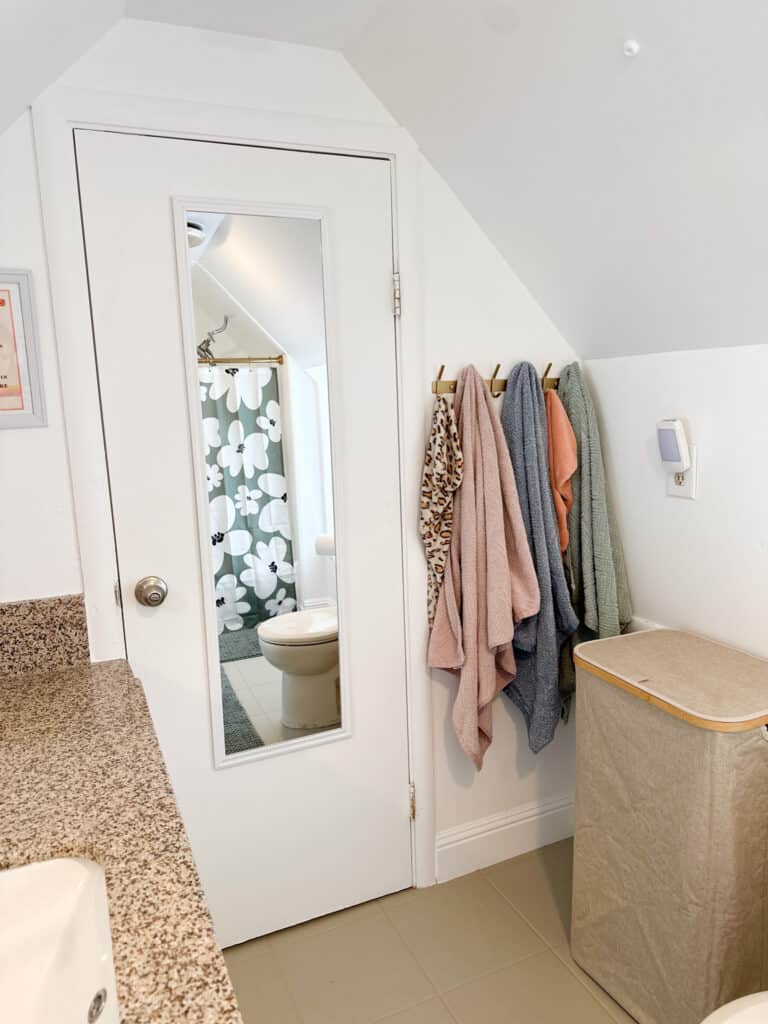
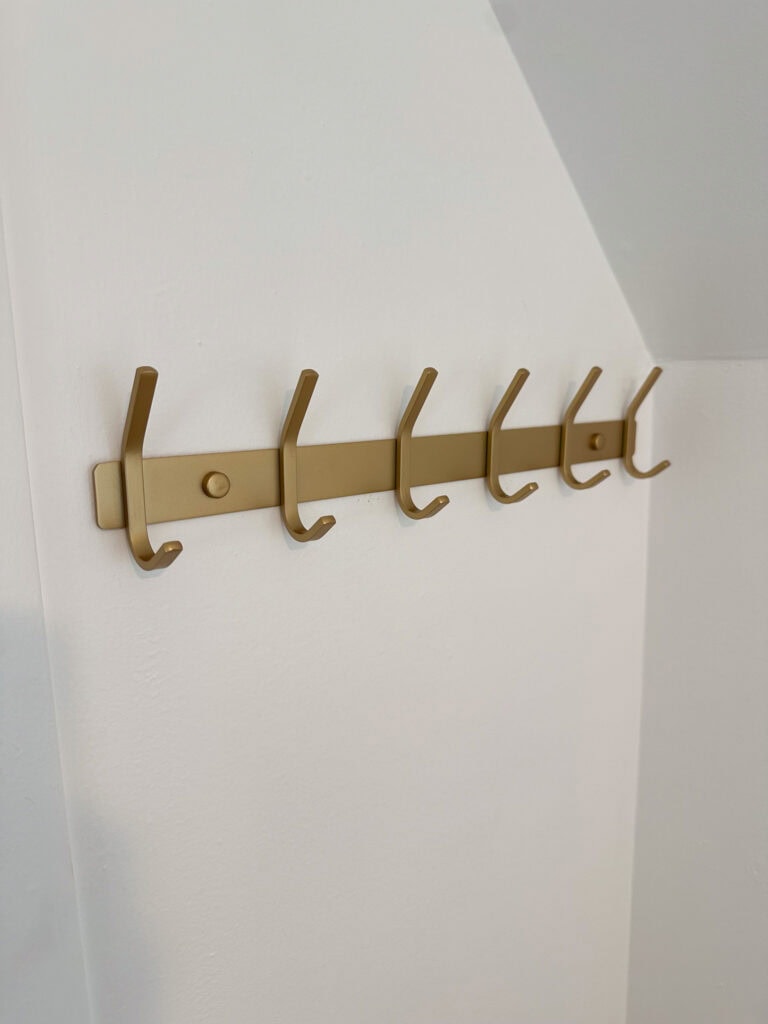
After the mirrors, it was time to install the hand towel holders and bath towel rack. One small thing I appreciated: the towel rack came with little metal screw covers to hide the hardware, which really elevated the overall look. I purchased two of them and plan to use the other in our laundry room.
Art and Organization
This hamper is so cute and the perfect size for use by three kids. It’s sturdy too so it won’t collapse when the kids throw their clothes in the general direction of the hamper but inevitably miss. Does anyone else constantly have a pile of kid’s laundry near but not in the hamper? Yeah, this hamper has fixed that problem after years with a flexible bag-style hamper. And this toilet paper holder works a lot better than the old built-in. It looks nice and it is weighted so won’t easily fall over.
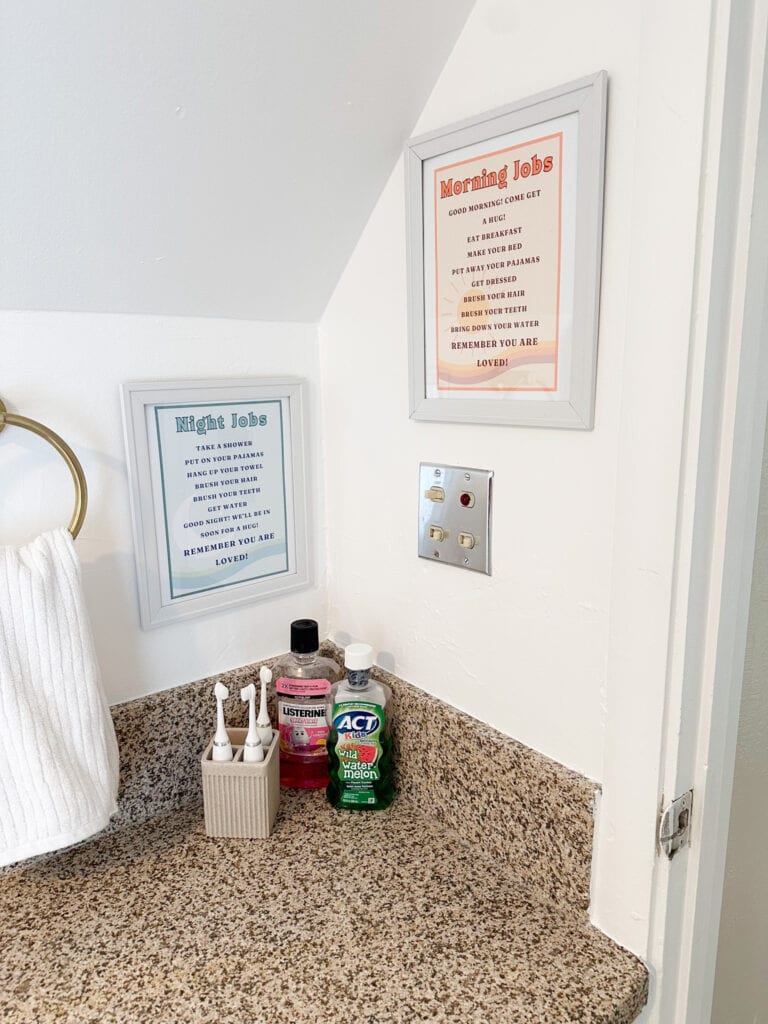
The art prints on the walls are from Esty and I made the word art and chore charts myself on Canva.
Sewing the Tiny Shower Curtain for the Tiny Shower
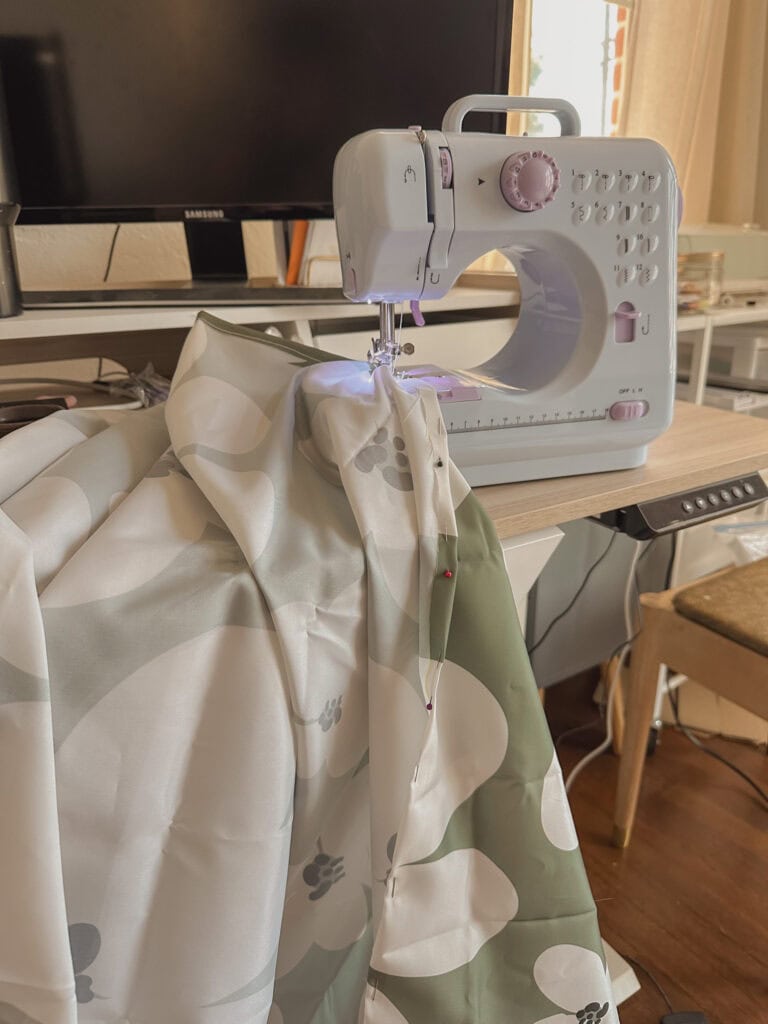
I love this shower curtain! I am admittedly not a huge fan of ultra-colorful kid decor and tend to prefer earth tones. This shower curtain was the best of both worlds! A gorgeous earthy green, my favorite color, with big bright whimsical flowers. Even though I got it in the shortest possible length and width and still had to cut about a foot off the bottom to fit this tiny shower. I hemmed the bottom using this mini sewing machine that I purchased to teach myself how to sew. The shower curtain rod is gorgeous and I was able to adjust it to fit this tiny shower by taking out one of the sections.
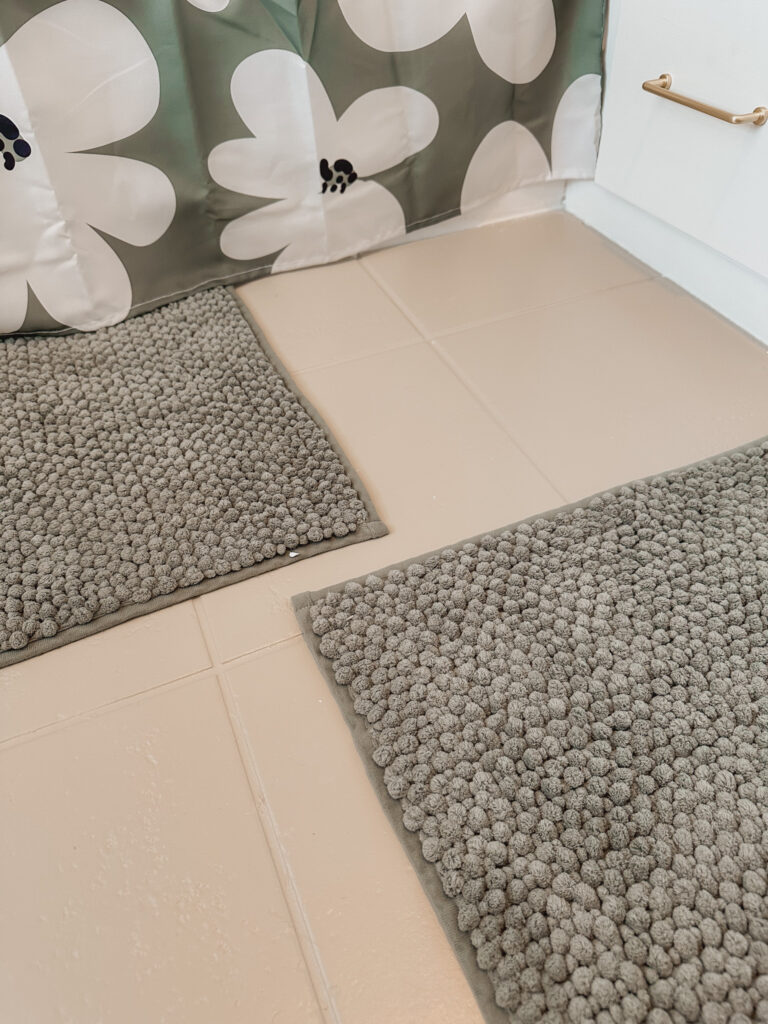
For the finishing touches, I added these bath mats that complement the shower curtain and have a great non-slip backing. I found this cute soap dispenser and toothbrush holder set. I also add a simple organizer in the drawers for hair ties and brushes. The final touch was this little frog that helps dispense toothpaste without having to squeeze the tube. The frog is definitely one of the kid’s favorite parts of this makeover.
The Final Reveal of this Bathroom Makeover!
Since my stepkids were on vacation with their mom while I did this bathroom makeover, the reveal was a fun surprise for them when they got back. I also cleaned and organized their rooms and added lots of colorful decor to their spaces. It was so fun surprising them with brighter, cleaner, and more colorful spaces!
Here’s the before one more time so I remember how much this bathroom improved with a couple of days of hard work and a little creativity.

And the after!
Overall, I am very happy with this relatively inexpensive DIY bathroom makeover! It will definitely tide them over until we can renovate in a few years. And most importantly the kids absolutely love it!
Did this post inspire you to DIY your bathroom? Have any tips for me? Let me know in the comments below!

Join the List
Stay up to date & receive the latest posts in your inbox.
0 Comments