Paint for Floor Tiles: Update 6 Months Later
This summer, I decided to update our kid’s bathroom as part of a budget-friendly makeover of their spaces. Their bathroom is a tiny attic bathroom, that at the time, had brown walls, a brown floor, beige/ gold shower tiles, and a grey vanity. It was dark, dreary, and dated and I wanted to make it a cute, colorful space, more fit for kids. But, I also wanted to update the bathroom with only a small budget and a short timeframe. One of the ways I kept the the timeframe short and the costs low was by using paint for the floor, instead of retiling. After some research, I decided that using Rust-Oleum Floor Paint seemed like the perfect solution. And after six months of wear and tear, I’m here to share an honest update. Spoiler alert: it’s held up beautifully- for the most part!
As an Amazon Associate, I receive a small commission (at no additional cost to you) for qualifying purchases on items purchased through the links in this post.
If you’re considering using paint for the floor in your home, this post will cover everything you need to know, including the results, common questions, and tips for success. For a detailed look at the process and full tutorial, be sure to check out my original article on how I painted the tile floors.
Why I Chose Paint for the Floor Tiles
The upstairs bathroom—which is shared by our three kids—had seen better days. Those days were probably before I was born though. Our house is about 80 years old and we think the bathroom was built in the 60s and possibly last updated in the 80’s or 90’s. Okay, so I was around then, but barely!
The bathroom tile was dark and dated, but a full renovation is not in the budget right now. I knew that painting the walls and the shower tiles would do a lot to brighten up the room, but I also wanted to do something with the flooring. Rust-Oleum Floor Paint seemed like an affordable and beginner-friendly solution that would allow me to refresh the space without demolition or high costs. And it was. The process required minimal tools, and with just a weekend of work, the bathroom floor looked brand new.
This was the right decision for our home because:
- The bathroom was dark and ugly, so almost anything would be an improvement.
- The bathroom is upstairs and only used by kids, so I wasn’t too worried about things going wrong.
- Lastly, the bathroom is tiny (6’4″ ceilings) so to make this bathroom work for our kids as they grow, we will one day need full renovation. This update was just to make it feel a little cuter and cleaner in the meantime.
Consider these factors as they might relate to your home before using floor paint. It’s great for certain spaces, but I suggest carefully considering all these factors before using it in a high-traffic room like a living room or kitchen.
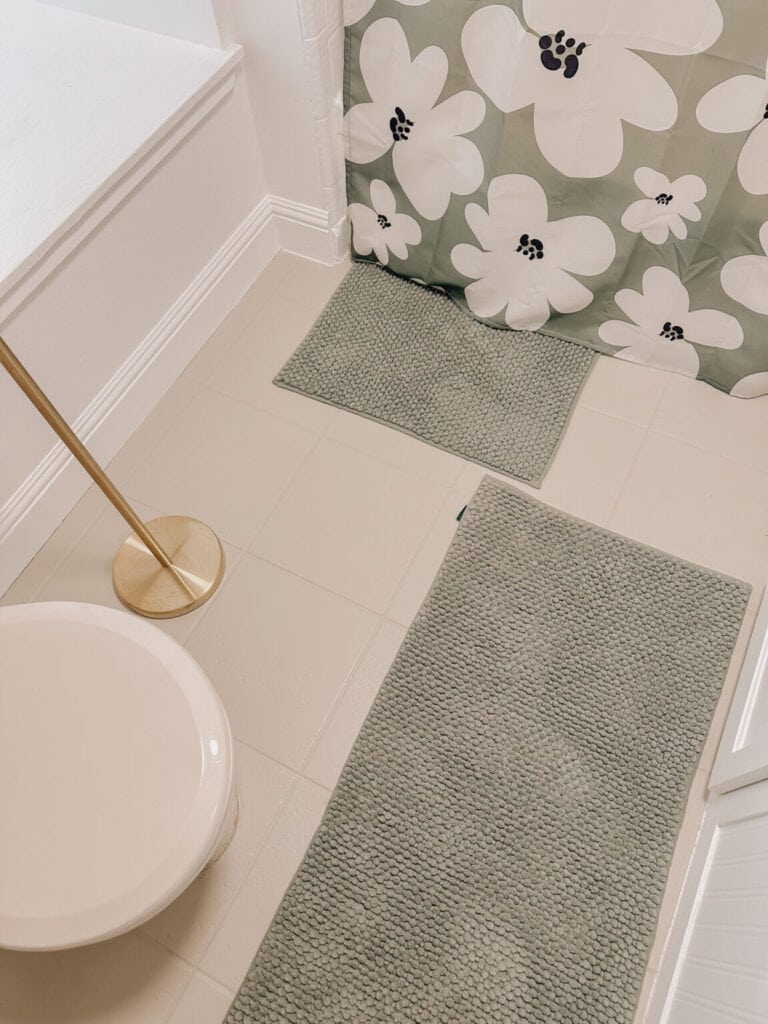
That said, here’s the before and after for our tiny attic bathroom!


Read about the full bathroom makeover to see all the details of this cute kid’s bathroom!
6-Month Results: How Does Painted Tile Hold Up?
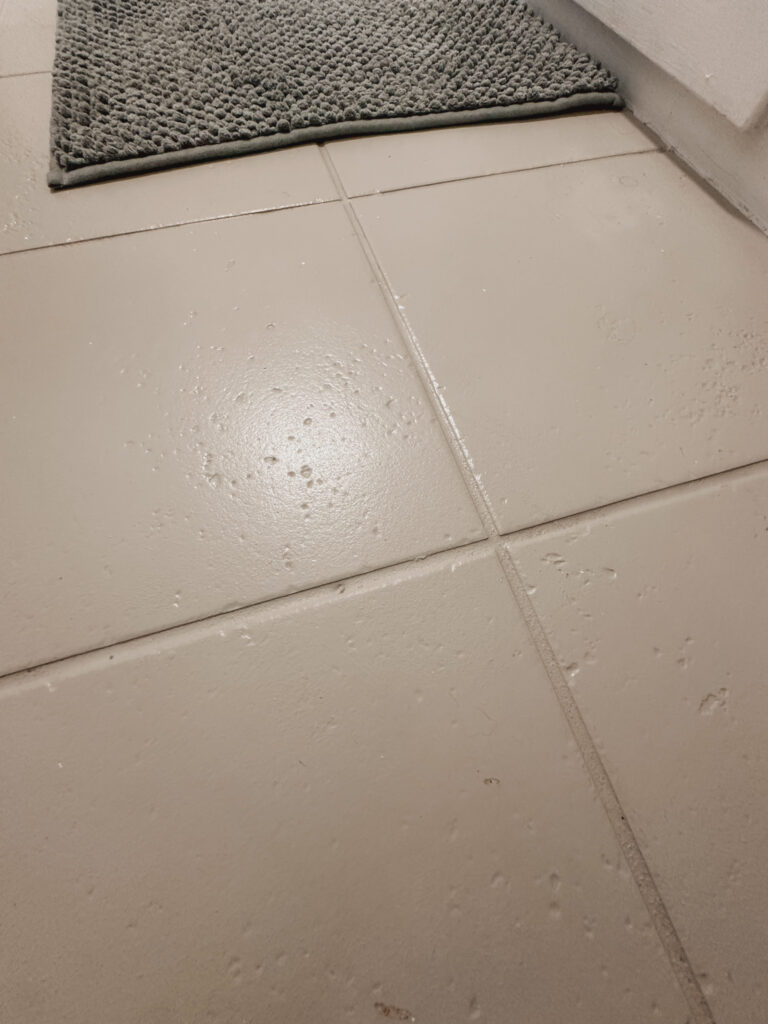
Six months later, I’m thrilled to report that the painted floor still looks great and is a vast improvement over what we started with. However, upon closer inspection, I did find a couple of minor issues:
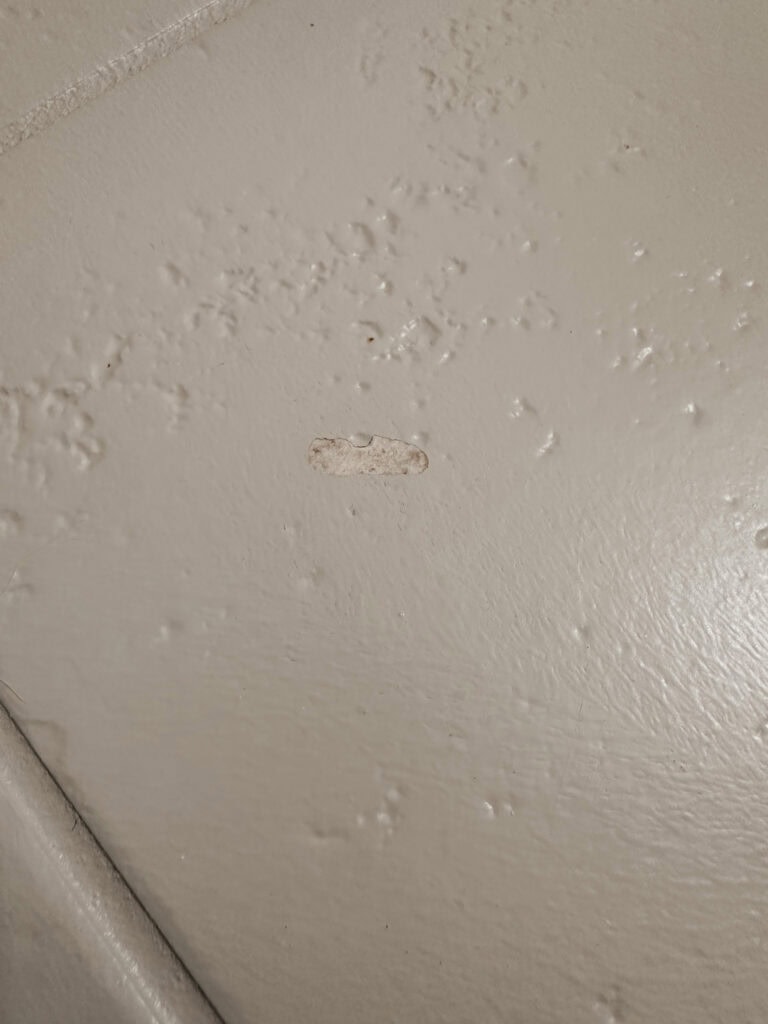
- One Small Scratch: There is a small scratch under the laundry basket, likely caused by the kids dragging it out. While not very noticeable, it’s something to keep in mind if your floor sees heavy use.
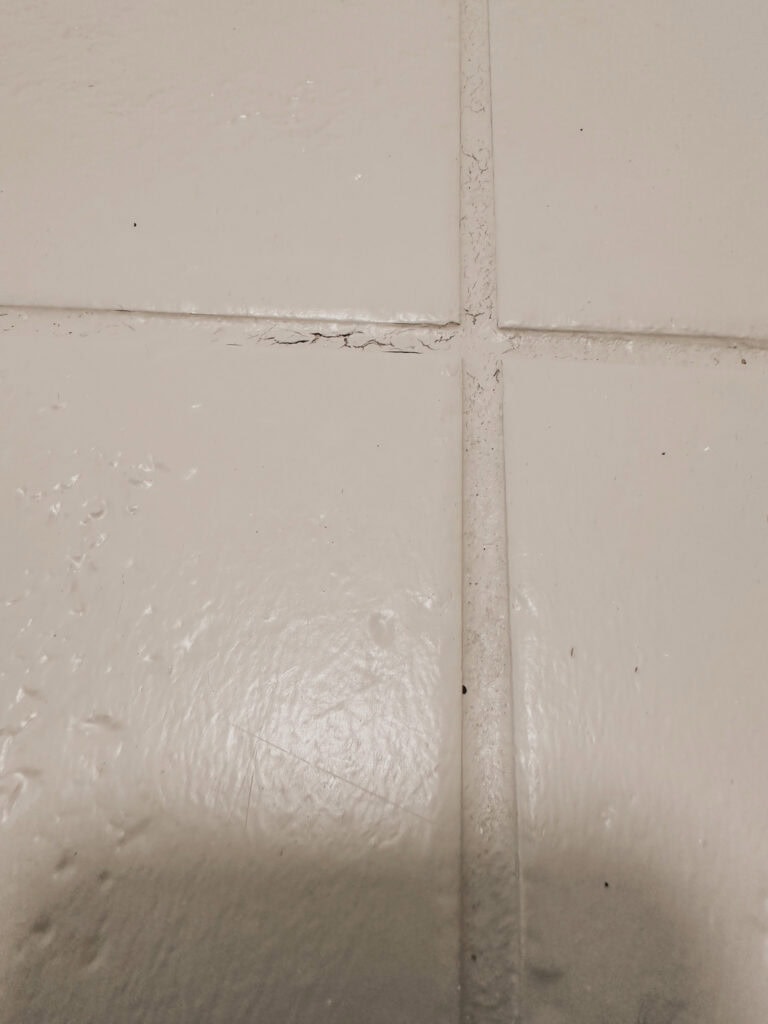
- Bubbling and Chipping in One Spot: I also noticed an area between tiles where the paint appears to have bubbled and chipped. I’ve done a lot of painting (both walls and art) in my life and I suspect the grout line might have been wet when I applied the paint. This seems like user error rather than an issue with the product itself. All other areas of grout look fine. Excuse the lint in this image- I used a black cotton cloth and didn’t realize how much it left behind.
Results Overall for Floor Paint
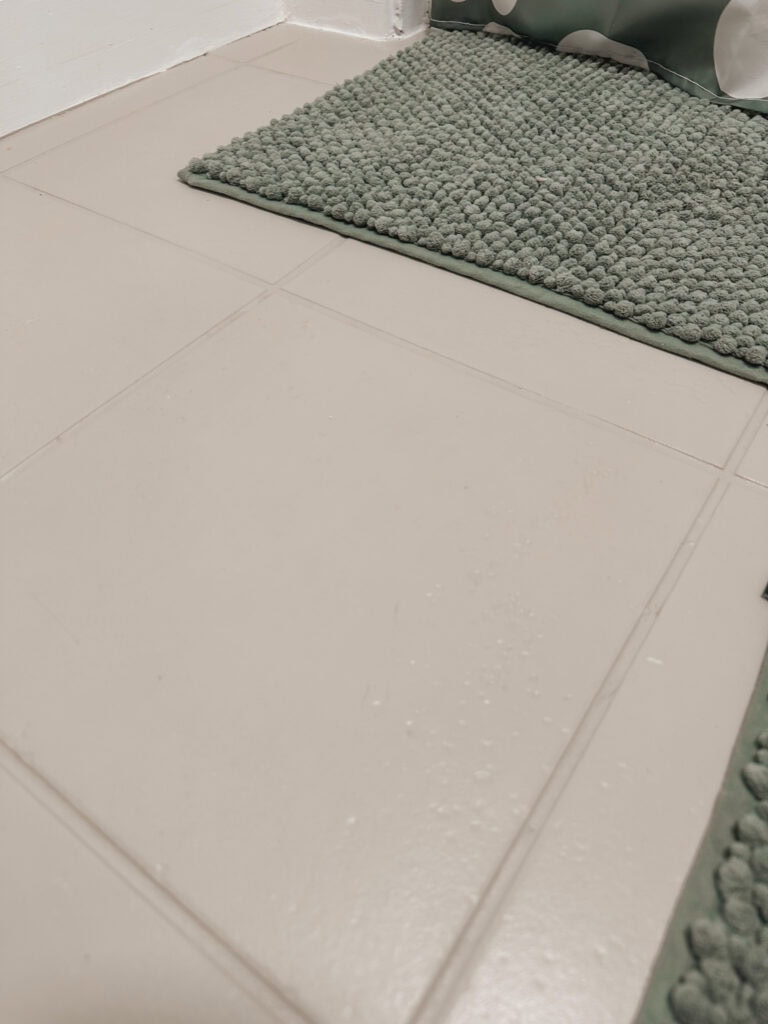
Overall, the floor has held up perfectly in most areas. There are no chips or peeling outside of the isolated issues mentioned above, and the surface remains stain-free, water-resistant, and durable despite daily use by three kids.
The painted floor still looks nearly as good as it did the day I finished. Here’s a breakdown of how it has performed:
- Stain Resistance: Kids are messy, but the floor hasn’t shown any signs of staining. Spilled toothpaste, muddy footprints and pawprints, and various other kinds of kid stains from slime to markers- nothing has stained the floor yet.
- Durability: There’s very little to no fading or scuffing, even in high-traffic areas. The painted surface has proven to be incredibly durable.
- Water Resistance: Since it’s a bathroom, I was concerned about water exposure. Thankfully, the sealed surface has handled splashes and wet feet without any issues.
Why Painting the Floor is a Great DIY Option
Using paint for the floor is an excellent way to refresh old tiles without a big investment. It’s especially ideal for beginner DIYers because:
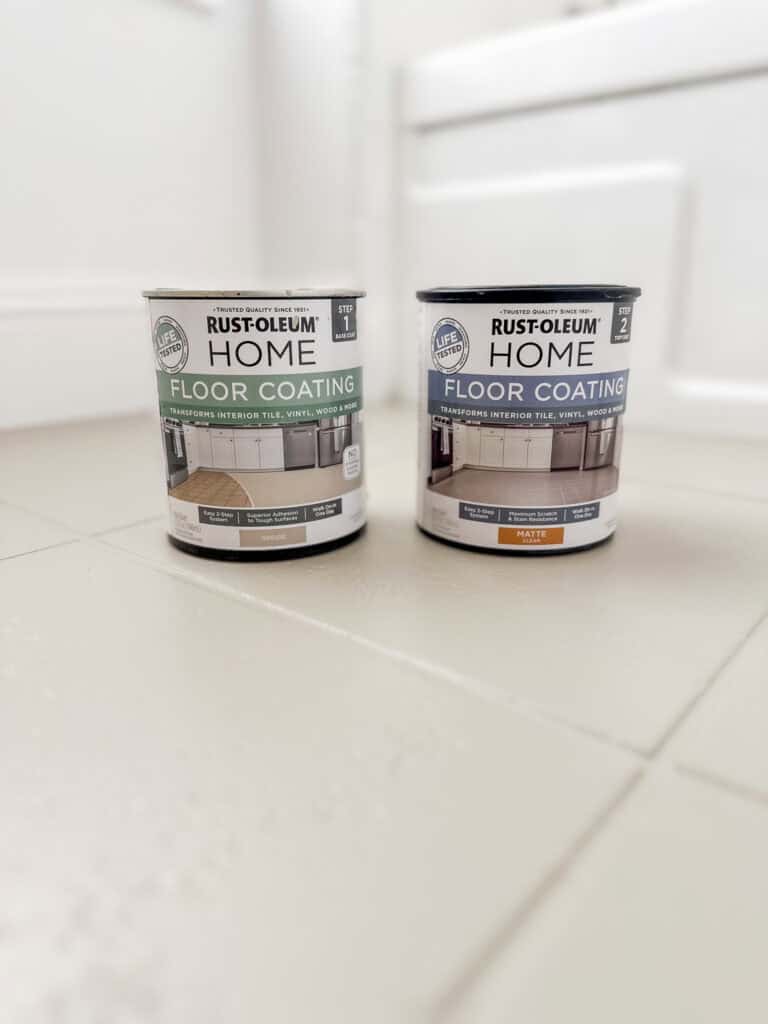
- It’s Affordable: The two-part system of Rust-Oleum Floor Paint costs a fraction of what it would cost to replace the tile.
- It’s Quick: The entire process, from cleaning to sealing, can be done over a weekend.
- It’s Beginner-Friendly: No special skills or tools are required, making it accessible to almost anyone.
Common Questions About Painting Floors
1. Does the paint really last?
Yes! As long as you follow the proper preparation and sealing steps, painted floors can hold up for years. Six months in, my painted floor looks just as good as it did when I first finished.
2. What preparation is required?
Proper preparation is key to ensuring the paint adheres well. For tile floors, this typically involves:
- Cleaning thoroughly to remove dirt, grease, and soap scum.
- Lightly sanding the surface to create texture for the paint to grip *is not required with this specific product though some other brands do suggest it.
3. Is floor paint waterproof?
Rust-Oleum Floor Paint is water-resistant once sealed. It can handle splashes and everyday moisture, but it’s not suitable for areas that experience standing water, like a shower floor.
4. Can you use any paint for the floor?
No, it’s essential to use paint specifically designed for floors. Regular wall paint won’t hold up to foot traffic and moisture.
5. How do you clean painted floors?
Painted floors are easy to maintain. I recommend using a gentle cleaner and avoiding abrasive tools that could scratch the surface. A mop and mild soap work perfectly. Magic erasers are wonderful for removing stains and smudges.
6. Can floor paint be removed?
Theoretically, yes. Since it is just paint that is physically and superficially bonded to the tile surface, it can be removed with physical or chemical means. That is, it could be removed by a combination of physically scrapping it off with a razor or dissolving it with chemical solutions like paint thinner or even some less toxic things like vinegar and baking soda.
This process will not change the tile so removal should be possible. That said, removal results will vary based on the specifics of your tile and the materials used to remove the floor paint. I do worry that getting it out of grout might be tricky.
Step-by-Step Recap of the Process
If you’re new to painting floors, here’s a quick overview of the steps I followed. For more details, be sure to visit my original post on this project.
Step 1: Clean the Surface
Start by thoroughly cleaning the tile to remove any grease, grime, or soap residue. This ensures the paint adheres properly. The surface should be clean and dry, free of lint, hair, or any other debris.
Step 2: Paint the Floor
Apply Part One of the Rust-Oleum Floor Paint system in an even coat. Most of the colors only require one coat, but white requires two. Allow the first layer to dry fully to the touch before applying the second. I used a small foam roller for larger areas and an angled brush for edges.
Step 3: Seal the Surface
Seal the painted floor with Part Two of the Rust-Oleum Floor Paint system clear topcoat to protect it from scratches, water, and stains. This step is non-negotiable for durability. Allow the top coat to dry and fully cure for 24-48 hours before walking on it.
Read the article below to see the full tutorial with all the details!
Tips for Success
- Use High-Quality Tools: Invest in a good roller and brushes to ensure a smooth finish.
- Work in Sections: This helps you avoid stepping on wet paint and getting even coverage.
- Allow Proper Drying Time: Don’t rush the drying process between coats or before sealing.
- Choose a Neutral Color: A classic, neutral color will stand the test of time and work with any decor changes.
Oil vs. Water-Based Floor Paints
Rust-Oleum Floor Paint is water-based, and I only have experience with this product, but some people wonder about oil-based options. Here’s a quick comparison:
- Water-Based Paints: These are low-odor, quick-drying, and easy to clean up. They’re ideal for most DIY projects.
- Oil-Based Paints: These are more durable but take longer to dry and require mineral spirits for cleanup. Oil-based paints are better suited for high-traffic commercial spaces.
For a family bathroom, the Rust-Oleum water-based option worked perfectly.
Final Thoughts: Would I Recommend Painting Your Floor?
Absolutely- in the right space with the right set of circumstances! Painting the floor is a cost-effective and impactful way to update a space. But it may or may not be a permanent solution. If you are looking for a somewhat short-term (a few years or so) and a budget-friendly fix for dated tile like I was, then this might be perfect for you.
Overall, I’m still happy with this product. The painted floor has held up well, with only minor issues like a small scratch and a bit of bubbling in one spot (which I believe was due to user error). It’s a great price point, easy to use, waterproof, and perfect for a quick update when retiling isn’t an option.
Six months later, I’m still amazed by how well the Rust-Oleum Floor Paint has held up, even with heavy use by three kids.
If you’re looking for paint for the floor in your home, I highly recommend this product and process. It’s quick, affordable, and beginner-friendly—everything you want in a DIY project. Whether you’re tackling a bathroom, laundry room, or entryway, this is a project that’s worth the effort, which was actually very minimal.

Join the List
Stay up to date & receive the latest posts in your inbox.