How to Build a DIY Pantry Shelf (Beginner-Friendly Tutorial)
Building your own DIY pantry shelf or shelves might feel a little intimidating if you’re new to woodworking—or if, like me, this is your first time tackling shelves of any kind. But trust me, this project is beginner-friendly and surprisingly doable. With a bit of planning, a handful of basic tools, and some simple materials, you can create custom pantry shelving that fits your space perfectly.
In this post, I’ll walk you through how I built narrow shelves for our mini “butler’s pantry” (really just a converted utility closet). This was my first time trying this method, so I’ll share both what worked and what I learned along the way. Even though my shelves are on the smaller side, the same approach works for larger pantry shelves, too.
Why We Needed a Pantry Shelf
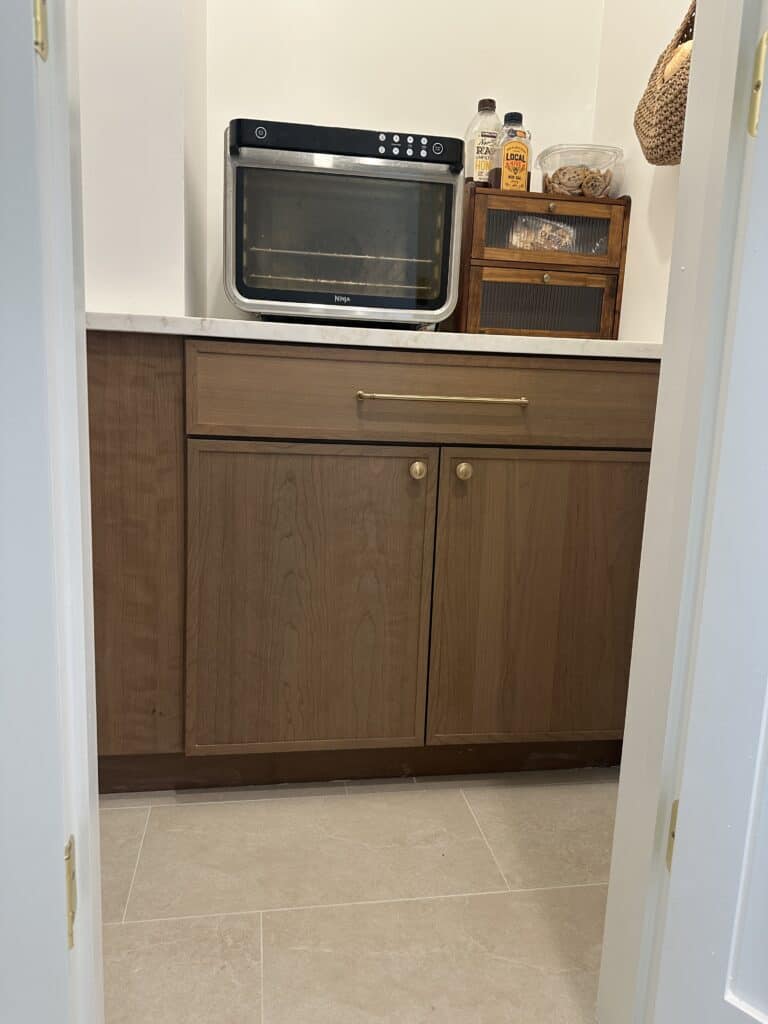
Our kitchen came with an awkwardly-located pantry closet that was more inconvenient than useful. During our recent renovation, we installed a tall cabinet for everyday pantry items, which freed up the old closet to become an “appliance garage.” This is where we store our air fryer (giant and not exactly beautiful, and I didn’t want it on the counter in our newly renovated kitchen), along with small appliances like our rice cooker, Instant Pot, and an extra blender.
We added a cabinet with a drawer to create a small appliance station. That left us with a 6-inch recessed space in the wall—perfect for canned goods. Rather than letting it go to waste, I decided to build a set of shallow shelves to make the most of the space.
Supplies for a DIY Pantry Shelf
Here’s what you’ll need (adjust quantities based on your space):
- 1×2 or 1×3 boards (for the cleats that support the shelves)
- Miter or handsaw (my favorite is the Pull Stroke Handsaw by Vaughan )
- Shelf wood: solid wood like pine or poplar, plywood, or MDF cut to your desired length and depth
- Screws (2” wood screws work for most builds)
- Drill + drill bits
- Stud finder + level ( laser level is best )
- Drywall anchors (if no studs available)
- Wood glue
- Nail gun (or hammer and finishing nails)
- Sandpaper
- Stain + polyurethane and/or paint
- Painter’s tape (for planning your layout)
Step 1: Plan Your DIY Pantry Shelves
Good planning makes or breaks this project.
- Measure your space carefully — width, depth, and height between shelves.
- Account for what you’ll store. I planned mine around stacked cans, leaving a couple of inches of breathing room so it wouldn’t look cramped.
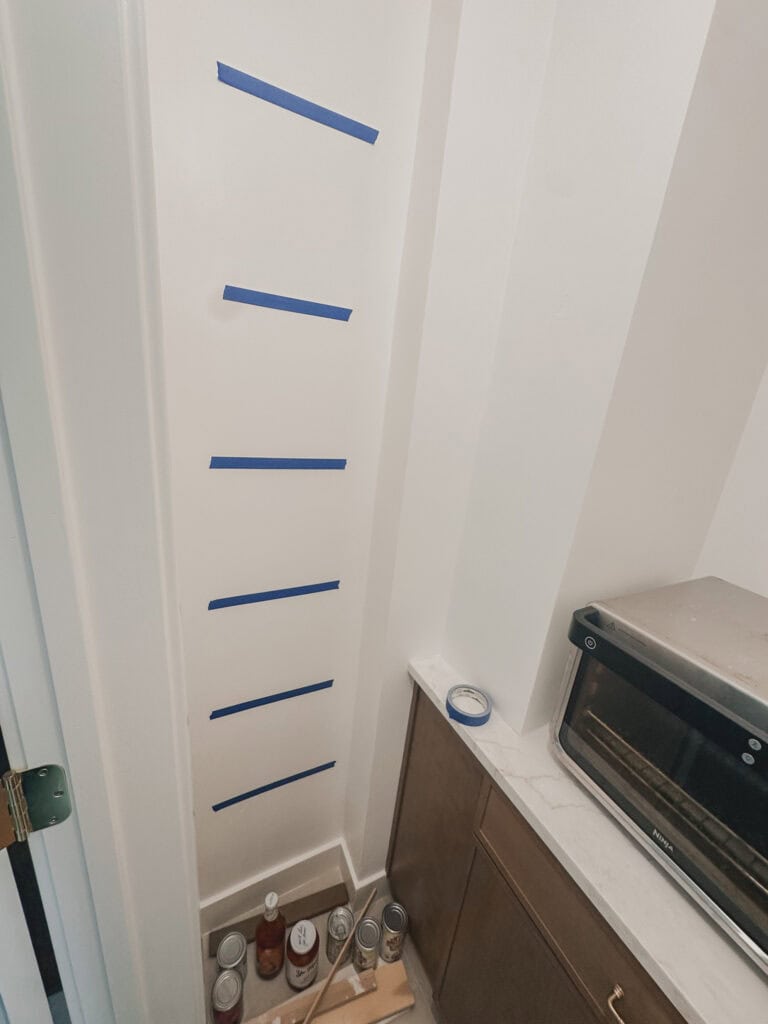
- Mark with painter’s tape. Taping out the shelf heights on the wall helps you visualize before committing.
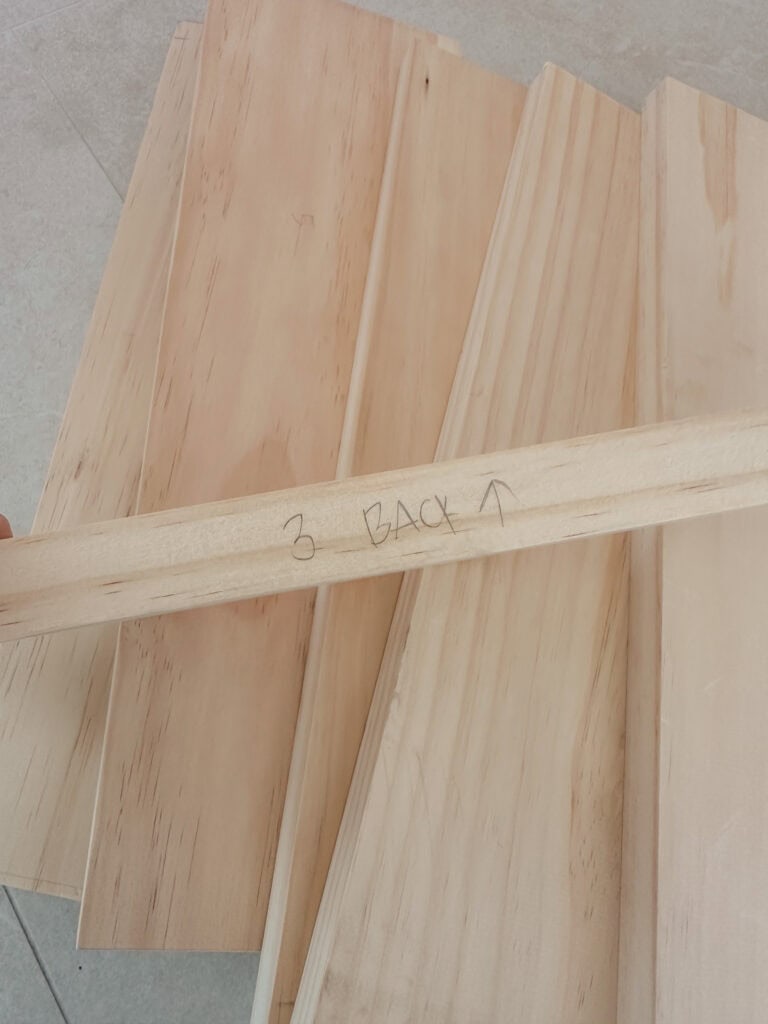
- Check your walls. Most aren’t perfectly straight! In my pantry, the recess opened up in a V-shape, so every shelf width was slightly different. Measure for each shelf individually.
- Purchase your lumbar.
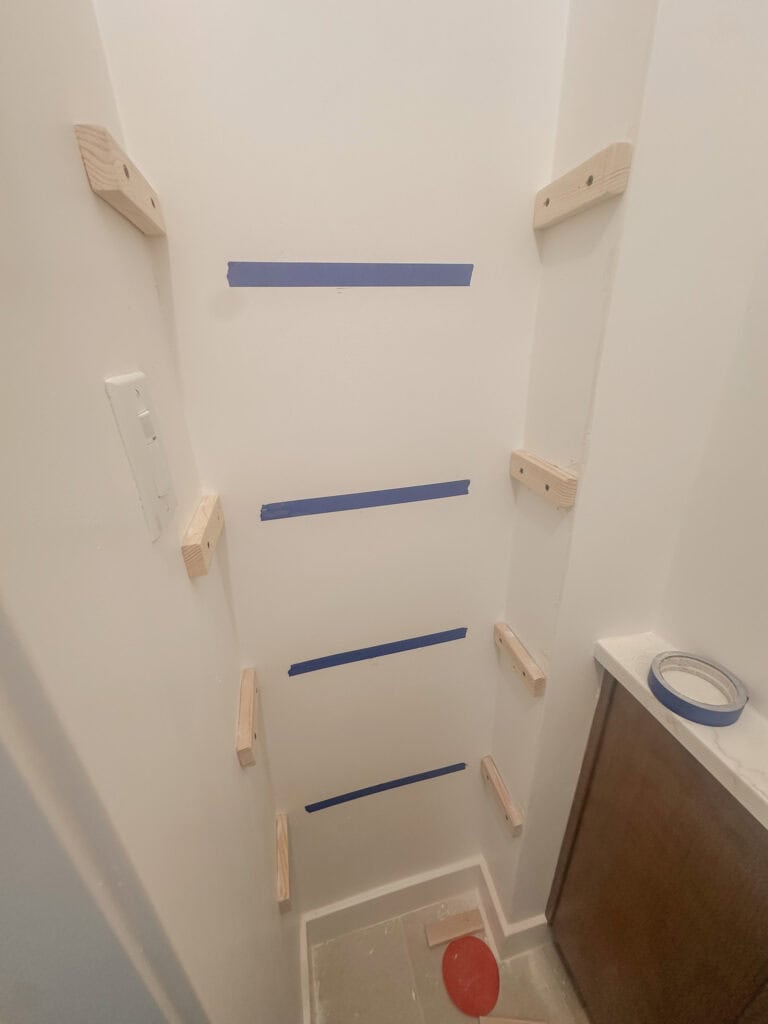
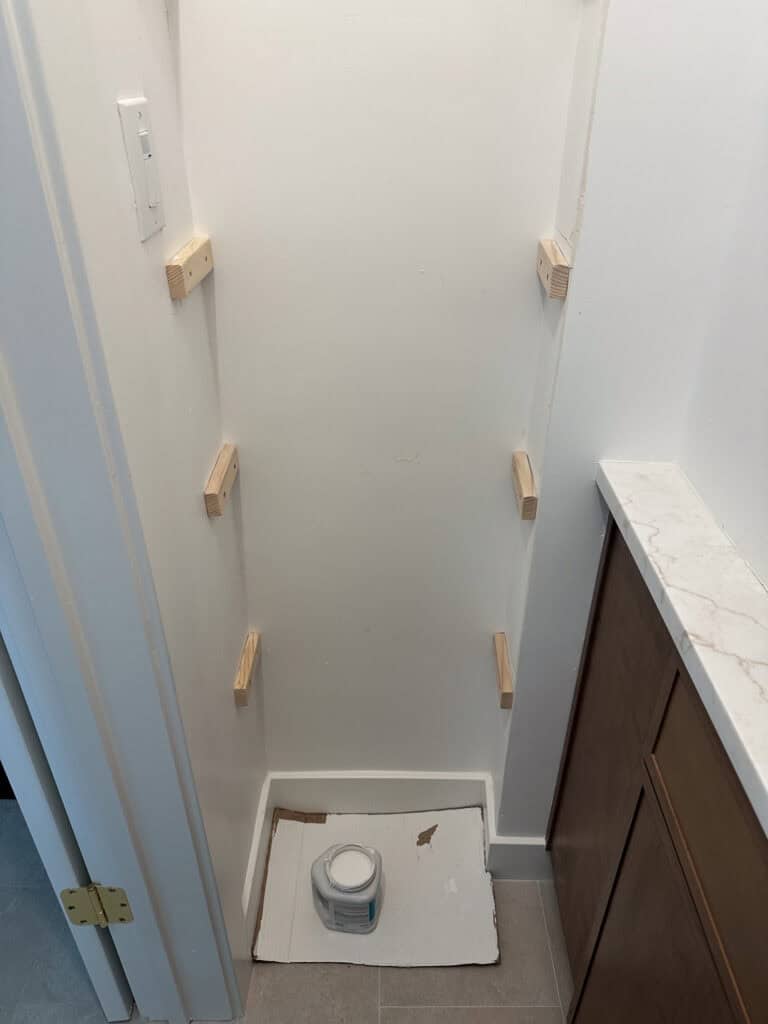
Step 2: Install the Cleats
The shelves sit on cleats (support strips) attached to the walls.
- Cut cleats about 1–2” shorter than the shelf depth.
- Locate studs with a stud finder. If possible, screw into studs for the strongest support.
- Level and install: Use a laser or bubble level to make sure your cleats are perfectly straight.
- For narrow shelves (under ~24”), side cleats are usually enough.
- For wider shelves, add a back cleat for extra support.
- Secure with screws. Pre-drill holes, then attach with 2” screws. If no stud is available, use drywall anchors.
Pro Tip: Hold the cleat in place, pre-drill into the wall, then add the anchor so everything lines up perfectly.
Here’s a quick guide on how to use drywall anchors if you are new to this.
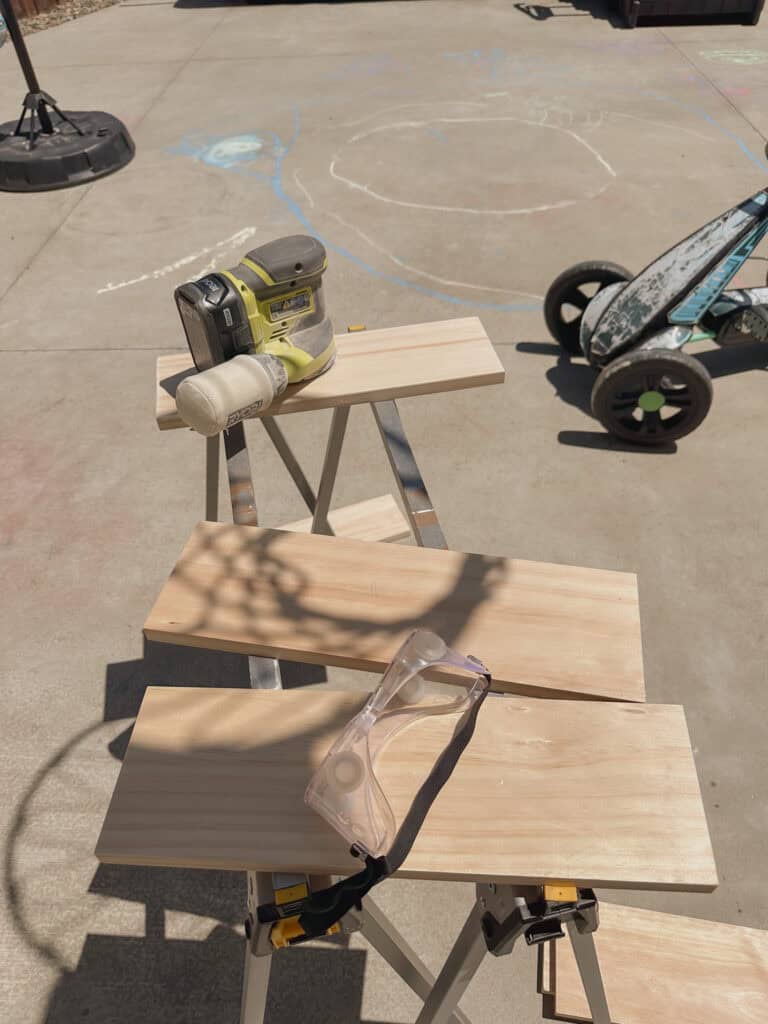
Step 3: Cut and Prep Your Shelves
Now measure and cut your boards to size.
- Material options:
- Pine or hardwood = stainable, strong.
- Plywood = sturdy and economical, will probably need paint, but there are some nice plywood sheets out there!
- MDF = smooth for painting (but avoid if moisture is a concern).
- Cutting tip: Big box stores will cut plywood and boards for you. Ask them to add an extra ⅛–¼” for sanding wiggle room.
- Test fit each shelf (dry run) before staining or painting. Walls are rarely square, so don’t assume all shelves will be the same width.
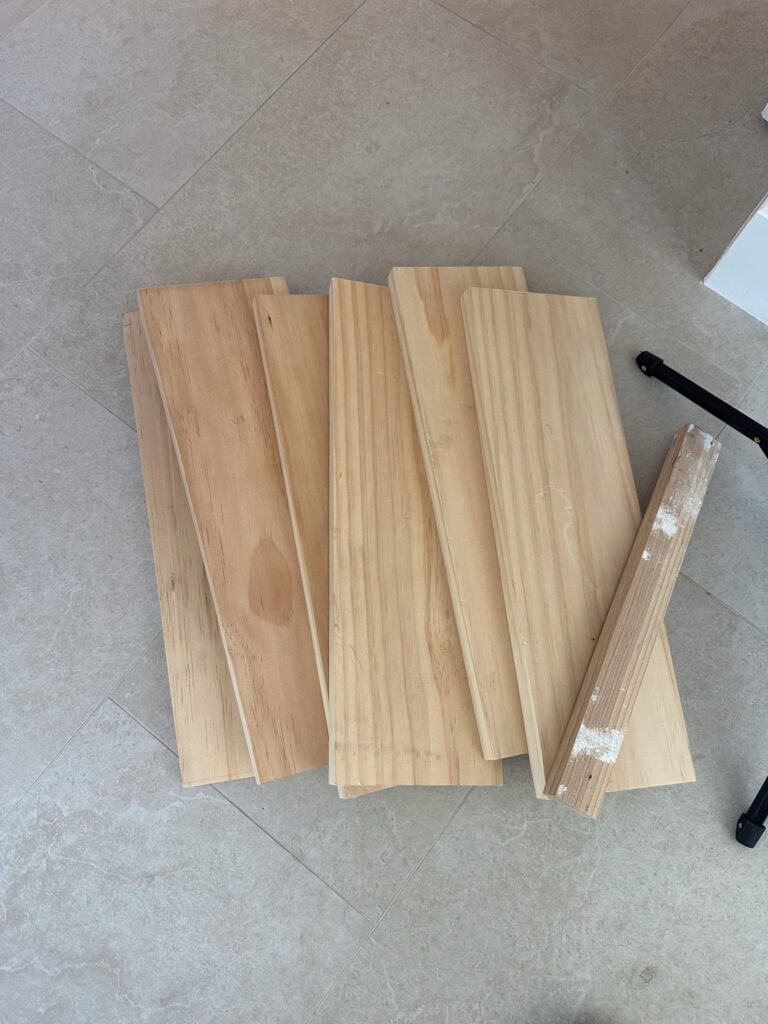
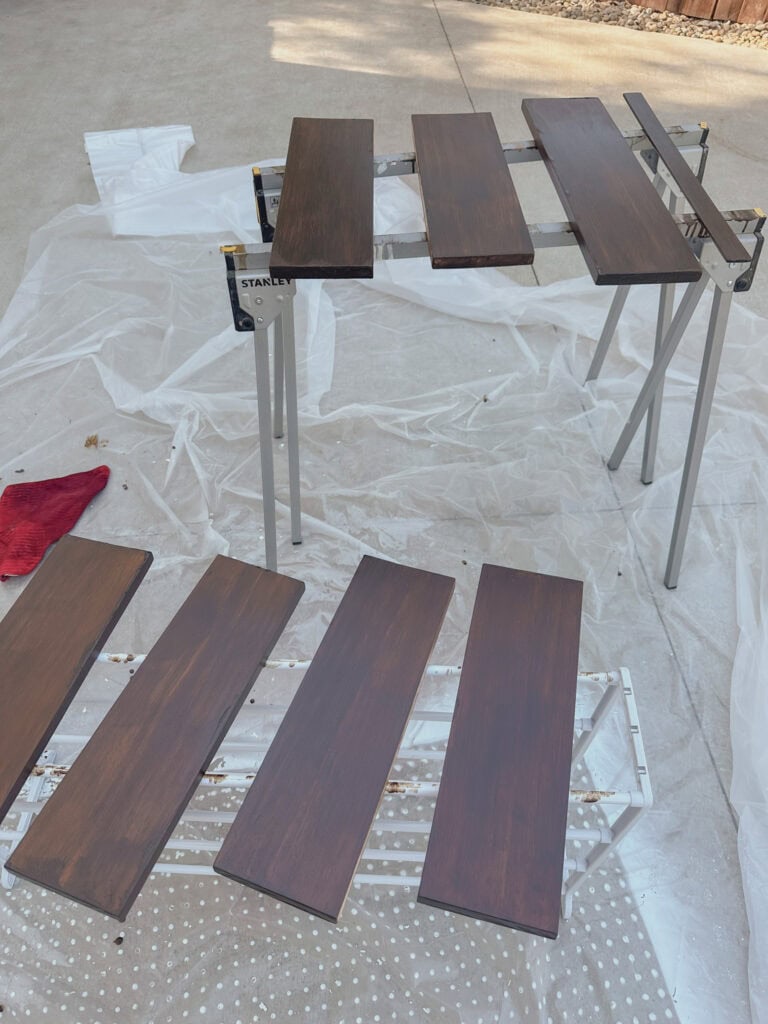
Because my walls are not straight, I labeled my shelves.
Step 4: Finish the Shelves
- Stain and seal: I used a stain + poly blend (Varathane, but Behr makes great options too).
- Paint: If using MDF, paint is a must since it doesn’t handle moisture well.
- Paint or stain cleats: I painted mine to match the wall so they blend in, but you could stain them for contrast.
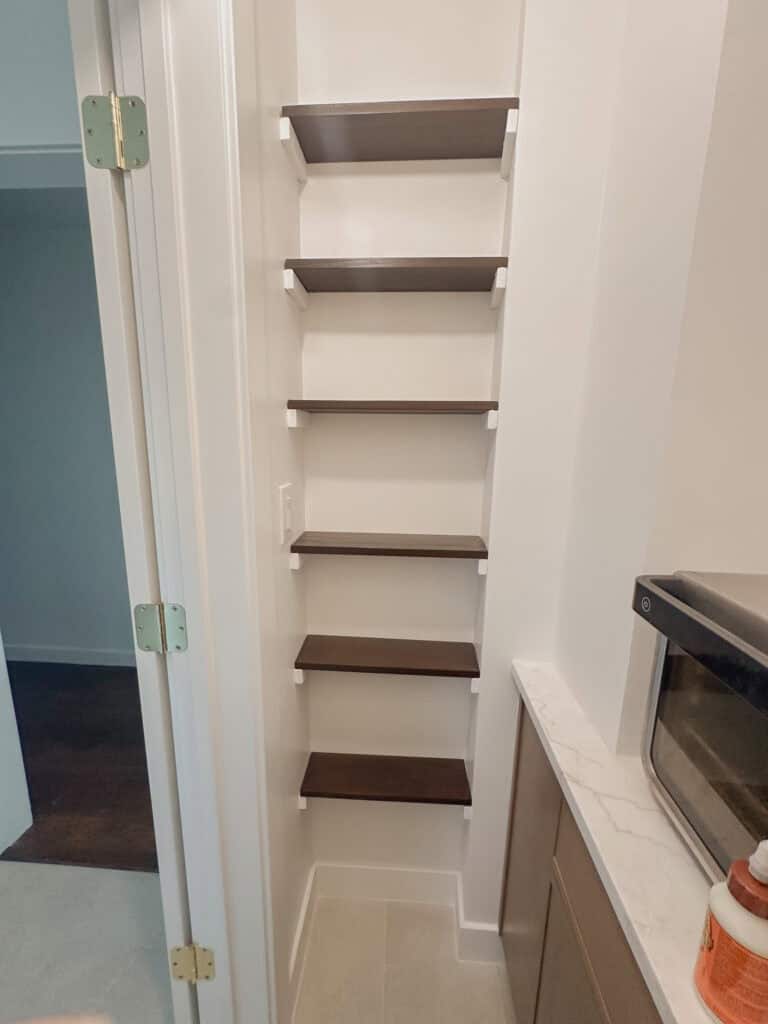
Step 5: Install the Shelves
- Run a bead of wood glue along the cleats.
- Set the shelves in place. A rubber mallet with a cloth helps if they’re snug.
- Secure the shelf in place with a nail gun or finishing nails through the cleats.
- Touch up wall paint if needed (sometimes shelves scuff as you slide them in).
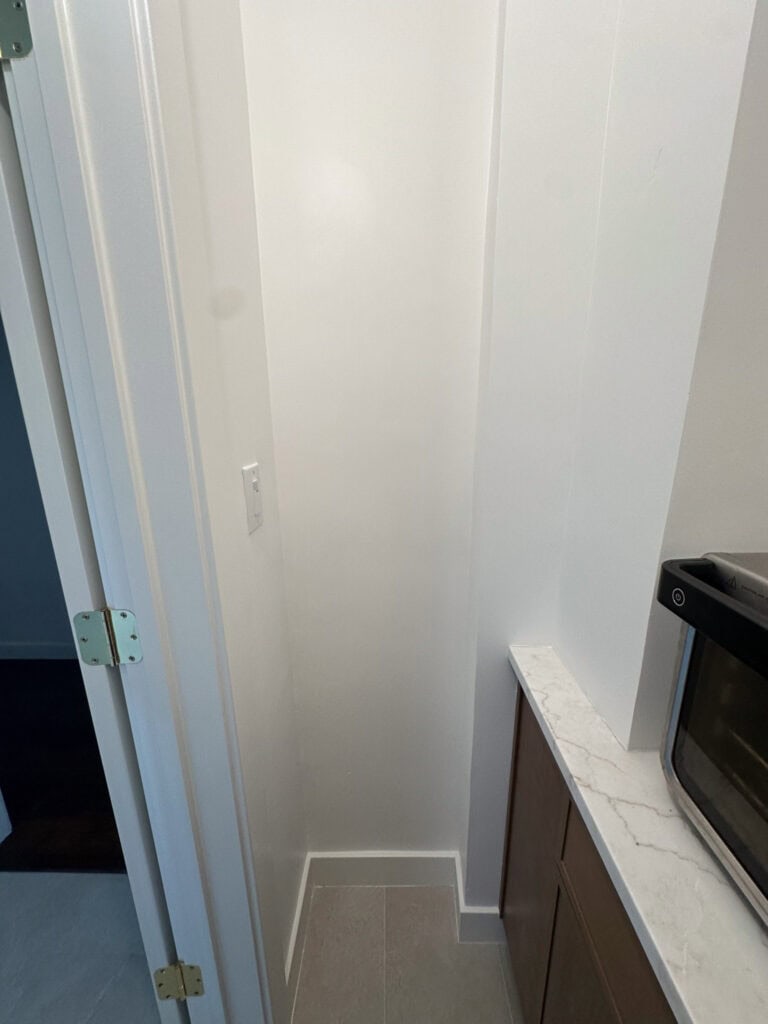
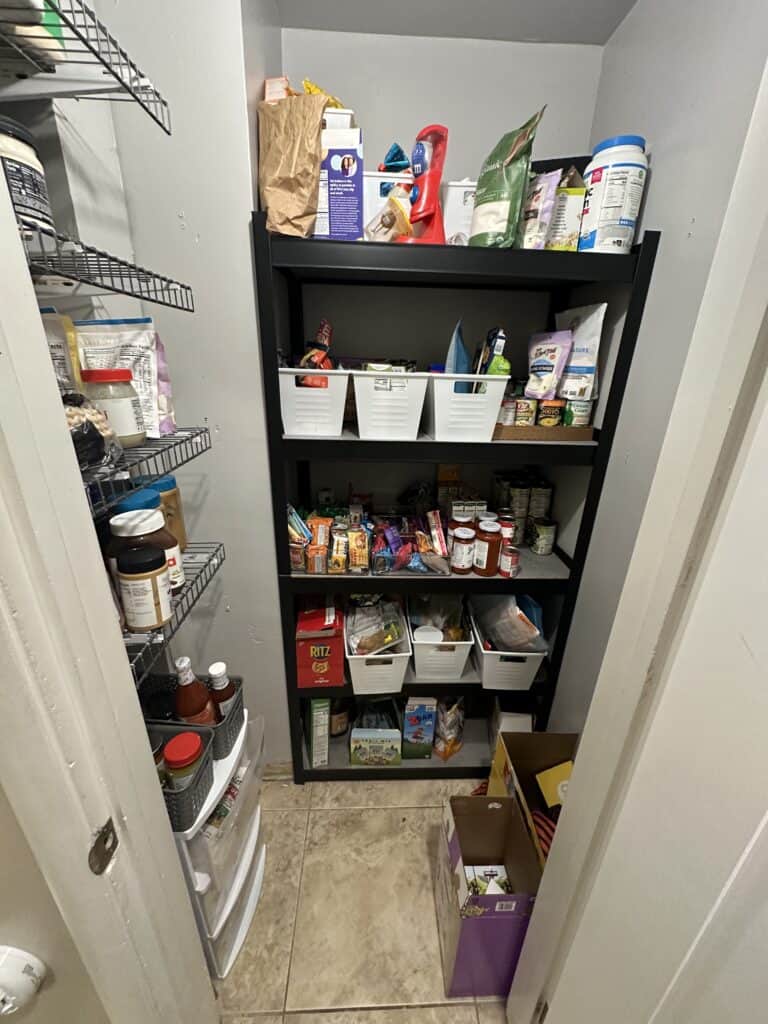
Our Pantry Before
Our pantry before was seriously a mess. The floor was literally not attached, just loose tiles that were barely hanging on. The shelves were so deep we kept losing things, and the wire shelves were just ugly.
And After
Created this adorable breakfast station with our air fryer and this adorable breadbox with reeded glass.
Optional: Make It Look Like Floating Shelves
My shelves are strictly functional, but if you want a more polished look, you have two beginner-friendly options:
- Add a front trim board: Attach a board slightly taller than the shelf + cleat combined (e.g., if your shelf is 1” thick and your cleats are 1×2, use a 1×3 trim board). This hides the cleats and gives the illusion of thicker floating shelves.
- Build an L-shaped cover: Join two boards at a right angle and slide them over the shelf so the front and top edges look seamless. This takes a bit more carpentry skill but creates a high-end look.
DIY Pantry Shelf: Beginner-Friendly Q&A
Q: How do I make sure my shelves fit perfectly, even if my walls aren’t straight?
A: Measure each shelf location individually. Walls are rarely perfectly plumb, so don’t assume all shelves will be the same width. For example, if your space measures 42¼” at the bottom and 42½” at the top, cut the bottom shelf slightly longer (e.g., 42⅜”) so you have a little wiggle room for sanding. Always dry-fit each shelf before staining or painting.
Q: What if I can’t find a stud where I want to place a cleat?
A: You can use drywall anchors to support your cleats. For wider or heavier shelves, try to locate a back stud for extra support and add a back cleat.
Q: My shelf wobbles or feels unstable—what can I do?
A: Check that all cleats are level and secured into studs or anchors. Add extra screws if necessary. If the shelf is wide, adding a back cleat can stabilize it. Using hardwood or plywood for the shelf helps prevent bowing.
Q: How much extra should I allow when cutting my shelves?
A: Add about ⅛–¼” to your measured width and depth. This gives room for sanding, slight wall imperfections, and minor adjustments during installation.
Q: Can I use MDF for pantry shelves?
A: Yes, but only if you’re painting them. MDF absorbs moisture easily, so avoid using it near sinks or anywhere it might get wet. Pine, hardwood, or plywood is better if you want to stain or have a more durable shelf.
Q: How do I hide cleats to make my shelves look like floating shelves?
A: Two beginner-friendly options:
- Front trim board: Attach a board slightly taller than your cleats + shelf thickness.
- L-shaped cover: Join two boards at a right angle and slide them over the shelf. This makes the front and top edges look seamless.
Q: Any tips to avoid scratches during installation?
A: Place a soft cloth over the shelf and use a rubber mallet to gently tap it into place. Keep touch-up paint handy for walls, and handle boards carefully after staining or painting.
Q: How high should I space the shelves?
A: Base it on what you’re storing. For stacked cans, measure the total height of the stack and add 1–2” for breathing room. For small appliances, measure the tallest item plus a few inches. Using painter’s tape on the wall is a great way to visualize shelf spacing before installing anything. Don’t forget to account for the width of the shelves themselves. I used 1-inch wide painter’s tape to mimic the width of my shelves.
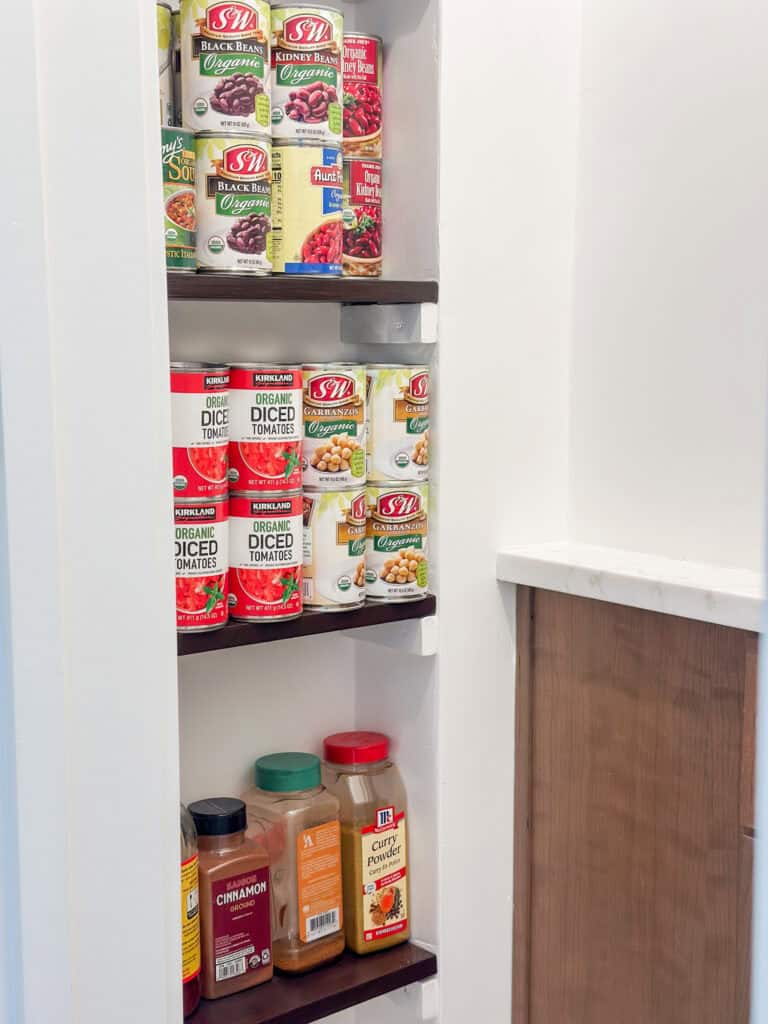
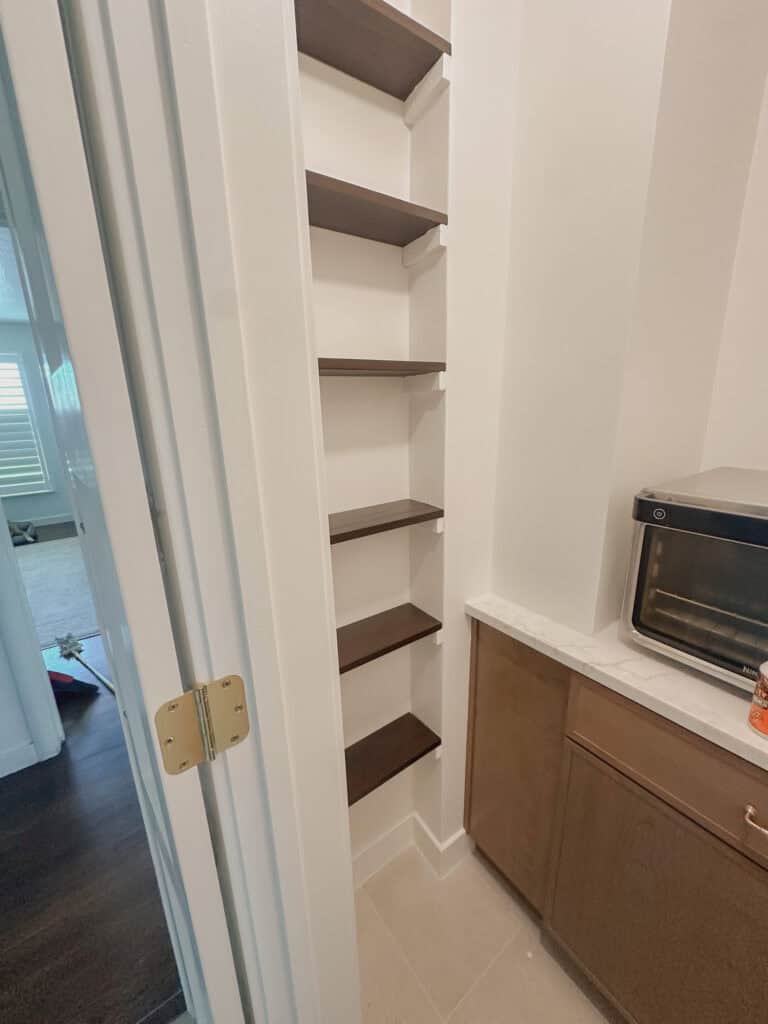
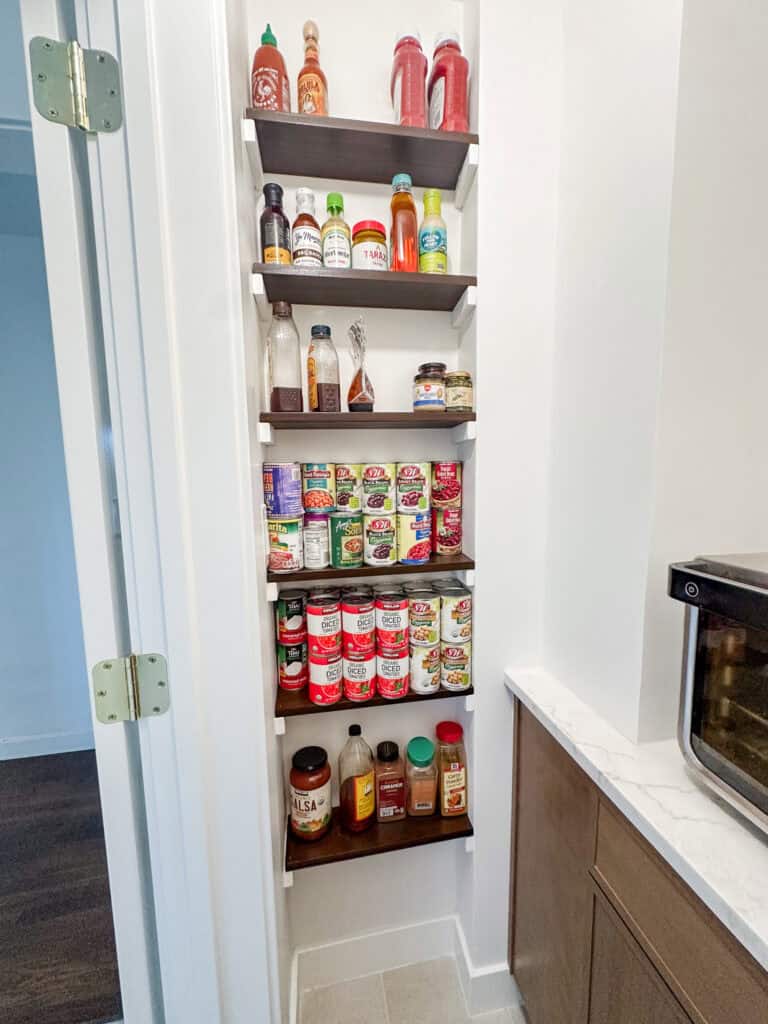
The Finished DIY Pantry Shelf
Once installed, I filled the shelves with canned goods, jars, spices, and backstock. I love the way it turned it out, and honestly, it feels like a mini store. No more overbuying because cans were lost in the back of a deep pantry!
This was my first time building shelves, and it was much simpler than I expected. If you’re intimidated, I promise this is a great beginner project. And if you have questions, leave a comment—I read and reply to every one.
Happy DIYing, friends!

Join the List
Stay up to date & receive the latest posts in your inbox.