How to: Tips for Painting Striped Walls and Bathroom Makeover Featuring the Ugliest Shower
This was possibly one of the hardest painting jobs I’ve ever undertaken, but was it worth it? Spoiler alert: Yes, but buckle up for the journey. In this guide, I’ll explain the process of painting striped walls and plead with you to only proceed if you’re prepared for the challenge ahead. Like climbing Everest, this task takes training, personal fortitude, and endurance.
Okay fine, it’s just painting, but it was hard!
Full disclosure: my struggles might have had something to do with the fact that I’m physically incapable of starting just one project at a time. While tackling these stripes, I was also making over the entire bathroom, working on our mudroom, and refinishing nightstands for our bedroom. (Hi, my name is Jen, and I’m a chronic project multi-tasker.)
I did show some restraint, though! I managed to resist updating what might actually be the world’s ugliest shower as I knew that was too big a project to take on simultaneously. Someday I’ll paint it, or microcement it, or send it back to the fire chasm from whence it came – but that’s a post for another day!
So, learn from my mistakes: if you’re painting striped walls, DO ONE TASK AT A TIME! Trust me, your sanity will thank you later.
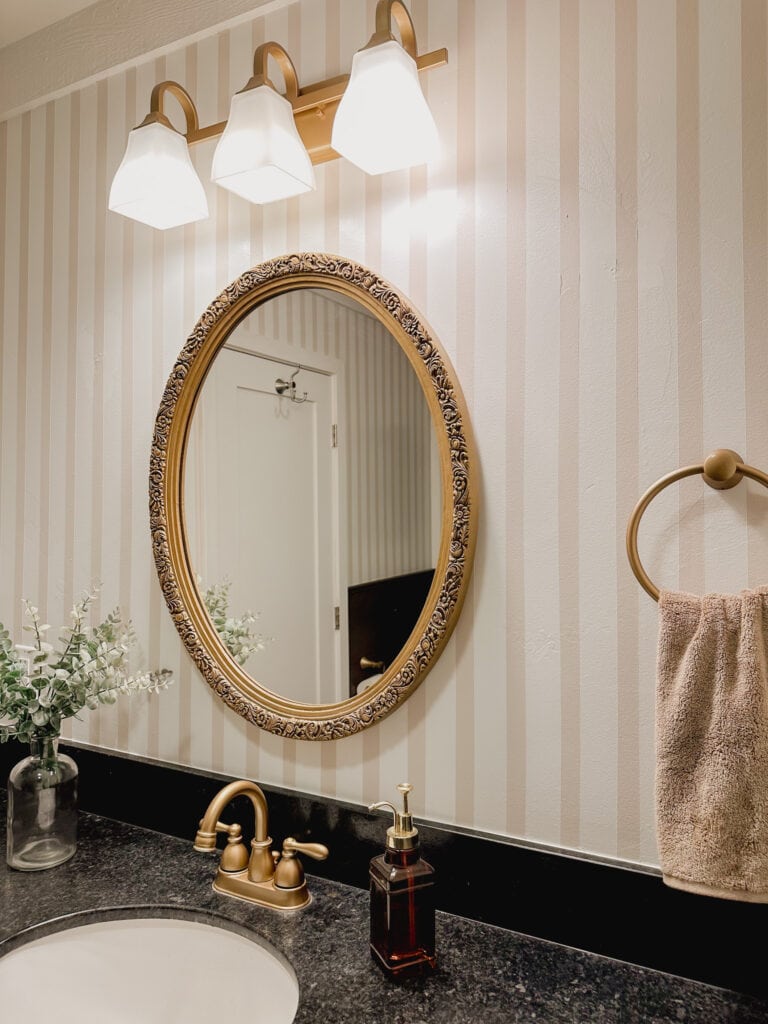
But look how pretty it turned out!
As an Amazon Associate, I receive a small commission (at no additional cost to you) for qualifying purchases on items purchased through the links in this post.
The Aforementioned Shower of Nightmares
Let me introduce you to what we not-so-affectionately call “The Sarcophagus.” It’s hard to describe the terror that is this basement bathroom shower. I’m sure you’ve seen ugly showers before, but I’m fairly certain you’ve never seen one like this. I know I hadn’t. The sheer audacity of its construction is mind-boggling, and I can only imagine the questionable decisions that led to its creation. Just think- someone, at some point, spent a considerable amount of time bringing this monstrosity to life.
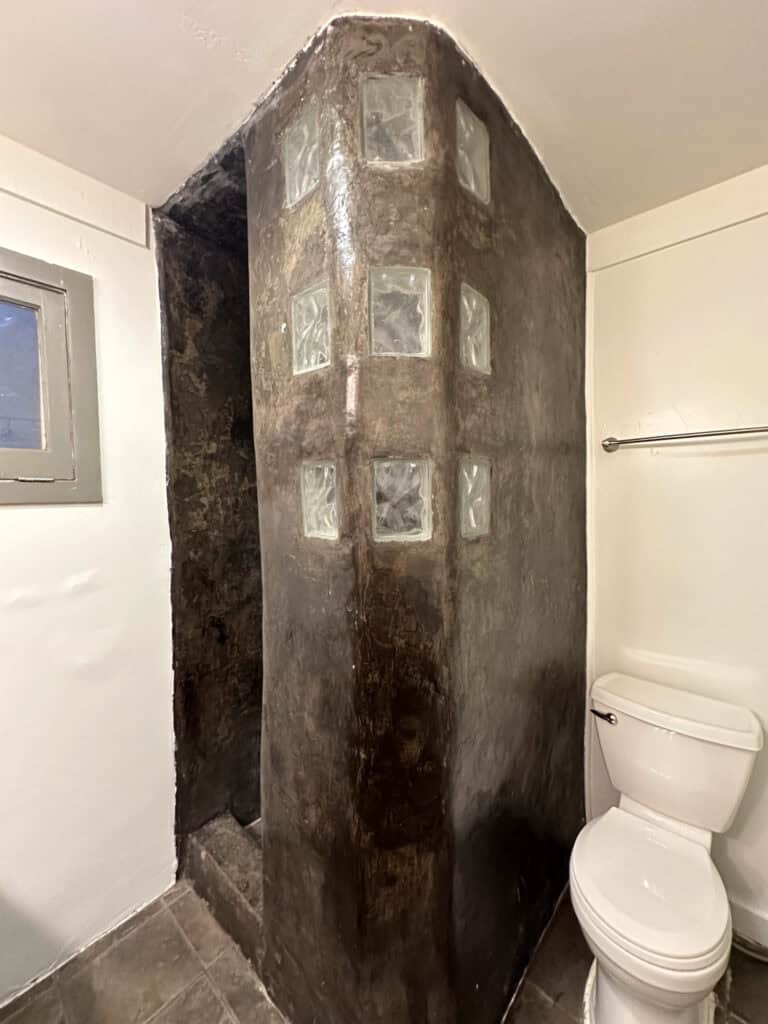
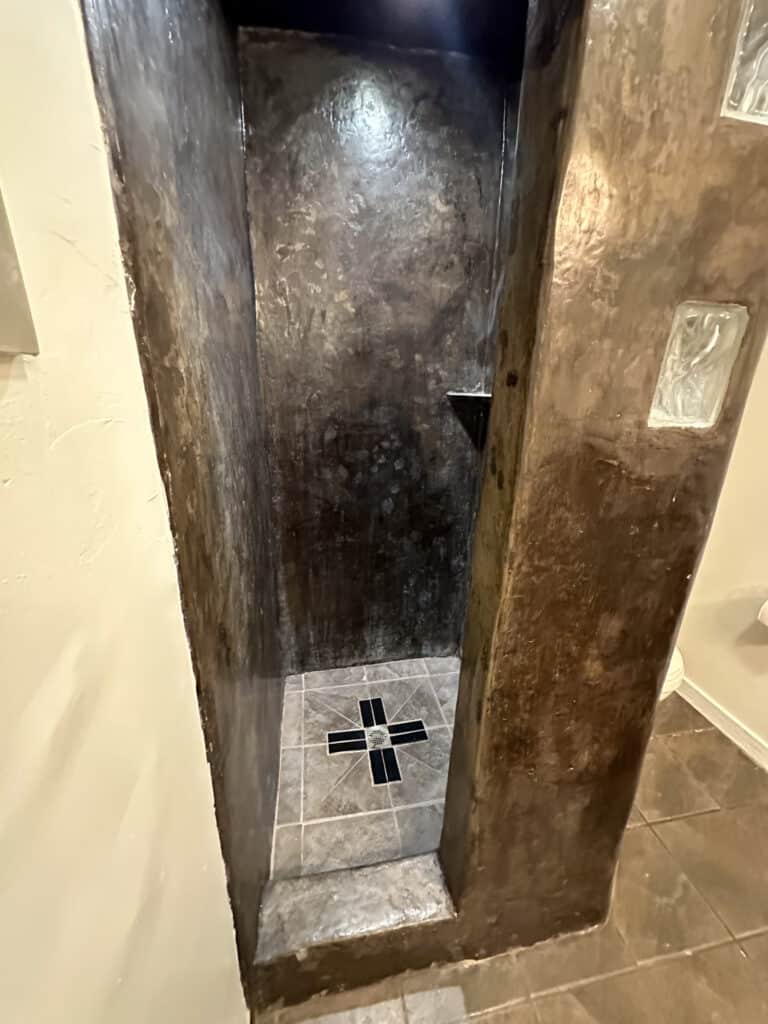
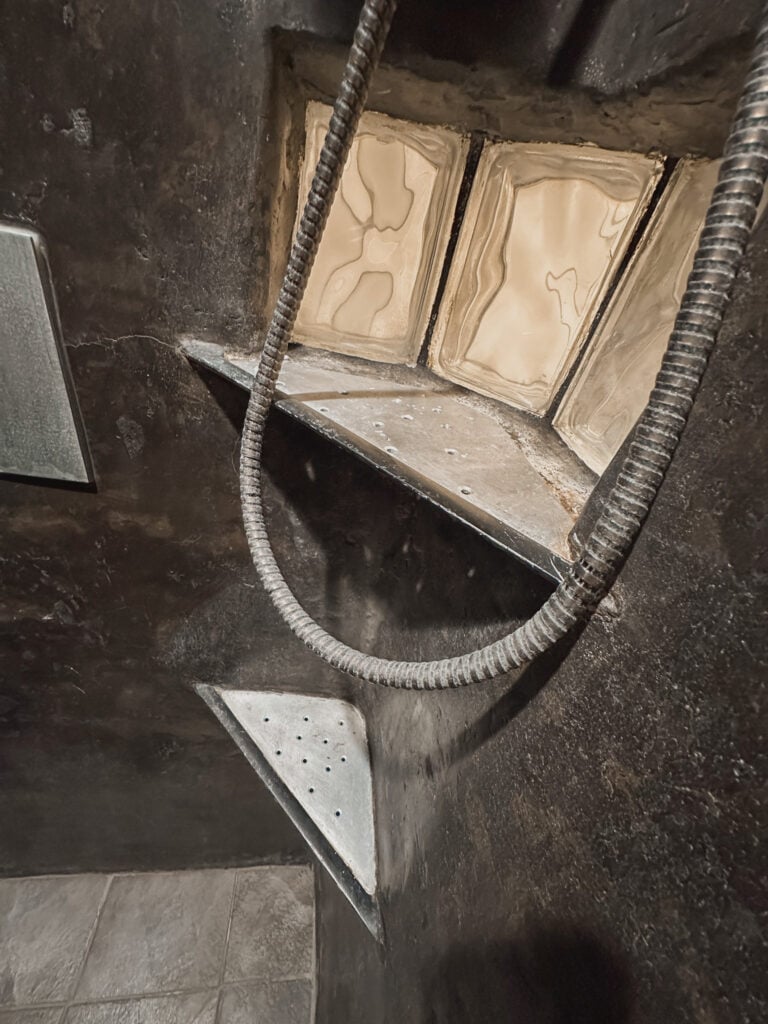
This dark dungeon of a shower is in our basement bathroom. Our basement is primarily used as the entrance to the garage, our laundry room, and a playroom for the kids. Because of its low-traffic status, I’ve managed to ignore it—most of the time. But I’d be lying if I said it hadn’t almost dissuaded me from buying the house. Still, we did, and now we’re stuck with it.
Now, take a moment and picture this shower in all its terrifying glory: Would you feel like taking a relaxing shower in it? Or does it feel more like something out of some terrible and far too gruesome B horror movie?
As terrible as it is, this cavernous shower, has to stay for now. But, with family coming soon and a kid’s birthday party to host, it’s time for me to tackle the rest of this cold, lifeless basement bathroom.
A Vision for the Basement Bathroom Makeover
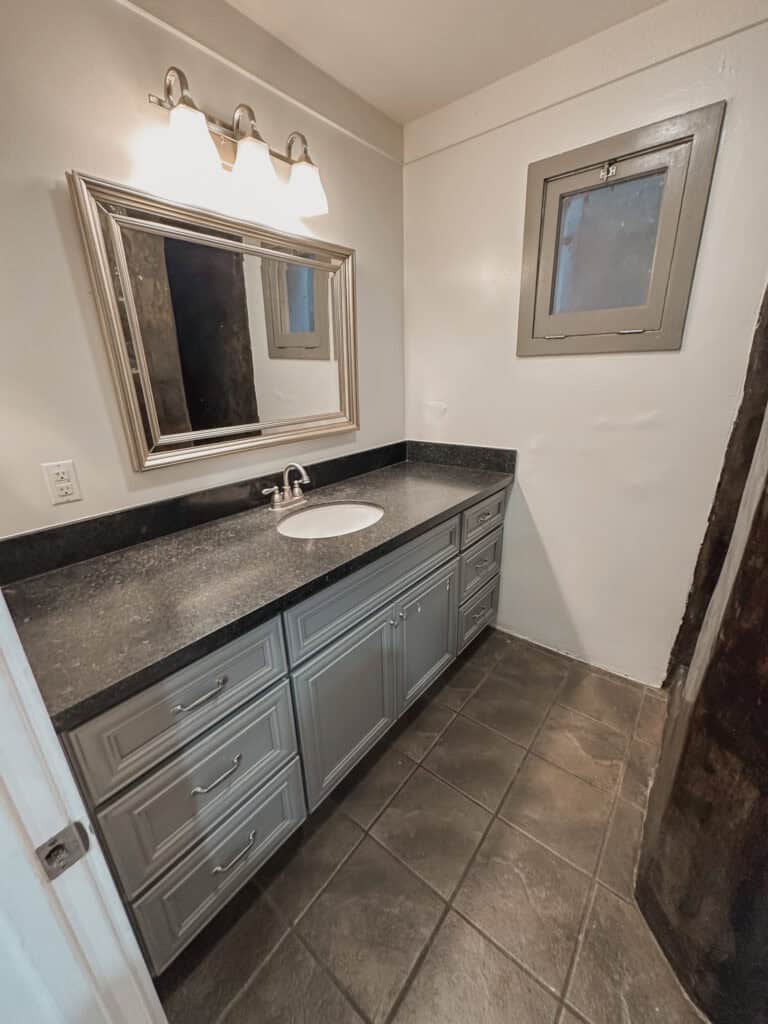
The current state of the bathroom can only be described as grim. Everything is either brown, gray, or black, with zero warmth. When we moved in, the walls and ceiling were painted a dark gray, the vanity was the same, and the cold, chrome hardware just added to the gloom. It’s cold on cold on cold, and if there’s one thing I can’t stand, it’s a space devoid of any sense of life or energy.
My personal style leans warm and vibrant, with earthy tones that make a space feel inviting. So, this all-black-and-gray aesthetic is not working for me. Even though the bathroom gets very little use, I want to transform it into a space that at least feels pleasant when I’m down there and for the kids.
Since we’re about to embark on a big kitchen and upstairs bathroom renovation, my budget for this basement makeover is limited. But I’m determined to give it a facelift for under $250. I’ll work with what I have, focus on small but impactful changes, and make this dark cave a little less terrifying.
The Plan For the Room and Painting Striped Walls
For this basement bathroom makeover, I wanted to go bolder than my usual style. The bathroom is primarily used by kids, but since it’s located in the basement of our 80-year-old home, I wanted the design to balance both fun and vintage elements. I think I pulled it off, and the kids approve!
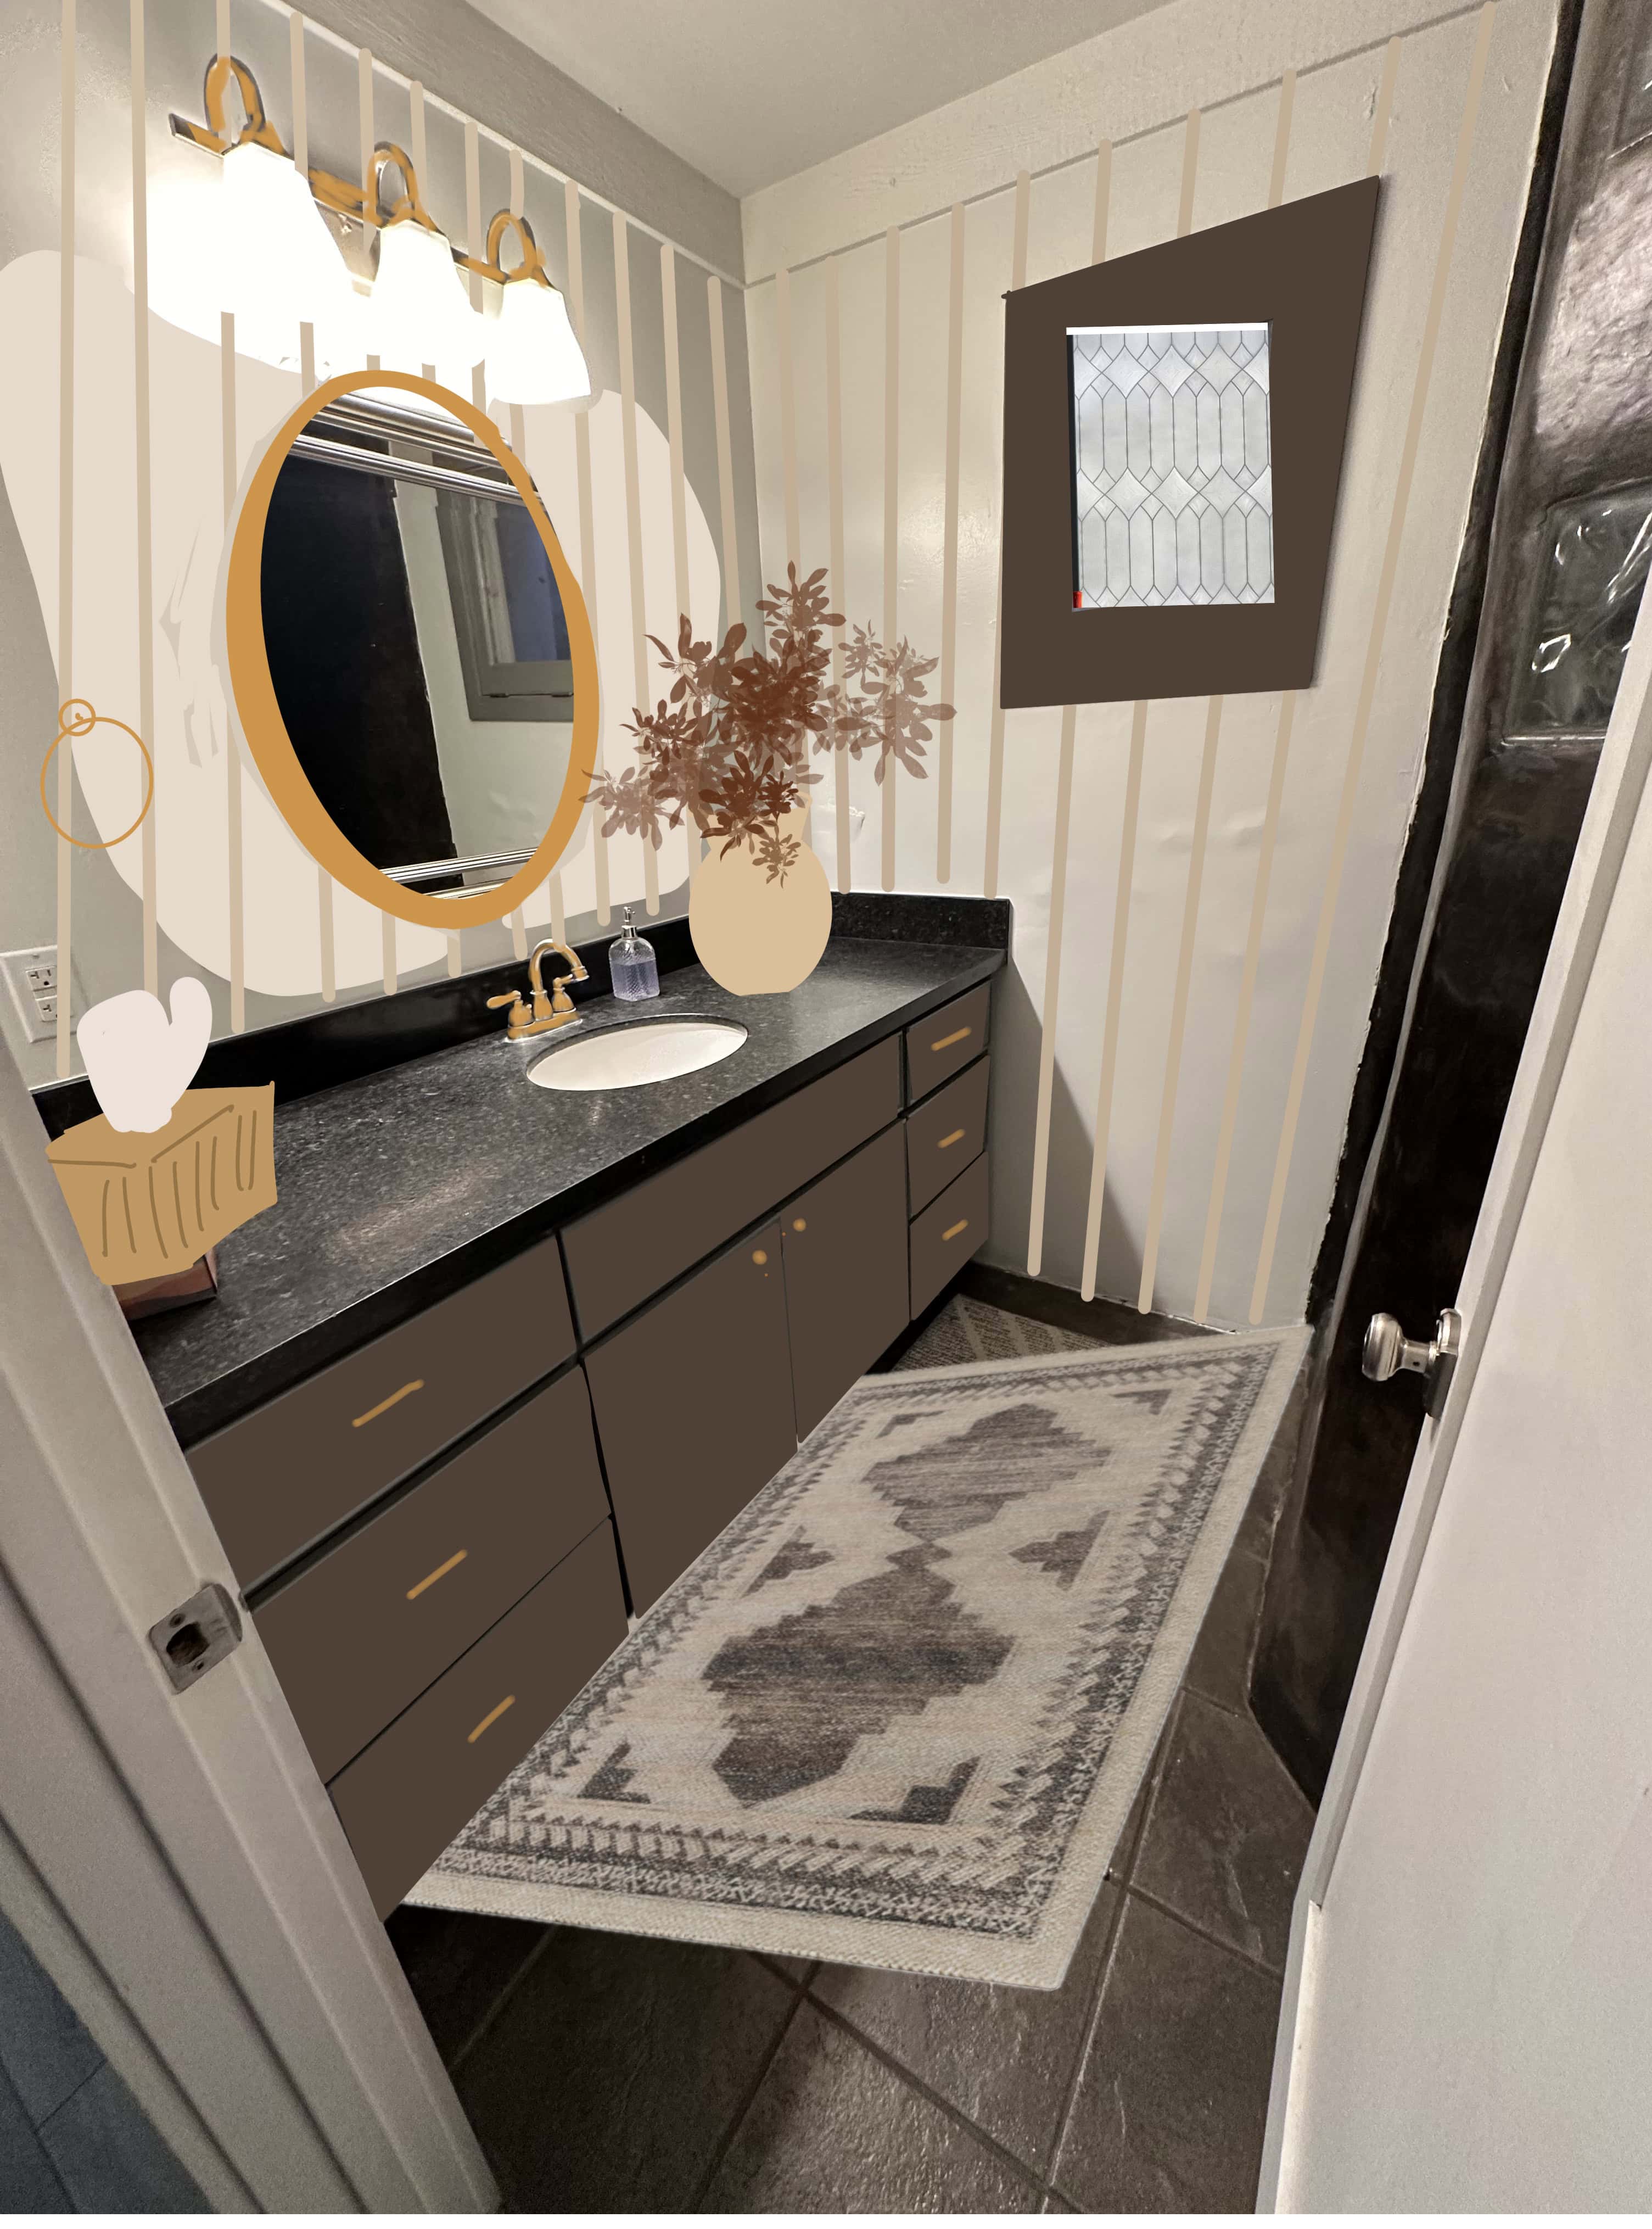
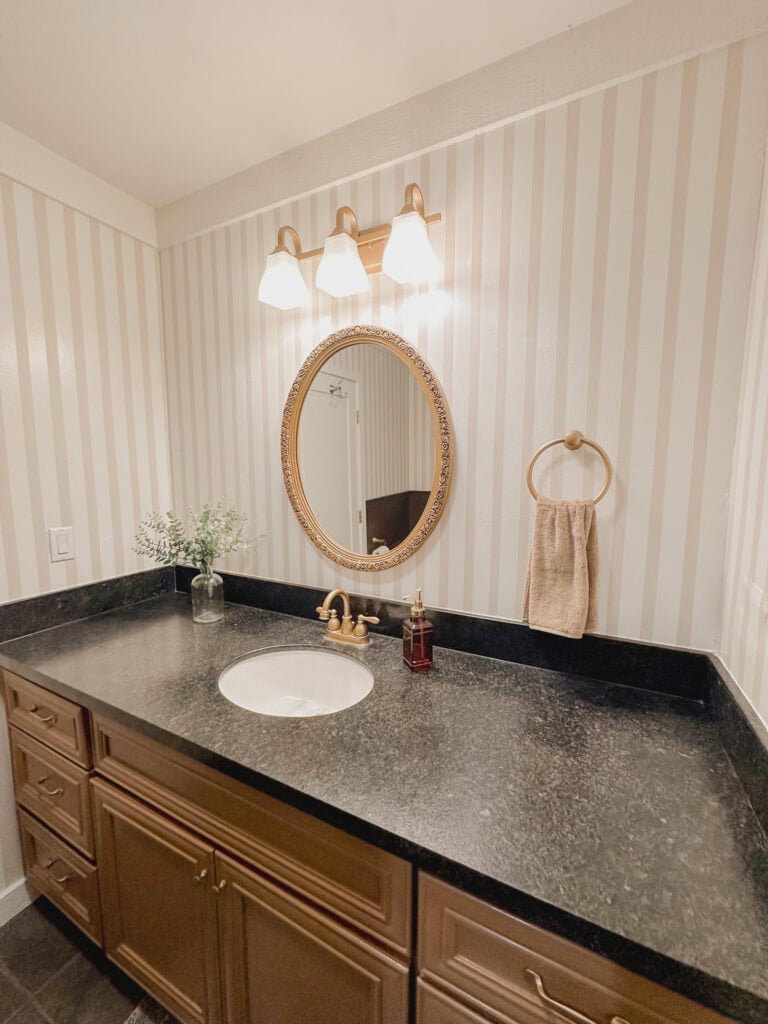
While I can’t tackle the outdated shower just yet, I embraced the space’s natural moody vibe and made it work. A key feature of this transformation is painting striped walls. With some help from my husband and a laser level (trust me, this tool is essential for straight lines!), we carefully taped and painted the stripes. The mix of stripes with the rest of the room adds a playful yet refined touch, while the brown vanity and accent wall maintain a vintage feel.
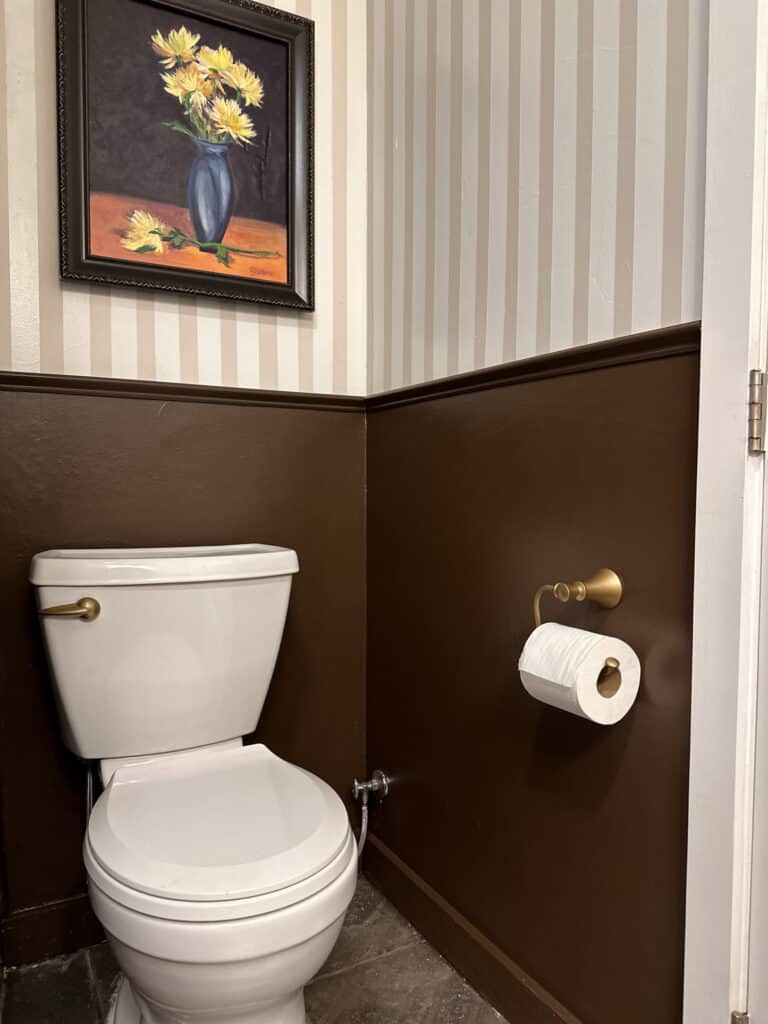
To complement the striking walls, I added an antique mirror I found on Facebook Marketplace and spray-painted the fixtures and hardware in a beautiful aged brass color. I also painted the vanity and the lower wall around the toilet in rich shades of brown. These updates, though bold, create a cozy, vintage atmosphere that plays off the room’s moody undertone while feeling intentional and a little whimsical.
I like start every project by digitally drawing over a photo to get an idea for for the colors in the space. Here’s my drawing for this project.
Step-by-Step Guide for the Bathroom Makeover and Striped Wall Painting
With a tiny budget, every change needs to count. I’m not ripping out the shower just yet—though I desperately want to—but I can make some updates to the room to at least bring it closer to my style. Here’s what I did for this bathroom makeover.
1: The Deep Clean
Before any major changes, the first step is the simplest: a deep clean. This bathroom, as I mentioned, is rarely used—except by our kids and the occasional spider. I’m not proud to admit it, but I only clean it every few months because life is just that busy. So, it desperately needed some attention.
Deep cleaning isn’t glamorous, but it makes a huge difference when prepping a room for updates. I tackled every corner, from the cobweb-covered ceiling to the dingy tile floors. I paid special attention to the walls and cabinets, which are going to be painted, and I gave the shower—yes, that shower—a solid scrub. Not that it helped much, but at least it no longer feels like it belongs in a dirty dungeon.
2. Demo and Prep
Remove any fixtures or elements you need to touch up, paint, or paint around. First I removed the light fixture and toilet paper holder to spray paint them. I removed the light switch covers to paint the walls. Lastly, I removed the mirror, which I replaced with a new mirror. I also removed the rug, towels, and soap dispenser.
Note: keep track of which screws and hardware go with each fixture. I like to put the screws and hardware for each item into a bag or container or tape them to the object so they don’t get lost while I am working and moving things around. For example, when I took down the light fixture, I taped the screws to the mounting bracket on the backside so I wouldn’t lose them. I put all the light switch and outlet covers and their corresponding screws in a Tupperware.
After Cleaning, It’s Time to Prep for Painting
To paint the walls:
- Use painter’s tape and drop cloth to protect the floor and countertops (or whatever you need to protect).
- Cover light switches and outlets.
To paint the vanity:
- Remove the knobs and/or pulls from the doors and drawers. Note: Put the knobs and pulls and the screws used to secure them in a container so they don’t lost!
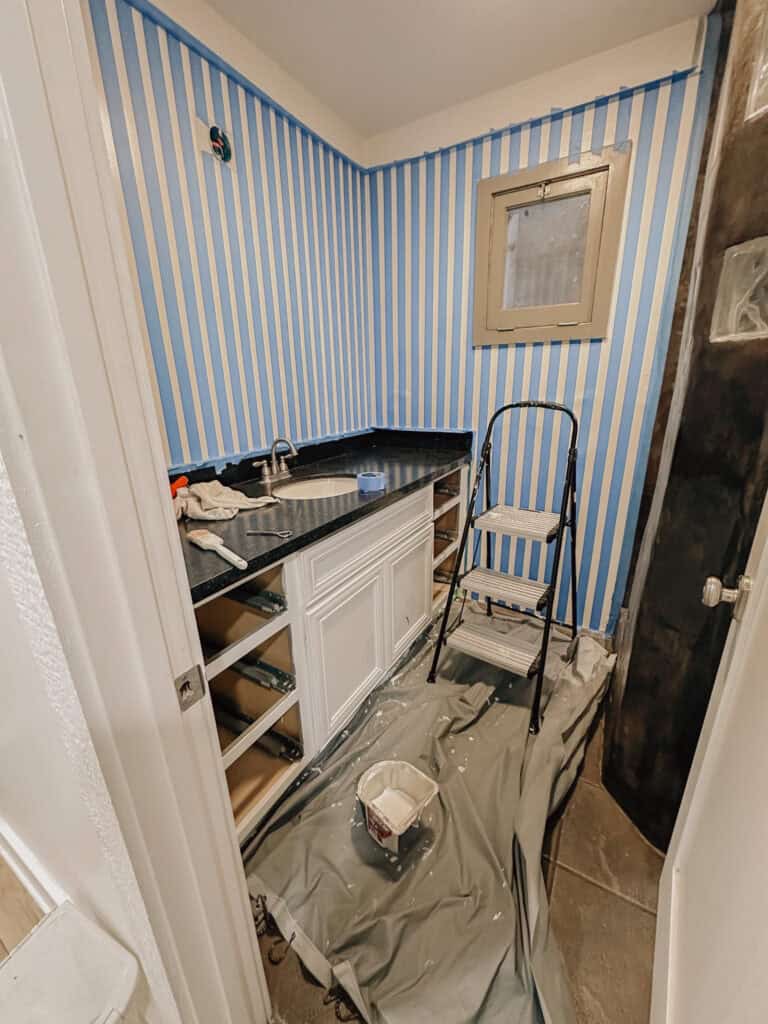
- Remove drawers and doors and relocate to your painting area. (I laid out a drop cloth in the middle of our basement). Don’t skip this step. It is tempting to paint the vanity with doors and drawers in place, but I promise you it is more work to paint them in place AND the end result will be worse! Removing the doors and drawers will give you the best results and prevent dripping!
- Tape off around the face frame of the vanity to protect the countertop, floor, and walls.
3. Painting Striped Walls: A Labor of Love and Creativity
As I subtly hinted at the beginning, this was time-consuming but worth it!
To start this project, you need to make some decisions:
- Choose the color for your stripes- this can be bold or subtle. I opted for beige on white walls for this room.
- Choose the width and frequency of your stripes. There are so many ways to do this so let creativity flow. You can choose super thin pinstripes spaced out every 6 inches, or you can do wide and even stripes. Choose what works for you!
If you aren’t experienced with painting this might be new and a little confusing. The areas you tape will remain the existing wall color. The exposed areas will be the new color.
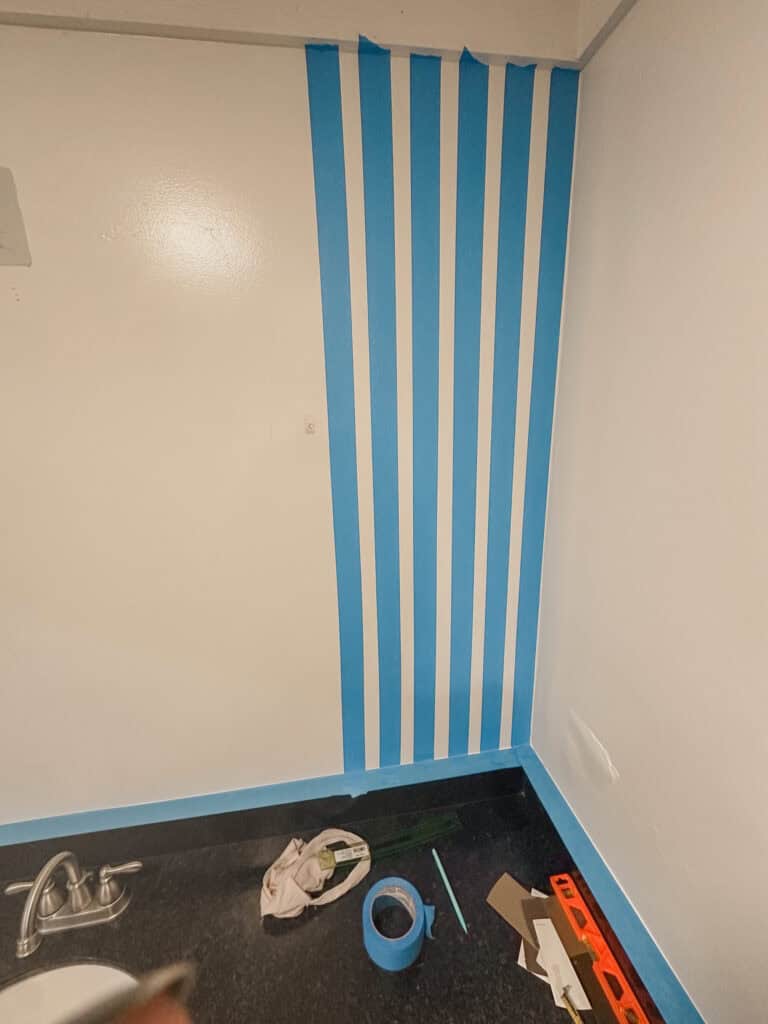
I wanted an almost even striped pattern, so I used 2-inch painters’ tape (which is really more like 1.88 inches) and I left a gap of 1 inch between the tape lines. You can choose any width you would like.
When you have decided on your pattern, it is time to start taping!
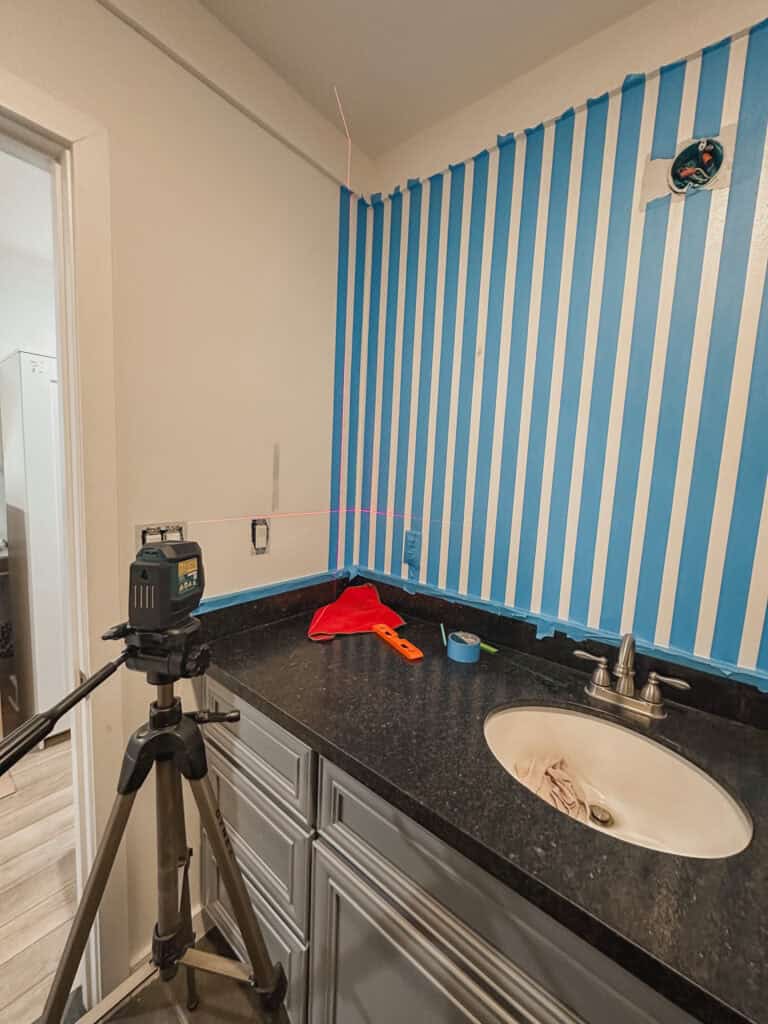
- Use a laser level to get perfectly straight lines. Trust me, I thought I could get away with it and I started using a standard level and “eyeballing it”- my lines were hilariously off. I bought a laser level from Bosch and quickly realized I needed to retape the entire first wall. Luckily I had only done the short wall above the vanity at that point! When it comes to painting striped walls, perfectly straight lines are a must, and so is a laser level!
How to Paint Striped Walls Without Bleeding?
Paint over the tape with the existing wall color first to prevent bleeding!
Before painting your striped walls, paint your basecoat (the color of the wall) over the tape, or the area you wish to add your stripes and allow it to dry for at least 4-6 hours, preferably overnight to allow it to cure.
Then paint two coats of the color of your stripes directly on top of the coat you just applied. I did this rapidly, one coat right after the other. Allow about 1 hour between coats. When the wall is dry to the touch, apply the second coat.
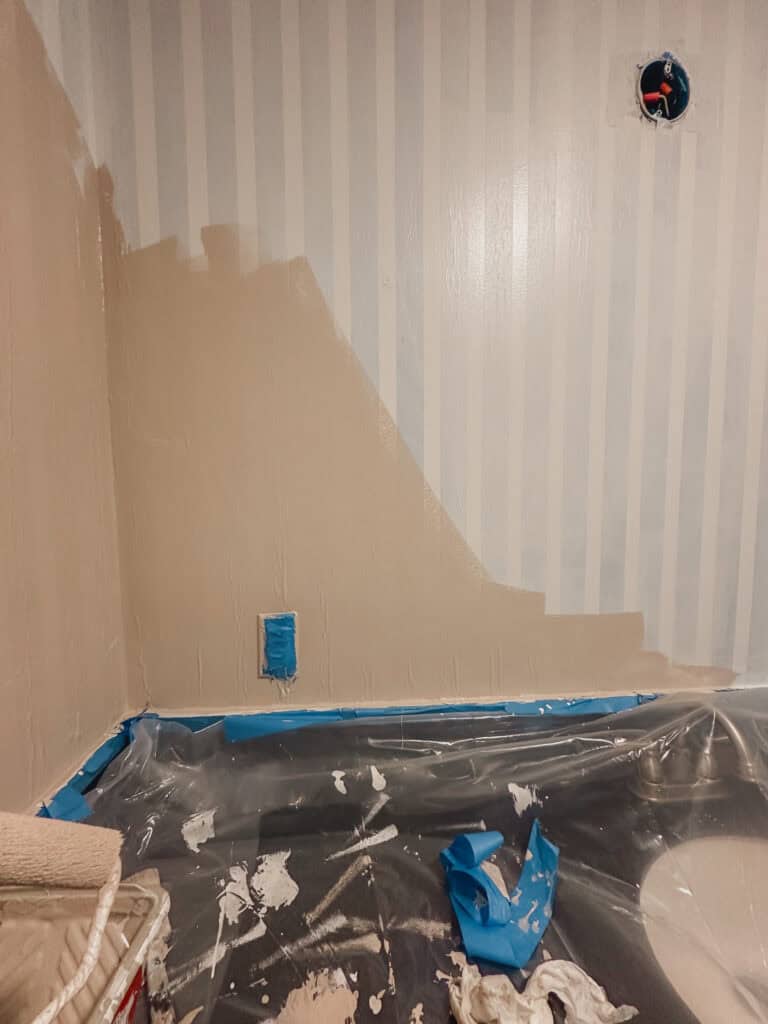
After the second coat, allow the wall to dry to the touch. This might take anywhere from 1-2 hours. Remove the tape as soon as it is dry to the touch to get the cleanest lines. Do not wait until the next day because the tape will start to break down and be hard to remove and your lines will not be as crisp.
Touch-ups: the tape worked pretty well but I had a few issues so I had to take a small brush and make a few corrections. I should have used Frog Tape for cleaner lines, but I already had lots of blue tape on hand so I tried to make that work. If you are buying tape for this project, I recommend Frog Tape.
Color Consideration for Painting Striped Walls
You can choose any color you like, but because painting striped walls already makes quite a statement, I suggest using a muted and desaturated color for the stripes. Think beige, taupe, light greens, airy blue, petal pink, etc.
The walls in this bathroom were painted Pure White by Sherwin Williams and the beige for the stripes is a color mixed from several paints I already had. I wouldn’t necessarily recommend mixing your own paint color unless you have a pretty decent understanding of color theory and know how to balance any unwanted hues that might emerge.
I did buy new paint for the half-wall area around the toilet in the shade Dark Truffle by Behr.
When mixing the color for the stripes, I added a little of the Dark Truffle paint so the colors would relate to one another.
4. Refreshing the Vanity
I am on a mission to remove all the grey from this house and this dark gray vanity is next on the list. While don’t have the budget to replace it, a fresh coat of paint will work wonders. I went with a bright camel brown color that I feel compliments the black countertops and brings a lot more warmth to the room.


Painting cabinets might be my least favorite task ever and I have so much of this awful shiny grey cabinetry in our house. Our primary bathroom and walk-in closet have the same cold grey cabinetry.
But I will say that having the right materials makes all the difference! I have painted many vanities in my day and typically just used whatever latex paint I had on hand. While that is one way to do it, it was so much easier with self-leveling, super smooth enamel paint created for this specific purpose.
I used Behr Cabinet, Door, and Trim Enamel in satin finish in the color Wild Mustang. Honestly I’ll never go back to regular paint for cabinetry. I love that you can get this tinted in any Behr color you want and it performs beautifully.
Because the surface of the cabinets was extremely glossy, I started with primer to enhance paint adhesion and prevent/ reduce scratches. I used this bathroom and kitchen primer by Behr.
Don’t Skip the Prep Work!
Make sure to take the doors and drawers off before you paint. I was being a little lazy at first and only took off the drawers, but not the doors. That was dumb. It was harder to paint around the hung doors than it would have been to take them off and the paint pooled and dripped around the doors, so I had to let the primer dry and then sand it off and prime it again.
Learn from my mistake, and take the drawers and the doors off!
I did two coats of primer and two coats of cabinet enamel from Behr in Wild Mustang.
I used a 2-inch angled brush to cut in and a 4-inch foam roller to smooth the doors.
3. Updating the Hardware and Fixtures
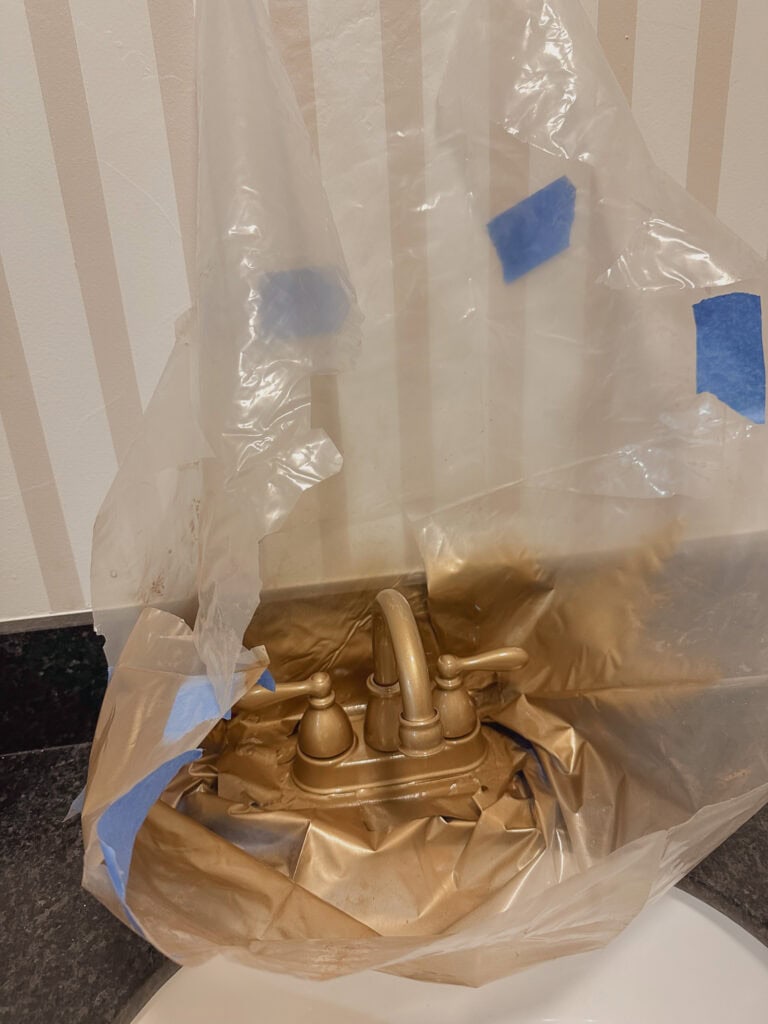
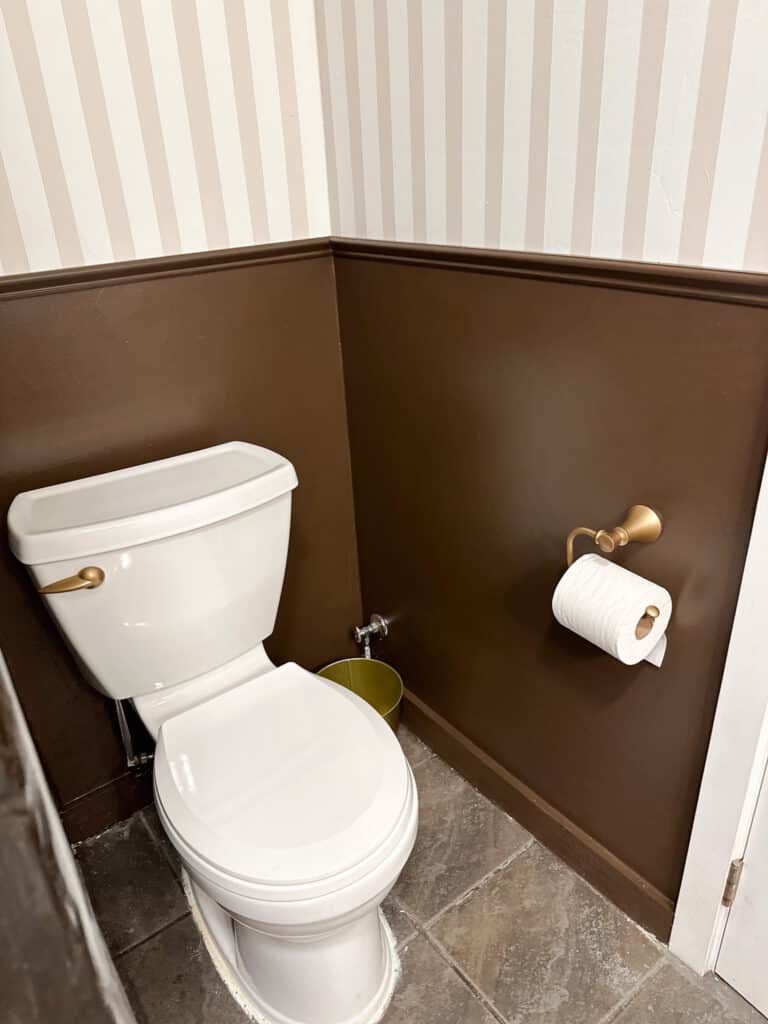
The chrome hardware in this all-grey and black bathroom felt cold and uninviting. Since I’m more drawn to gold and brass, I decided to spray paint the existing hardware and fixtures to save costs. I used Rust-Oleum metallic spray paint in the color champagne bronze, which is a close match to Delta’s champagne bronze—though slightly darker. I’m using Delta’s champagne bronze in our upstairs bathroom, so I wanted the finishes to coordinate.
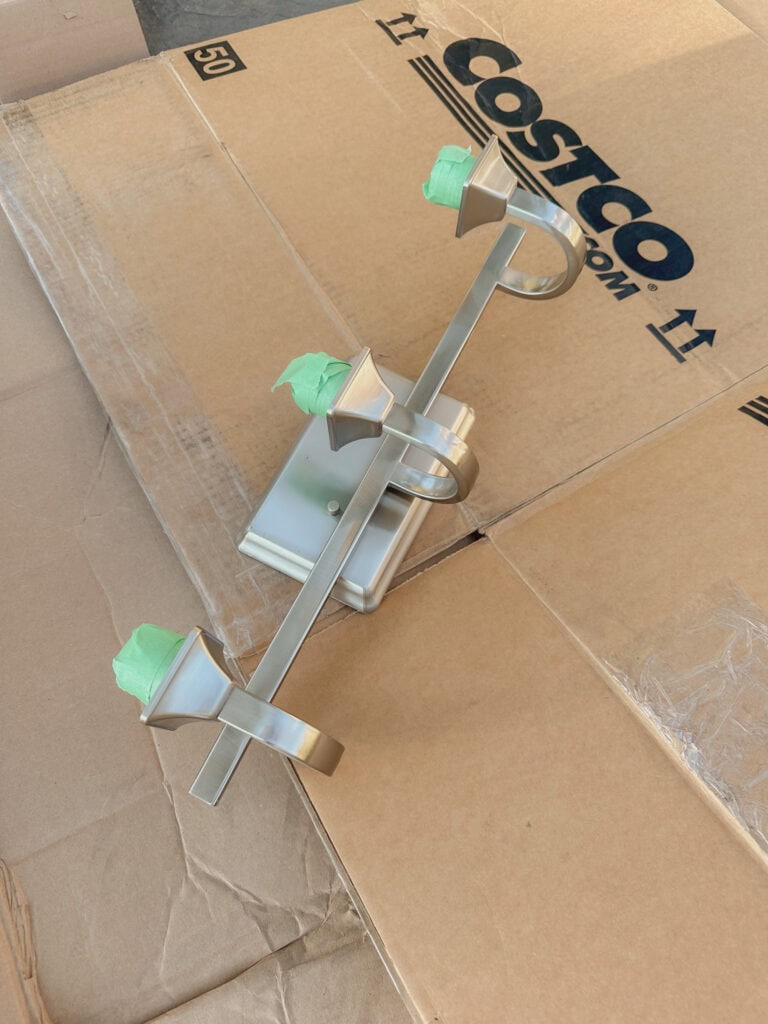
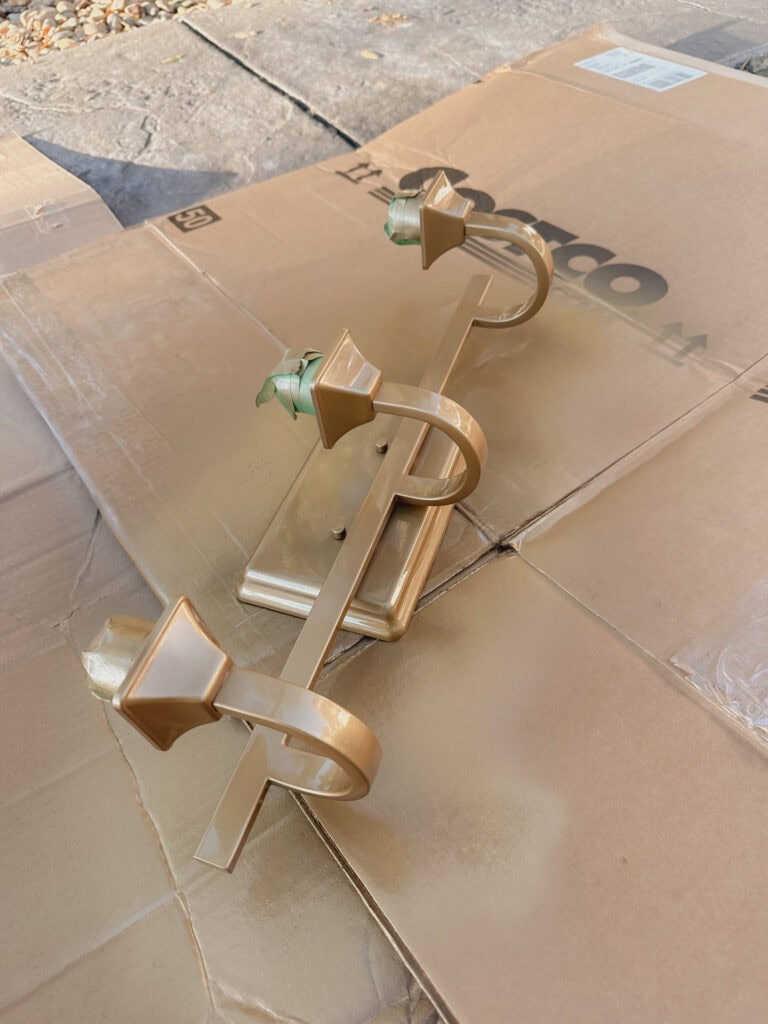
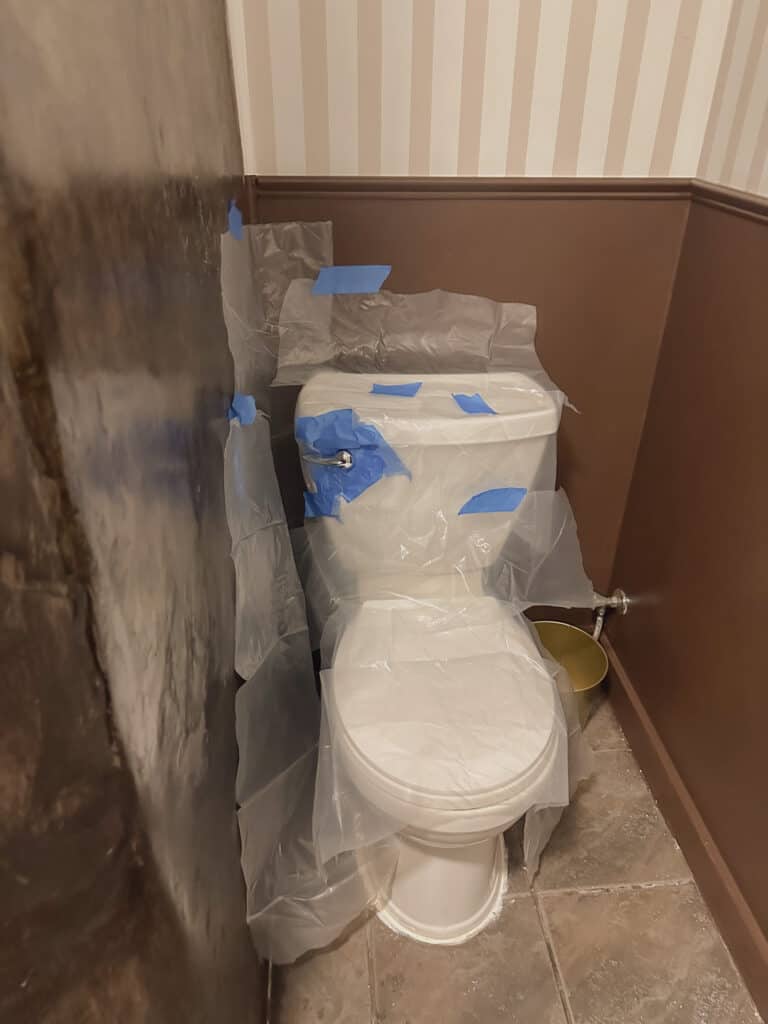
I spray-painted the light fixture, knobs, pulls, toilet paper holder, towel holder, faucet, and toilet handle. Although it’s best to remove the faucet and handle before painting, I didn’t want the hassle of shutting off the water, so I carefully taped and covered everything instead. If you’re new to this, it’s probably better to remove these pieces and paint them outside.
For safety, I only spray painted when the kids and pets were out of the house. I opened all the windows and doors, set up a fan for ventilation, and wore a respirator to protect myself from fumes. I spray-painted and finished up for the day, closed the basement door, and let the space air out overnight.
If you can’t ventilate your space like this, it’s best to remove the fixtures and paint outside. And remember, whether indoors or out, always wear a respirator! —safety first when it comes to VOCs.
4. Adding the Moulding
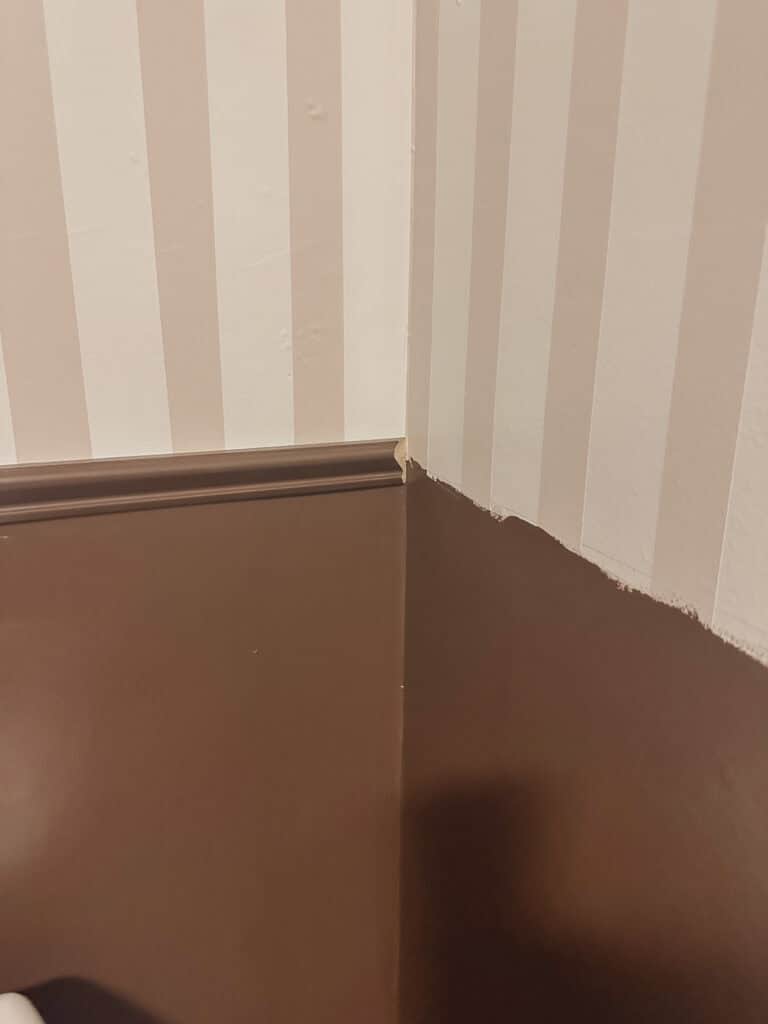
Painting around toilets can be really tricky and painting stripes around the toilet seemed impossible. Adding a half-wall accent seemed like the perfect solution to this problem and fit with the moody vibe. I chose Behr Dark Truffle, a deep rich brown. I used a few feet of chair rail cut at 45-degree angles to create a border between the dark area and the striped area. Adding trim always makes a project feel a lot more finished.
5. Don’t Forget to Do Touch Ups!
Use a small brush to touch up trim and baseboards if needed! Clean, remove, or cover paint drops or bleeding under the tape.
Note: it is easier to clean up dry paint than wet, so if you have a big drop of paint land on your floor, just let it dry then scrape it off. If the paint is spread out and can’t be easily cleaned up, use white vinegar diluted in water to clean it up. Soak the painted area of the tile or counter for a few minutes and then use a textured sponge or brush to remove.
7. Replace and Reinstall Fixtures and Hardware
Hopefully, you neatly stored all your hardware in separate containers and this is an easy task!
Replace your light fixture, toilet paper holder, and light fixtures.
It was at this point that I installed a new hand towel holder.
6. Decor and Finishing Touches
The last step is to do a quick clean-up, wipe down the counters, and mirror, and sweep the floor. I also folded up my drop clothes, put away my tools, and washed my paintbrushes.
After that, I added this rug and hand towel I found at Ross, a vase with greenery, a soap dispenser, and for now, a painting I thrifted. I might change the art later, but it fits for now!
Small Updates with Big Impact
This makeover took less than three days and less than $250 dollars. I did a little similar but still small-scale bathroom makeover for our kid’s upstairs bathroom a few months ago. That makeover was a lot more labor-intensive because I painted the walls, vanity, floor, and tile. If you want to see how that project turned out, check out the post below!
Final Thoughts: Making It Work on a Budget
This vintage and moody bathroom makeover has completely transformed the space, giving it character, warmth, and a touch of whimsy. The combination of deep, rich colors, vintage accents, and brass fixtures brings out the room’s natural charm, while painting striped walls adds a bold, yet refined element. The stripes, carefully planned and executed, elevate the entire design and create a stunning focal point.


Are you ready to tackle your own striped wall project? Whether you’re looking to add personality to a small space or make a bold statement in a larger room, this technique is a great way to introduce visual interest and timeless style. And it is more budget-friendly than wallpaper.
I wasn’t able to tackle the shower this time, so the sarcophagus lives on, but I am focusing on what I can do, rather than what I can’t! I feel good knowing the bathroom is refreshed and more in line with my style.
On to my next project, Cheers!



Join the List
Stay up to date & receive the latest posts in your inbox.