DIY Medicine Cabinet: Hidden Bathroom Storage Behind Artwork
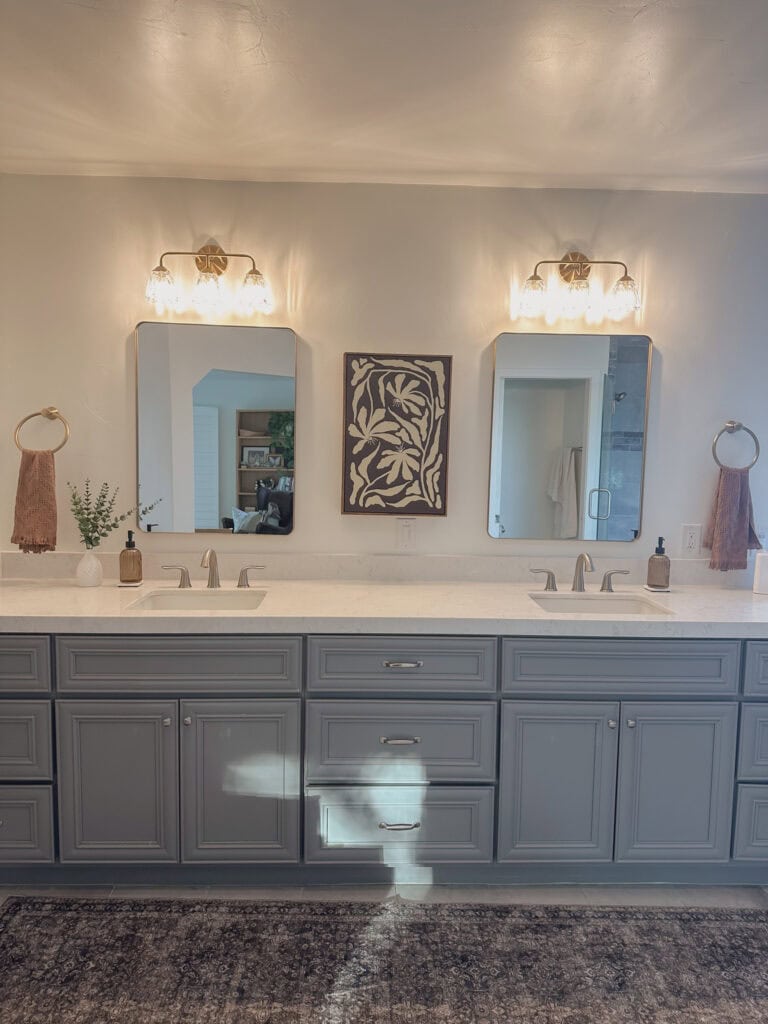
Our primary bathroom has always lacked eye-level storage, and I’ve never been a fan of keeping my skincare and beauty products under the sink or stuffed in drawers. It’s just easier to reach for everything at eye level. Because our vanity is on an exterior wall, recessed medicine cabinets weren’t an option. And my husband, for reasons I still don’t fully understand, has an irrational hatred of traditional medicine cabinets.
So this was my creative middle ground: I built a DIY medicine cabinet with hidden storage behind a piece of art. It’s pretty, functional, and the perfect compromise between form and function.
Why I Built My Own DIY Medicine Cabinet
Our bathroom had a clean look, but no eye-level storage. I needed a spot for my everyday skincare, makeup, and beauty products that didn’t clutter the countertop or force me to open ten drawers. That’s when the idea hit me: why not hide storage behind artwork? I could build a slim cabinet that looked like a framed painting — and because I’m a painter, I could even create the art myself.
Tools & Materials
Tools:
- Miter saw
- Nail gun or hammer and nails
- Corner clamps
- Level
Materials:
- Framed artwork or thrifted canvas
- 1×4 wood boards
- Wood glue
- Stain (Walnut or your choice)
- Hinges (decorative or hidden)
- Magnet closure
- Eye hooks
- Drywall anchors and screws
- Command Strips (optional)
Step 1: Finding the Right Frame
The first step was finding a frame that could double as a cabinet door. I went thrifting (the best place for this kind of project) and found a large, sturdy canvas print with a hard backing and a walnut floating frame. This type of frame works perfectly because it’s lightweight but solid enough to function as a door.
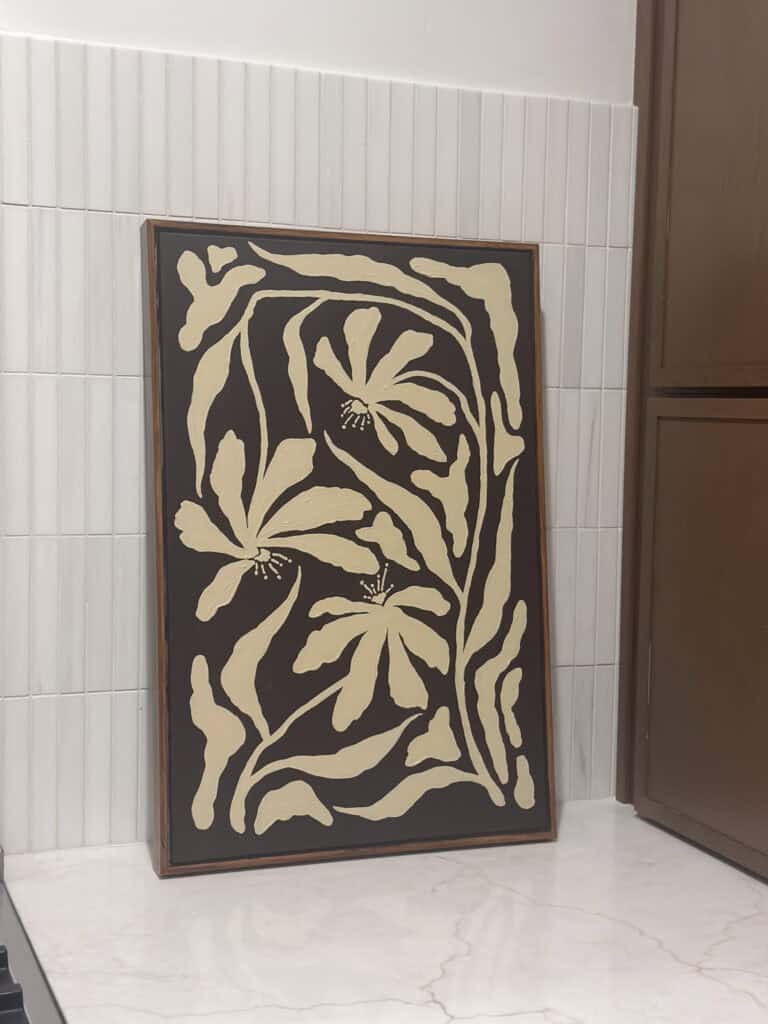
Step 2: Creating the Artwork
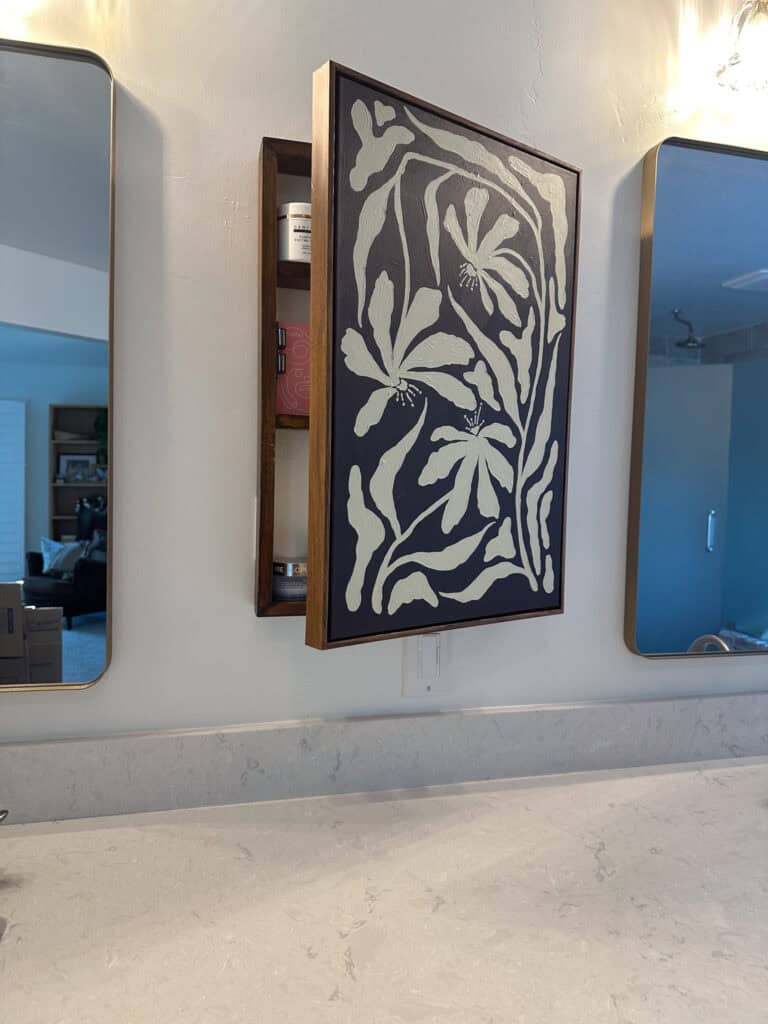
Once I got the frame home, I started painting. Lately, I’ve been drawn to deep, moody tones — so I went with a burgundy-brown background and an abstract floral design that complemented the walnut frame. You could easily swap this out for any art that fits your style: a thrifted print, a family photo, or a fabric panel. The beauty of this DIY medicine cabinet is that it can change with your decor.
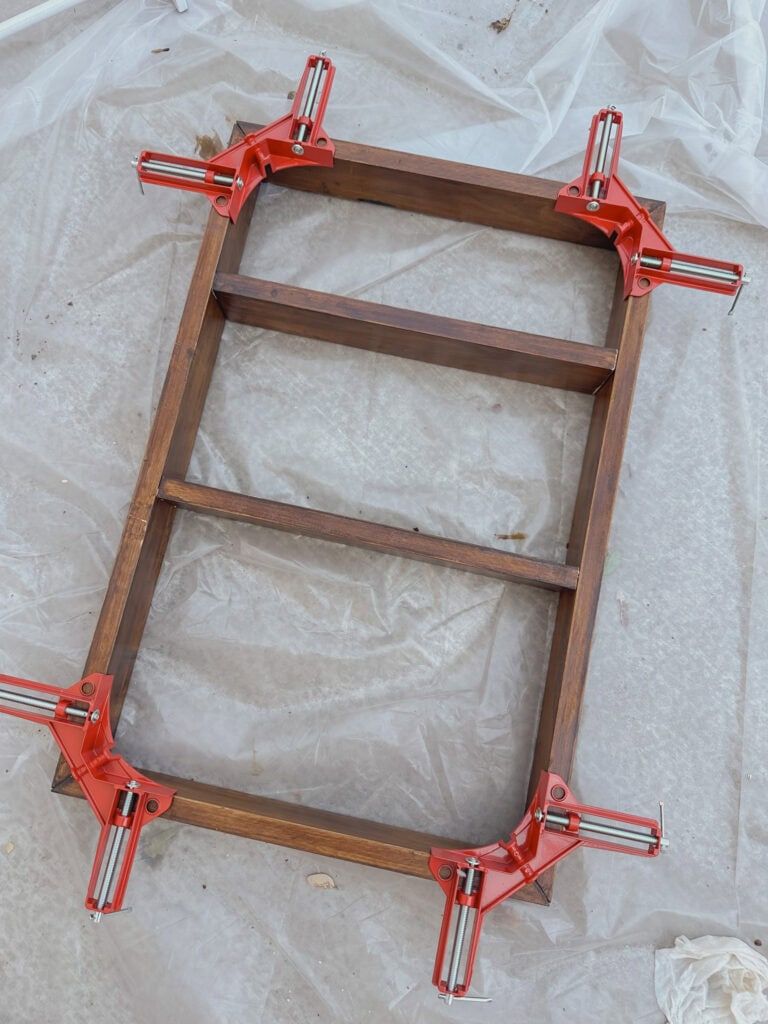
Step 3: Building the Cabinet Frame
For the cabinet itself, I used 1x4s to build a simple rectangular box. I measured my frame carefully and cut all four sides at mitered angles with my miter saw so the corners would fit neatly together. I stained the wood using what I already had on hand — a walnut shade that came close enough to match the thrifted frame.
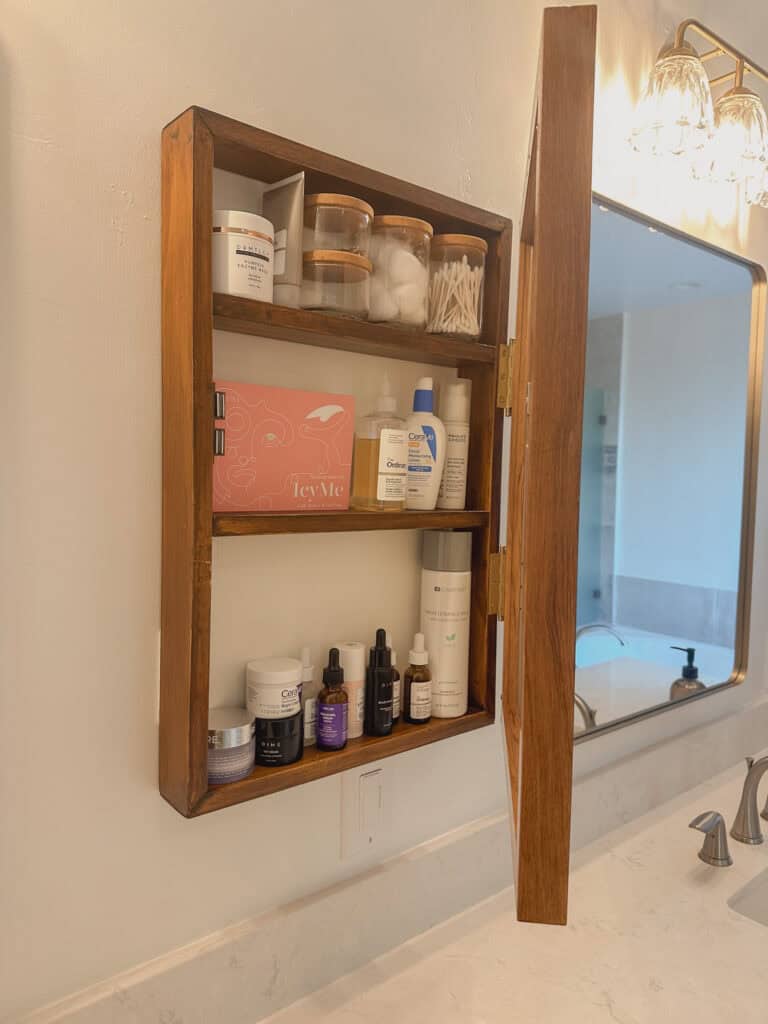
Then I assembled the box using wood glue and corner clamps (if you’ve never used these before, run — don’t walk — to Harbor Freight. They’re about $2 each and make your life infinitely easier). Once the outer box was complete, I cut and installed two shelves using wood glue and a nail gun.
Make sure to check your shelf spacing before you commit — I put my shorter shelf at the top (which looked nice), but since I’m 5’5″, I can barely reach my serums now. Lesson learned.

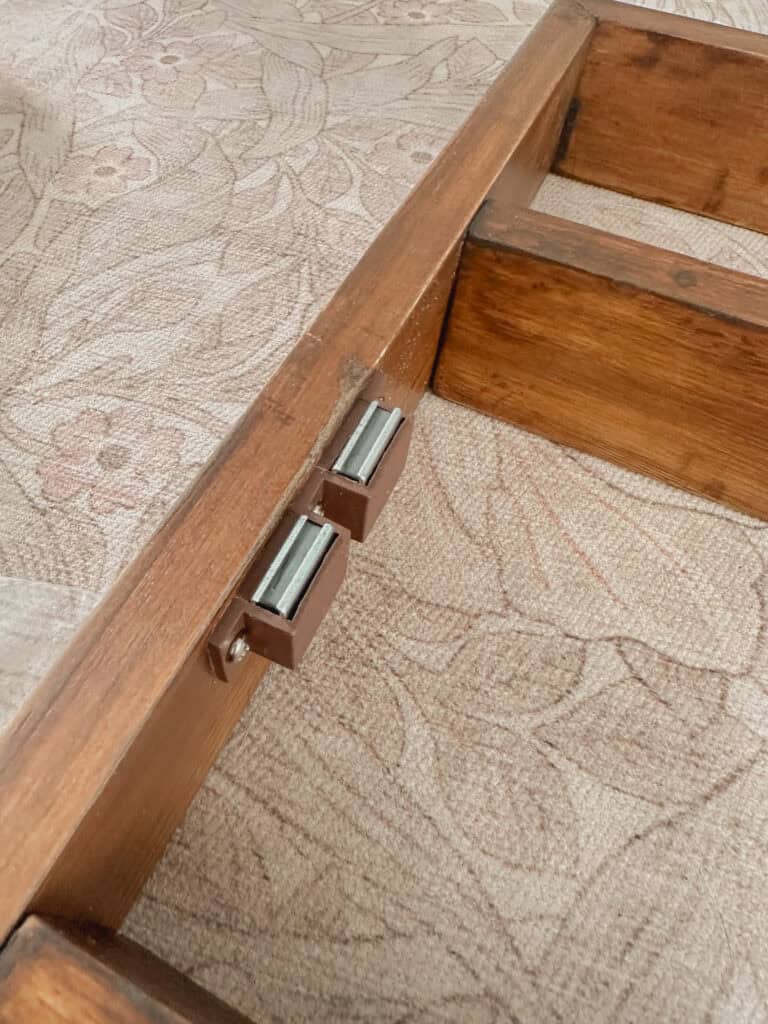
Step 4: Adding Hardware
To attach the door, I used two 4-inch gold hinges that would stay visible — so I picked pretty ones. Then I added a magnet closure to keep the cabinet securely shut. For hanging, I attached two eye hooks to the back of the frame and hung the cabinet on screws mounted with drywall anchors (you’ll definitely need anchors unless you happen to hit two studs).
To help the cabinet sit flush against the wall, I added two Command Strips along the bottom. This also took a bit of weight off the screws and made it perfectly level.


Step 5: Mounting the Cabinet
I mounted the cabinet to the wall using drywall anchors to make sure it was safely secured, since I wasn’t able to line it up perfectly with wall studs. If you’re new to drywall anchors, here’s a quick DIY post I wrote about how to use them.
For extra stability and to help the cabinet sit flush against the wall, we also added Command Strips along the bottom. They keep everything snug and prevent any shifting over time.
Step 6: Hanging and Finishing Touches
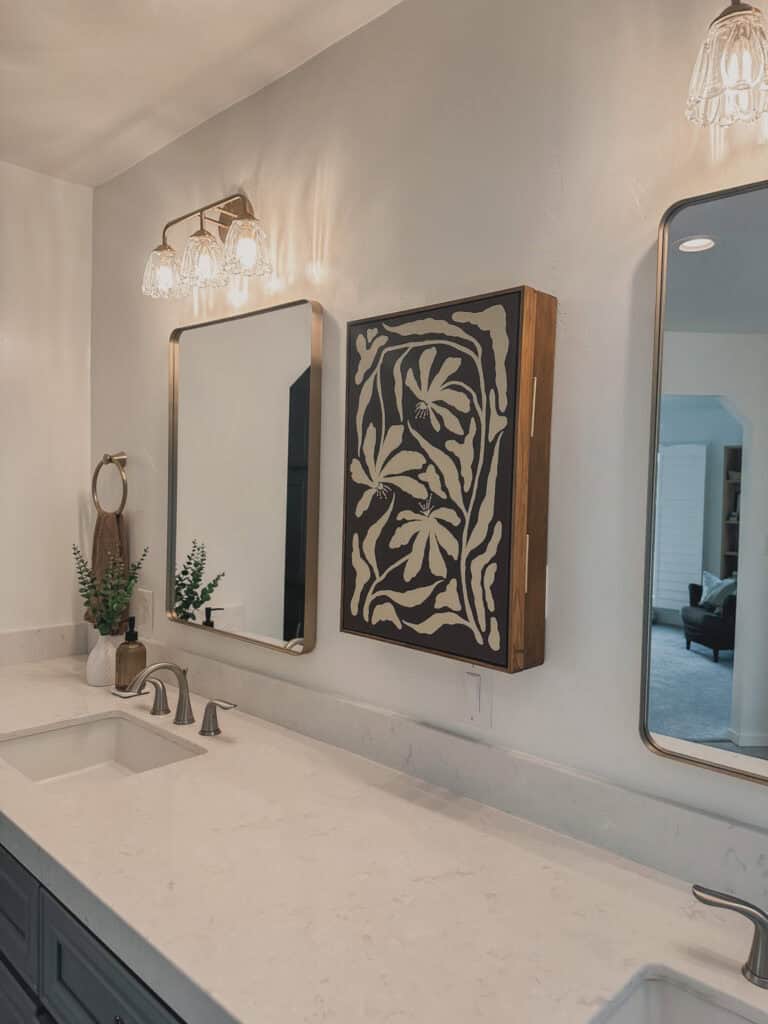
Once everything was in place, I hung the cabinet between our two bathroom mirrors — where a traditional medicine cabinet might normally go. It’s discreet, functional, and honestly looks like a piece of art. Inside, I store my skincare products, serums, and a few beauty tools I use daily. No more bending over or rummaging through drawers.
I had a sprained wrist when this went up, so a big shout-out to my handsome assistant (and doting husband) for putting the shelf up and grabbing the WD40 because the hinges were creaky.

Beyond the Bathroom: Hidden Storage Anywhere
This project isn’t just for the bathroom. Once I finished this DIY medicine cabinet, I realized how versatile the idea is. You could use the same concept anywhere you want a little secret (or at least less conspicuous) storage.
It would be perfect for holding first aid supplies or extra toiletries in a guest bathroom, spices or backup kitchen staples you don’t reach for every day, or even by the front door to stash keys, wallets, and mail. Basically, anywhere you want function without visual clutter.
The Finished DIY Medicine Cabinet
This might just be one of my favorite DIY projects ever. It’s functional, custom, and a great compromise between style and practicality. I finally have hidden bathroom storage right where I need it — and because the “door” is a painting, I can switch out the artwork whenever I want.
If you’re short on storage or just want to add something creative and unexpected to your space, this DIY medicine cabinet hidden behind art might be the perfect weekend project.


Join the List
Stay up to date & receive the latest posts in your inbox.